Integration Guide
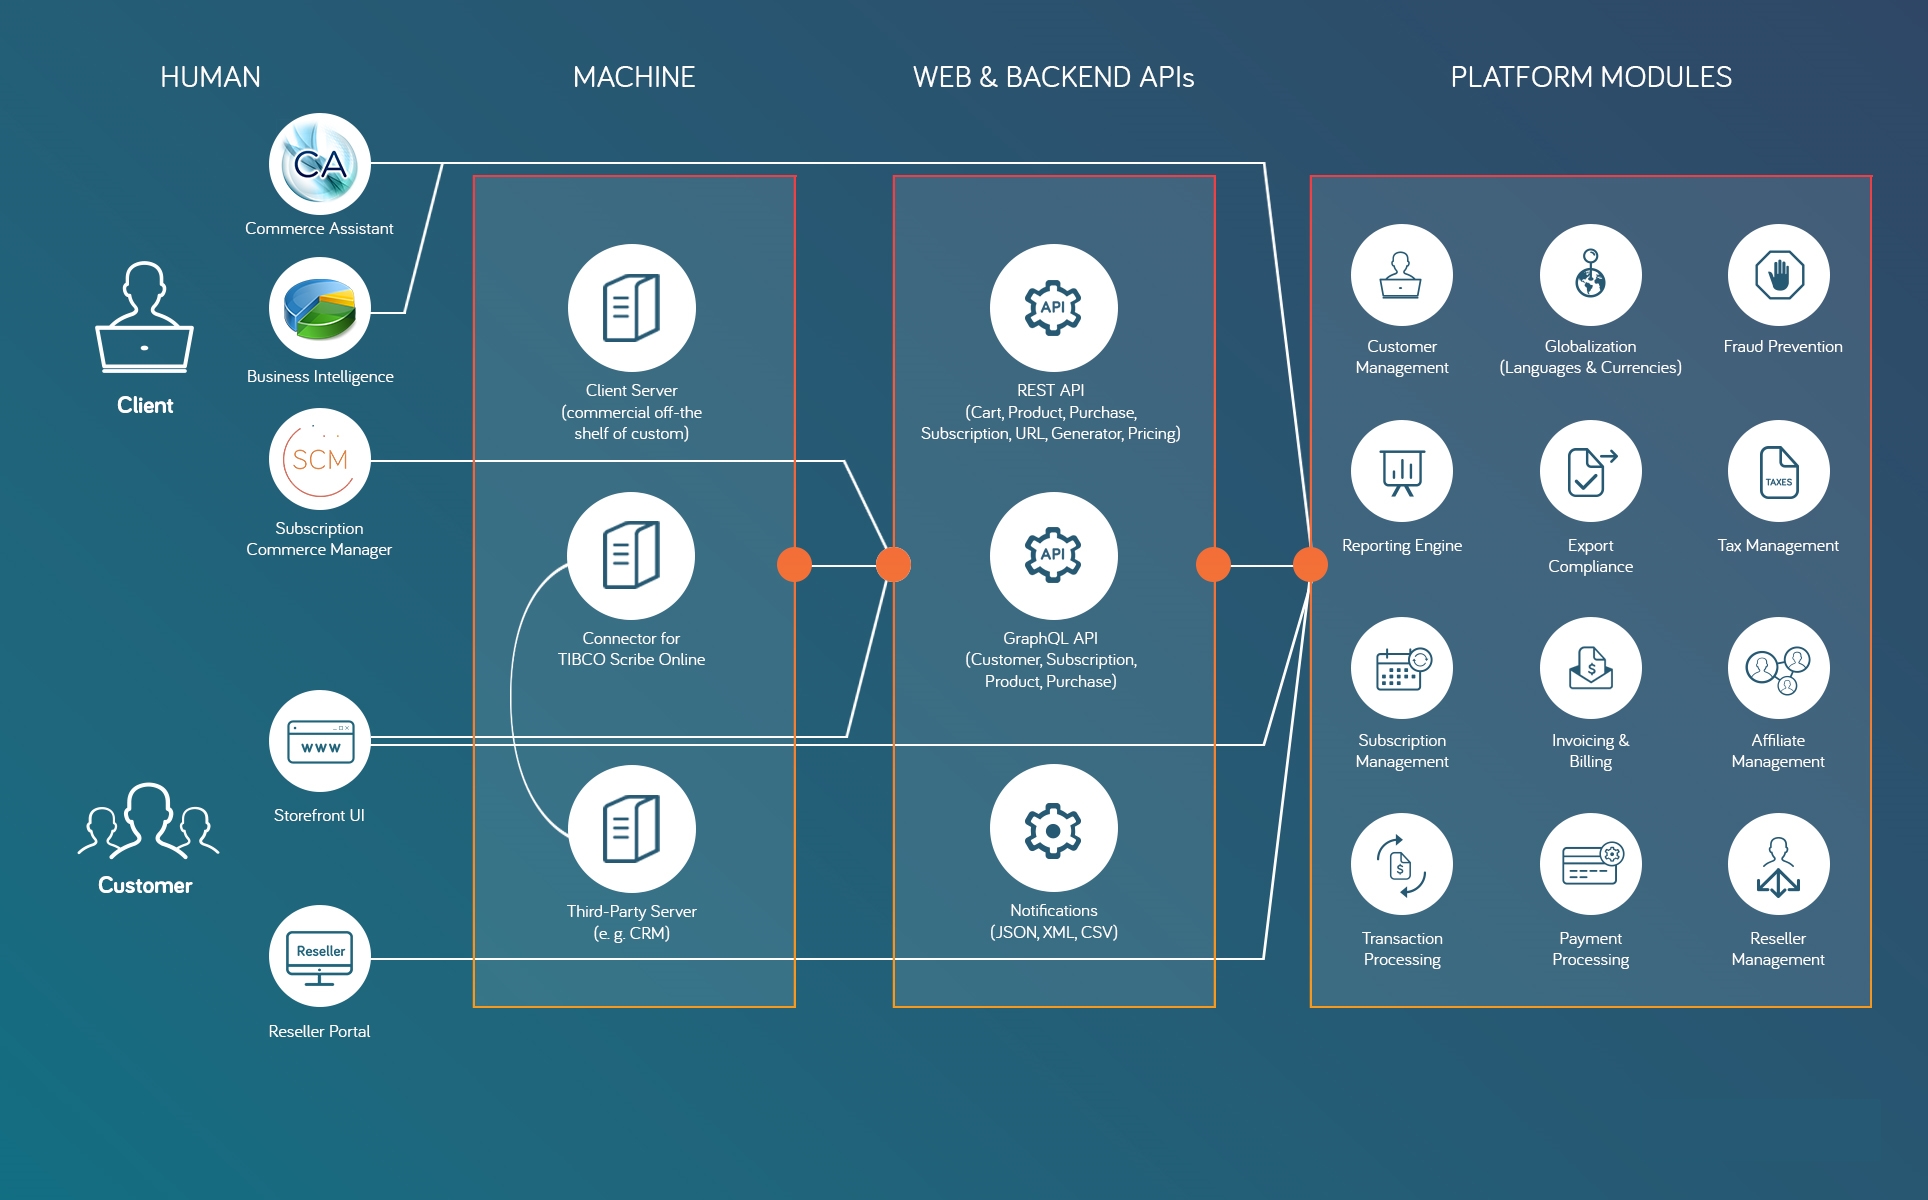
The integration guide explains how you can use our APIs and notifications to attract customers and manage subscriptions during the following phases in the customer lifecycle:
- Engage Phase
- Acquire Phase
- Grow Phase
- Retain Phase
You can also find a section that describes how to migrate existing customers from another system to the Cleverbridge platform:
- Migrate Existing Customers
In each of these sections, you can learn how to achieve and automate a variety subscription-related use cases. These descriptions contain the recommended flows that you should implement to achieve the use case; API requests and response examples that you can copy and integrate; and code snippets that highlight the notification fields that you need to be aware of.
Tip
If you want to search for specific key words on this page, you can expand all dropdowns at once by clicking on in the top right corner of this page. That way you don't have to expand each one of them individually.
Engage Phase

By localizing the pricing information on your plan selection pages and catalogs, you can lower purchasing barriers and access more markets in an increasingly global economy. A simple way to do so is by integrating our web browser API service, the Pricing API, into your front-end.
After you've integrated this API, your website will automatically request localized pricing information from the Cleverbridge platform based on the customer's IP address. There is no need for redundant price management on your end.
curl --request GET \
--url 'https://pricingapi.cleverbridge.com/prices?client_id=864&product_id=123456' \
--header 'accept: application/json' \
--header 'accept-language: en-US'
For a simple way to integrate the Pricing API using a JavaScript SDK, see Integrate the Pricing API.
To learn how to integrate pricing into your front-end using the Cleverbridge GraphQL API, see Display Local Pricing on Website.

One opportunity to engage with unknown prospects about the paid or premium version of your product is by offering them the opportunity to try it out for free for a limited period of time. The Cleverbridge platform supports free trials as long as the customer submits payment information for preauthorization. If the customer doesn't cancel the subscription before the end of the trial period, this payment information is then used to convert the free trial into a paid subscription. To use our solution for free trials, integrate the following flow into your system:
Step 1: Create a purchase link
Create a purchase link and add the following parameters for mapping and reporting purposes:
x-source
, etc. - assign additional information to these x-parameters for reporting purposes
https://www.cleverbridge.com/864/?scope=checkout&cart=97771&language=en¤cy=USD&x-source=website-visit-05.2019
Step 2: Protect the purchase link
Call the Generate User Session URL API endpoint to protect the parameters in the TargetUrl
.
curl --request POST \
--url 'https://rest.cleverbridge.com/urlgenerator/generateusersessionurl' \
--header 'accept: application/json' \
--header 'content-type: application/json' \
--header 'authorization: Basic xxxxxxxxxxxxxxxxxxxxxxxxxxxxxxxxxxxx' \
--data '{
"TargetUrl": "https%3A%2F%2Fwww.cleverbridge.com%2F864%2F%3Fscope%3Dcheckout%26amp%3Bcart%3D97771%26amp%3Blanguage%3Den%26amp%3Bcurrency%3DUSD%26amp%3Bx-source%3Dwebsite-visit-05.2019
}'
Step 3: Forward customer to checkout process in protected link
In the checkout process, the customer is instructed on how to complete the transaction and submit payment information for preauthorization. The customer is not charged yet. If the preauthorization is successful, the customer receives a confirmation, as well as delivery details. If a key generator is configured for your account, a license key is generated in this process, and the license key is displayed in the delivery details.
Step 4: Cleverbridge sends you a PaidOrderNotification
Cleverbridge sends you a PaidOrderNotification, which contains information that allows you to map the payment profile and update your local ecosystem (CRM, ERP, etc.). It includes:
internalCustomer
- the unique customer identifiersubscriptionID
- the Cleverbridge subscription IDrenewalType
- whether the subscription is renewed automatically or manuallyintervalNumber
- the current billing interval, which for initial sign-ups is always0
nextBillingDate
- the next billing date is calculated based on your product settings
{
"meta": {
"type": "PaidOrderNotification",
"date": "2019-03-19T14:47:34.857671",
"schemaUrl": "https://www.cleverbridge.com/JsonNotificationSchemas/PaidOrderNotification"
},
"purchaseId": 123456789,
...
"internalCustomer": "123456789",
...
"items": [{
...
"recurringBilling": {
"subscriptionId": "S12345678",
...
"intervalNumber": 0,
...
"nextBillingDate": "2020-03-19T14:47:34.857671",
...
"renewalType": "Automatic"
...
}],
...
}
}
Important
If you want to offer free trials without collecting payment information at signup, you must create and manage your free trials outside of the Cleverbridge platform. When the free trial user decides to buy your product/service, you can forward them to a payment page and create the subscription in the Cleverbridge platform. For more information about how the Cleverbridge platform supports free trials, see and Set Up a Free Trial Period for a Subscription.
Acquire Phase

Once a visitor has made a decision to purchase your product, it is imperative that your checkout process is designed to make paying for software as easy and intuitive as possible. To enable known customers to seamlessly sign up for a paid subscription, integrate the following flow into your system:
Step 1: Create a purchase link
Create a purchase link and add the following parameters for mapping and reporting purposes:
-
internalcustomer
- assign your unique customer identifier (UUID) to the parameters so that you can map the individual within your system -
x-source
, etc. - assign additional information to these x-parameters for reporting purposes
https://www.cleverbridge.com/864/?scope=checkout&cart=97771&internalcustomer=UUID-YOUR-UNIQUE-ID-1234-5678&language=en¤cy=USD&x-source=website-visit-05.2019&x-device-id=UUID-asd89ad-asd89sd-asd89s0
Tip
If you already know a customer, you can optimize their experience by using single sign-on (SSO) to pre-populate the sign-up process. For more information, see Single Sign-On (SSO).
Step 2: Protect the purchase link
Call the Generate User Session URL API endpoint to protect the parameters in the TargetUrl
.
curl --request POST \
--url 'https://rest.cleverbridge.com/urlgenerator/generateusersessionurl' \
--header 'accept: application/json' \
--header 'content-type: application/json' \
--header 'authorization: Basic xxxxxxxxxxxxxxxxxxxxxxxxxxxxxxxxxxxx' \
--data '{
"TargetUrl": "https%3A%2F%2Fwww.cleverbridge.com%2F864%2F%3Fscope%3Dcheckout%26amp%3Bcart%3D97771%26amp%3Binternalcustomer%3DUUID-YOUR-UNIQUE-ID-1234-5678%26amp%3Blanguage%3Den%26amp%3Bcurrency%3DUSD%26amp%3Bx-source%3Dwebsite-visit-05.2019%26amp%3Bx-device-id%3DUUID-asd89ad-asd89sd-asd89s0"
}'
Step 3: Forward customer to checkout process in protected link
In the checkout process, the customer is instructed on how to complete the transaction and submit their payment information. If the payment is successful, the customer receives a payment confirmation, as well as delivery details. If a key generator is configured for your account, a license key is generated in this process, and the license key is displayed in the delivery details.
Step 4: Cleverbridge sends you a PaidOrderNotification
Cleverbridge sends you a PaidOrderNotification, which contains information that allows you to map the payment profile and update your local ecosystem (CRM, ERP, etc.). It includes:
internalCustomer
- your unique customer identifiersubscriptionID
- the Cleverbridge subscription IDrenewalType
- whether the subscription has an automatic or manual renewal typeintervalNumber
- the current billing interval, which for initial sign-ups is always0
nextBillingDate
- the next billing date is calculated based on your product settings
{
"meta": {
"type": "PaidOrderNotification",
"date": "2019-03-19T14:47:34.857671",
"schemaUrl": "https://www.cleverbridge.com/JsonNotificationSchemas/PaidOrderNotification"
},
"purchaseId": 123456789,
...
"internalCustomer": "UUID-YOUR-UNIQUE-ID-1234-5678",
...
"items": [{
...
"recurringBilling": {
"subscriptionId": "S12345678",
...
"intervalNumber": 0,
...
"nextBillingDate": "2020-03-19T14:47:34.857671",
...
"renewalType": "Automatic"
...
}],
...
}
}

Once a visitor has made a decision to purchase your product, it is imperative that your checkout process is designed to make paying for software as easy and intuitive as possible. To enable unknown customers to seamlessly sign up for a paid subscription, integrate the following flow into your system:
Step 1: Create a purchase link
Create a purchase link and add the following parameters for mapping and reporting purposes:
x-source
, etc. - assign additional information to these x-parameters for reporting purposes
https://www.cleverbridge.com/864/?scope=checkout&cart=97771&language=en¤cy=USD&x-source=website-visit-05.2019
Step 2: Protect the purchase link
Call the Generate User Session URL API endpoint to protect the parameters in the TargetUrl
.
curl --request POST \
--url 'https://rest.cleverbridge.com/urlgenerator/generateusersessionurl' \
--header 'accept: application/json' \
--header 'content-type: application/json' \
--header 'authorization: Basic xxxxxxxxxxxxxxxxxxxxxxxxxxxxxxxxxxxx' \
--data '{
"TargetUrl": "https%3A%2F%2Fwww.cleverbridge.com%2F864%2F%3Fscope%3Dcheckout%26amp%3Bcart%3D97771%26amp%3Blanguage%3Den%26amp%3Bcurrency%3DUSD%26amp%3Bx-source%3Dwebsite-visit-05.2019
}'
Step 3: Forward customer to checkout process in protected link
In the checkout process, the customer is instructed on how to complete the transaction and submit their payment information. If the payment is successful, the customer receives a payment confirmation, as well as delivery details. If a key generator is configured for your account, a license key is generated in this process, and the license key is displayed in the delivery details.
Step 4: Cleverbridge sends you a PaidOrderNotification
Cleverbridge sends you a PaidOrderNotification, which contains information that allows you to map the payment profile and update your local ecosystem (CRM, ERP, etc.). It includes:
internalCustomer
- the unique customer identifiersubscriptionID
- the Cleverbridge subscription IDrenewalType
- whether the subscription is renewed automatically or manuallyintervalNumber
- the current billing interval, which for initial sign-ups is always0
nextBillingDate
- the next billing date is calculated based on your product settings
{
"meta": {
"type": "PaidOrderNotification",
"date": "2019-03-19T14:47:34.857671",
"schemaUrl": "https://www.cleverbridge.com/JsonNotificationSchemas/PaidOrderNotification"
},
"purchaseId": 123456789,
...
"internalCustomer": "123456789",
...
"items": [{
...
"recurringBilling": {
"subscriptionId": "S12345678",
...
"intervalNumber": 0,
...
"nextBillingDate": "2020-03-19T14:47:34.857671",
...
"renewalType": "Automatic"
...
}],
...
}
}
Grow Phase

Once a customer has had a pleasant experience with one of your products, you can often convince them to add additional items to their subscriptions, thereby increasing their overall value. To enable a customer to immediately add products to their subscriptions, integrate the following flow into your system:
![]() |
![]() |
Step 1: Show customer price of add-on
If a customer would like to immediately add a product, call the Add Subscription Item API endpoint to generate the pro-rated price that the customer will pay for the new product for the remainder of the current billing interval. In the API call, do the following:
- Submit the
ProductId
that belongs to the new product. - Set
AlignToCurrentInterval
totrue
in theAlignmentSettings
argument to generate the pro-rated cost of the new product for the remainder of the current billing interval. - Set
GetCustomerPricePreviewOnly
totrue
in theAlignmentSettings
argument and setGenerateMail
tofalse
to generate a preview that will not be processed or communicated via email.
curl --request POST \
--url https://rest.cleverbridge.com/subscription/addsubscriptionitem \
--header 'accept: application/json' \
--header 'content-type: application/json' \
--header 'authorization: Basic xxxxxxxxxxxxxxxxxxxxxxxxxxxxxxxxxxxx' \
--data '{
"AlignmentSettings": {
"AlignToCurrentInterval": true,
"ExtendInterval": false,
"GetCustomerPricePreviewOnly": true
},
"GenerateMail": false,
"ProductId": 123456,
"Quantity": 1,
"SubscriptionId": "S12345678"
}'
For more information about the AlignmentSettings
argument, see Alignment Settings.
Step 2: Process add-on for customer
After the customer confirms the previewed price, set GetCustomerPricePreviewOnly
to false
in the AlignmentSettings
argument and set GenerateMail
to true
. Call the Add Subscription Item API endpoint again. Cleverbridge will process the add-on using the payment details that we have stored in our database and send a confirmation email to the customer.
curl --request POST \
--url https://rest.cleverbridge.com/subscription/addsubscriptionitem \
--header 'accept: application/json' \
--header 'content-type: application/json' \
--header 'authorization: Basic xxxxxxxxxxxxxxxxxxxxxxxxxxxxxxxxxxxx' \
--data '{
"AlignmentSettings": {
"AlignToCurrentInterval": true,
"ExtendInterval": false,
"GetCustomerPricePreviewOnly": false
},
"GenerateMail": true,
"ProductId": 123456,
"Quantity": 1,
"SubscriptionId": "S12345678"
}'
Step 3: Cleverbridge sends you a PaidOrderNotification
Cleverbridge sends you a PaidOrderNotification, which contains information that allows you to map the payment profile and update your local ecosystem (CRM, ERP, etc.). It includes:
subscriptionID
- the Cleverbridge subscription IDintervalNumber
- the current billing interval, which is always the same as the previous billing interval sinceAlignToCurrentInterval
was set totrue
nextBillingDate
- the next billing date, which is always the same as the previous billing date sinceAlignToCurrentInterval
was set totrue
{
"meta": {
"type": "PaidOrderNotification",
"date": "2019-03-19T14:47:34.857671",
"schemaUrl": "https://www.cleverbridge.com/JsonNotificationSchemas/PaidOrderNotification"
},
"purchaseId": 123456789,
...
"items": [{
...
"recurringBilling": {
"subscriptionId": "S12345678",
...
"intervalNumber": 1,
...
"nextBillingDate": "2020-01-01T12:59:59.111100",
...
}],
...
}
}

If your customers pay based on the number of individuals using a product or service, a great way to grow your revenue is to enable customers to add seats, users, or licenses. To enable customers to immediately add licenses to their subscriptions, integrate the following flow into your system:
![]() |
![]() |
Step 1: Show customer price of additional licenses
If a customer would like to immediately add licenses, call the Increase Subscription Item Quantity API endpoint to generate a preview of the pro-rated price that the customer will pay for the additional license for the remainder of the current billing interval. In the API call, do the following:
- Submit the new
Quantity
of licenses that the customer will have after the completion of this transaction (existing licenses + additional licenses). - Set
AlignToCurrentInterval
totrue
in theAlignmentSettings
argument to generate the pro-rated cost of the additional licenses for the remainder of the current billing interval. - Set
GetCustomerPricePreviewOnly
totrue
in theAlignmentSettings
argument and setGenerateMail
tofalse
to generate a preview that will not be processed or communicated via email.
curl --request POST \
--url https://rest.cleverbridge.com/subscription/increasesubscriptionitemquantity \
--header 'accept: application/json' \
--header 'content-type: application/json' \
--header 'authorization: Basic xxxxxxxxxxxxxxxxxxxxxxxxxxxxxxxxxxxx' \
--data '{
"AlignmentSettings":{
"AlignToCurrentInterval":true,
"ExtendInterval":false,
"GetCustomerPricePreviewOnly":true
},
"GenerateMail":false,
"Quantity":5,
"RunningNumber":1,
"SubscriptionId":"S12345678"
}'
For more information about the AlignmentSettings
argument, see Alignment Settings.
Step 2: Process additional licenses for customer
After the customer confirms the previewed price, set GetCustomerPricePreviewOnly
to false
in the AlignmentSettings
argument and set GenerateMail
to true
. Call the Increase Subscription Item Quantity API endpoint again. Cleverbridge will process the additional licenses using the payment details that we have stored in our database and send a confirmation email to the customer.
curl --request POST \
--url https://rest.cleverbridge.com/subscription/increasesubscriptionitemquantity \
--header 'accept: application/json' \
--header 'content-type: application/json' \
--header 'authorization: Basic xxxxxxxxxxxxxxxxxxxxxxxxxxxxxxxxxxxx' \
--data '{
"AlignmentSettings":{
"AlignToCurrentInterval":true,
"ExtendInterval":false,
"GetCustomerPricePreviewOnly":false
},
"GenerateMail":true,
"Quantity":5,
"RunningNumber":1,
"SubscriptionId":"S12345678"
}'
Step 3: Cleverbridge sends you a PaidOrderNotification
Cleverbridge sends you a PaidOrderNotification, which contains information that allows you to map the payment profile and update your local ecosystem (CRM, ERP, etc.). It includes:
subscriptionID
- the Cleverbridge subscription IDintervalNumber
- the current billing interval, which is always the same as the previous billing interval sinceAlignToCurrentInterval
was set totrue
nextBillingDate
- the next billing date, which is always the same as the previous billing date sinceAlignToCurrentInterval
was set totrue
{
"meta": {
"type": "PaidOrderNotification",
"date": "2019-03-19T14:47:34.857671",
"schemaUrl": "https://www.cleverbridge.com/JsonNotificationSchemas/PaidOrderNotification"
},
"purchaseId": 123456789,
...
"items": [{
...
"recurringBilling": {
"subscriptionId": "S12345678",
...
"intervalNumber": 1,
...
"nextBillingDate": "2020-01-01T12:59:59.111100",
...
}],
...
}
}

A great way to grow your revenue is to convince your current customers that they should upgrade to a more expensive version of your product or service that has more bells and whistles. To enable customers to upgrade their plans, integrate the following flow into your system:
![]() |
![]() |
Step 1: Show customer price of upgrade
If a customer would like to upgrade, call the Update Subscription Item API endpoint to generate a preview of the pro-rated price that the customer will pay for the new plan for the remainder of the current billing interval. In the API call, do the following:
- Submit the
ProductId
that pertains to the premium product. - Set
AlignToCurrentInterval
totrue
in theAlignmentSettings
argument to generate the pro-rated cost of upgrade for the remainder of the current billing interval. - Set
GetCustomerPricePreviewOnly
totrue
in theAlignmentSettings
argument and setGenerateMail
tofalse
to generate a preview that will not be processed or communicated via email. - Set
UpdateAction
toUpgrade
for reporting purposes. - Set
ExtendInterval
totrue
to apply the new subscription interval.
curl --request POST \
--url https://rest.cleverbridge.com/subscription/updatesubscriptionitem \
--header 'accept: application/json' \
--header 'content-type: application/json' \
--header 'authorization: Basic xxxxxxxxxxxxxxxxxxxxxxxxxxxxxxxxxxxx' \
--data '{
"AlignmentSettings": {
"AlignToCurrentInterval": true,
"ExtendInterval": true,
"GetCustomerPricePreviewOnly": true
},
"GenerateMail": false,
"ProductId": 123456,
"Quantity": 1,
"RunningNumber": 1,
"SubscriptionId": "S12345678",
"UpdateAction": "Upgrade"
}'
For more information about the AlignmentSettings
argument, see Alignment Settings.
Step 2: Process upgrade for customer
After the customer confirms the previewed price, set GetCustomerPricePreviewOnly
to false
in the AlignmentSettings
argument and set GenerateMail
to true
. Call the Upgrade Subscription Item API endpoint again. Cleverbridge will process the upgrade using the payment details that we have stored in our database and send a confirmation email to the customer.
curl --request POST \
--url https://rest.cleverbridge.com/subscription/updatesubscriptionitem \
--header 'accept: application/json' \
--header 'content-type: application/json' \
--header 'authorization: Basic xxxxxxxxxxxxxxxxxxxxxxxxxxxxxxxxxxxx' \
--data '{
"AlignmentSettings": {
"AlignToCurrentInterval": true,
"ExtendInterval": true,
"GetCustomerPricePreviewOnly": false
},
"GenerateMail": true,
"ProductId": 123456,
"Quantity": 1,
"RunningNumber": 1,
"SubscriptionId": "S12345678",
"UpdateAction": "Upgrade"
}'
Step 3: Cleverbridge sends you a PaidOrderNotification
Cleverbridge sends you a PaidOrderNotification, which contains information that allows you to map the payment profile and update your local ecosystem (CRM, ERP, etc.). It includes:
subscriptionID
- the Cleverbridge subscription IDintervalNumber
- the current billing interval, which is always the same as the previous billing interval sinceAlignToCurrentInterval
was set totrue
nextBillingDate
- the next billing date, which is always the same as the previous billing date sinceAlignToCurrentInterval
was set totrue
{
"meta": {
"type": "PaidOrderNotification",
"date": "2019-03-19T14:47:34.857671",
"schemaUrl": "https://www.cleverbridge.com/JsonNotificationSchemas/PaidOrderNotification"
},
"purchaseId": 123456789,
...
"items": [{
...
"recurringBilling": {
"subscriptionId": "S12345678",
...
"intervalNumber": 1,
...
"nextBillingDate": "2020-01-01T12:59:59.111100",
...
}],
...
}
}

A great way to grow your revenue is to convince your current customers that they should not only renew, but upgrade to a premium version of your product. This makes customer churn less likely. To enable customers to upgrade to premium plans and renew early, integrate the following flow into your system:
![]() |
![]() |
Step 1: Show customer price of upgrade and immediate renewal
If a customer has a single-item subscription and would like to upgrade and start a new billing interval immediately, call the Update Subscription Item API endpoint to generate a preview of the price that the customer will pay for the new plan. In the API call, do the following:
- Submit the
ProductId
that belongs to the premium product. - Set
AlignToCurrentInterval
andGetCustomerPricePreviewOnly
totrue
in theAlignmentSettings
argument and setGenerateMail
tofalse
to generate a preview that will not be processed or communicated via email. - Set
UpdateAction
toUpgrade
for reporting purposes. - Set
ExtendInterval
totrue
to apply the new subscription interval.
Example
When a customer buys a standard product and pays $99.95 for a yearly subscription and then immediately agrees to upgrade to a premium product that costs $150 yearly, the call to generate a preview the price for the upgraded plan looks as follows:
curl --request POST \
--url https://rest.cleverbridge.com/subscription/updatesubscriptionitem \
--header 'accept: application/json' \
--header 'content-type: application/json' \
--header 'authorization: Basic xxxxxxxxxxxxxxxxxxxxxxxxxxxxxxxxxxxx' \
--data '{
"AlignmentSettings": {
"AlignToCurrentInterval": true,
"ExtendInterval": true,
"GetCustomerPricePreviewOnly": true
},
"GenerateMail": false,
"ProductId": 123456,
"Quantity": 1,
"RunningNumber": 1,
"SubscriptionId": "S12345678",
"UpdateAction": "Upgrade"
}'
For more information about the AlignmentSettings
argument, see Alignment Settings.
Step 2: Process upgrade for customer
After the customer confirms the previewed price, set GetCustomerPricePreviewOnly
to false
in the AlignmentSettings
argument and set GenerateMail
to true
. Call the Update Subscription Item API endpoint again. Cleverbridge will process the upgrade using the payment details that we have stored in our database and send a confirmation email to the customer.
curl --request POST \
--url https://rest.cleverbridge.com/subscription/updatesubscriptionitem \
--header 'accept: application/json' \
--header 'content-type: application/json' \
--header 'authorization: Basic xxxxxxxxxxxxxxxxxxxxxxxxxxxxxxxxxxxx' \
--data '{
"AlignmentSettings": {
"AlignToCurrentInterval": true,
"ExtendInterval": true,
"GetCustomerPricePreviewOnly": false
},
"GenerateMail": true,
"ProductId": 123456,
"Quantity": 1,
"RunningNumber": 1,
"SubscriptionId": "S12345678",
"UpdateAction": "Upgrade"
}'
You'll receive the following response as confirmation that the price has been calculated and the interval aligned for the upgraded plan:
{
"UpdateSubscriptionItemResponse": {
"ResultMessage": "OK",
"AlignmentCustomerGrossPrice": "50.32",
"AlignmentCustomerVatPrice": "42.29",
"AlignmentCustomerNetPrice": "8.03",
"NextBillingCustomerGrossPrice": "150",
"NextBillingCustomerVatPrice": "126.05",
"NextBillingCustomerNetPrice": "23.95",
"PriceCurrencyId": "USD",
"_xmlns": "http://api.cleverbridge.com/datacontract"
}
}
Step 3: Cleverbridge sends you a PaidOrderNotification
Cleverbridge sends you a PaidOrderNotification, which contains information that allows you to update your local ecosystem (CRM, ERP, etc.). It includes:
subscriptionID
- the Cleverbridge subscription IDrenewalType
- whether the subscription has an automatic or manual renewal typeintervalNumber
- the current billing interval, which for renewals is always1
or morenextBillingDate
- the next billing date is calculated based on your product settings
{
"meta": {
"type": "PaidOrderNotification",
"date": "2019-03-19T14:47:34.857671",
"schemaUrl": "https://www.cleverbridge.com/JsonNotificationSchemas/PaidOrderNotification"
},
"purchaseId": 123456789,
...
"items": [{
...
"recurringBilling": {
"subscriptionId": "S12345678",
...
"intervalNumber": 1,
...
"nextBillingDate": "2020-03-19T14:47:34.857671",
...
"renewalType": "Automatic"
...
}],
...
}
}

A great way to grow your revenue is to convince your current customers that they should not only renew immediately, but upgrade to a longer plan. This makes customer churn less likely. To enable customers to upgrade to longer plans and renew early, integrate the following flow into your system:
![]() |
![]() |
Step 1: Show customer price of upgrade and immediate renewal
If a customer has a single-item subscription and would like to upgrade and start a new billing interval, call the Update Subscription Item API endpoint to generate a preview of the price that the customer will pay for the new plan. In the API call, do the following:
- Submit the
ProductId
that belongs to the annual product. - Set
AlignToCurrentInterval
andGetCustomerPricePreviewOnly
totrue
in theAlignmentSettings
argument and setGenerateMail
tofalse
to generate a preview that will not be processed or communicated via email. - Set
UpdateAction
toUpgrade
for reporting purposes. - Set
ExtendInterval
totrue
to apply the new renewal date.
curl --request POST \
--url https://rest.cleverbridge.com/subscription/updatesubscriptionitem \
--header 'accept: application/json' \
--header 'content-type: application/json' \
--header 'authorization: Basic xxxxxxxxxxxxxxxxxxxxxxxxxxxxxxxxxxxx' \
--data '{
"AlignmentSettings": {
"AlignToCurrentInterval": true,
"ExtendInterval": true,
"GetCustomerPricePreviewOnly": true
},
"GenerateMail": false,
"ProductId": 123456,
"Quantity": 1,
"RunningNumber": 1,
"SubscriptionId": "S12345678",
"UpdateAction": "Upgrade"
}'
For more information about the AlignmentSettings
argument, see Alignment Settings.
Step 2: Process upgrade for customer
After the customer confirms the previewed price, set GetCustomerPricePreviewOnly
to false
in the AlignmentSettings
argument and set GenerateMail
to true
. Call the Update Subscription Item API endpoint again. Cleverbridge will process the upgrade using the payment details that we have stored in our database and send a confirmation email to the customer.
curl --request POST \
--url https://rest.cleverbridge.com/subscription/updatesubscriptionitem \
--header 'accept: application/json' \
--header 'content-type: application/json' \
--header 'authorization: Basic xxxxxxxxxxxxxxxxxxxxxxxxxxxxxxxxxxxx' \
--data '{
"AlignmentSettings": {
"AlignToCurrentInterval": true,
"ExtendInterval": true,
"GetCustomerPricePreviewOnly": false
},
"GenerateMail": true,
"ProductId": 123456,
"Quantity": 1,
"RunningNumber": 1,
"SubscriptionId": "S12345678",
"UpdateAction": "Upgrade"
}'
Step 3: Cleverbridge sends you a PaidOrderNotification
Cleverbridge sends you a PaidOrderNotification, which contains information that allows you to update your local ecosystem (CRM, ERP, etc.). It includes:
subscriptionID
- the Cleverbridge subscription IDrenewalType
- whether the subscription has an automatic or manual renewal typeintervalNumber
- the current billing interval, which for renewals is always1
or morenextBillingDate
- the next billing date is calculated based on your product settings
{
"meta": {
"type": "PaidOrderNotification",
"date": "2019-03-19T14:47:34.857671",
"schemaUrl": "https://www.cleverbridge.com/JsonNotificationSchemas/PaidOrderNotification"
},
"purchaseId": 123456789,
...
"items": [{
...
"recurringBilling": {
"subscriptionId": "S12345678",
...
"intervalNumber": 1,
...
"nextBillingDate": "2020-03-19T14:47:34.857671",
...
"renewalType": "Automatic"
...
}],
...
}
}

If your customers pay based on the number of individuals using a product or service, a great way to grow your revenue is to enable customers to add seats or users. To enable customers to add a seat and extend the billing interval of the existing seat(s) so that all subscriptions co-term, integrate the following flow into your system:
![]() |
![]() |
Step 1: Show customer price of additional seat and extension of original seat
If a customer would like to purchase an additional license and extend the billing interval of the existing license so that the two licenses co-term, call the Update Subscription Item API endpoint to generate a preview of the full price that the customer will pay for the additional license plus the pro-rated price of the extension. In the API call, do the following:
- Enter the new
Quantity
of licenses that the customer will have after the completion of this transaction (existing license + additional license). - Set
AlignToCurrentInterval
andExtendInterval
totrue
in theAlignmentSettings
argument to generate the pro-rated cost of extending the billing interval of the original license, plus the cost of adding an additional license. - Set
GetCustomerPricePreviewOnly
totrue
in theAlignmentSettings
argument and setGenerateMail
tofalse
to generate a preview that will not be processed or communicated via email. - Set
UpdateAction
toUpdate
for reporting purposes.
curl --request POST \
--url https://rest.cleverbridge.com/subscription/updatesubscriptionitem \
--header 'accept: application/json' \
--header 'content-type: application/json' \
--header 'authorization: Basic xxxxxxxxxxxxxxxxxxxxxxxxxxxxxxxxxxxx' \
--data '{
"AlignmentSettings": {
"AlignToCurrentInterval": true,
"ExtendInterval": true,
"GetCustomerPricePreviewOnly": true
},
"GenerateMail": false,
"ProductId": 123456,
"Quantity": 2,
"RunningNumber": 1,
"SubscriptionId": "S12345678",
"TriggerImmediateRenewal": false,
"UpdateAction": "Update"
}'
For more information about the AlignmentSettings
argument, see Alignment Settings.
Step 2: Process change for customer
After the customer confirms the previewed price, set GetCustomerPricePreviewOnly
to false
in the AlignmentSettings
argument and set GenerateMail
to true
. Call the Update Subscription Item API endpoint again. Cleverbridge will process the transaction using the payment details that we have stored in our database and send a confirmation email to the customer.
curl --request POST \
--url https://rest.cleverbridge.com/subscription/updatesubscriptionitem \
--header 'accept: application/json' \
--header 'content-type: application/json' \
--header 'authorization: Basic xxxxxxxxxxxxxxxxxxxxxxxxxxxxxxxxxxxx' \
--data '{
"AlignmentSettings": {
"AlignToCurrentInterval": true,
"ExtendInterval": true,
"GetCustomerPricePreviewOnly": false
},
"GenerateMail": true,
"ProductId": 123456,
"Quantity": 2,
"RunningNumber": 1,
"SubscriptionId": "S12345678",
"TriggerImmediateRenewal": false,
"UpdateAction": "Upgrade"
}'
Step 3: Cleverbridge sends you a PaidOrderNotification
Cleverbridge sends you a PaidOrderNotification, which contains information that allows you to map the payment profile and update your local ecosystem (CRM, ERP, etc.). It includes:
subscriptionID
- the Cleverbridge subscription ID-
intervalNumber
- the current billing interval, which is always the same as the previous billing interval sinceAlignToCurrentInterval
was set totrue
nextBillingDate
- the next billing date, which is always the same as the previous billing date sinceAlignToCurrentInterval
was set totrue
{
"meta": {
"type": "PaidOrderNotification",
"date": "2019-03-19T14:47:34.857671",
"schemaUrl": "https://www.cleverbridge.com/JsonNotificationSchemas/PaidOrderNotification"
},
"purchaseId": 123456789,
...
"items": [{
...
"recurringBilling": {
"subscriptionId": "S12345678",
...
"intervalNumber": 1,
...
"nextBillingDate": "2020-03-19T14:47:34.857671",
...
}],
...
}
}

If your customers pay based on the number of individuals using a product or service, a great way to grow your revenue is to enable customers to add seats or users. To enable customers to add a seat and shorten the billing interval of the new seat so that all subscriptions co-term, integrate the following flow into your system:
![]() |
![]() |
Step 1: Show customer pro-rated price of additional seat
If a customer would like to purchase an additional license and shorten the billing interval of the additional license so that the two licenses co-term, call the Update Subscription Item API endpoint to generate a preview of the full price that the customer will pay for the pro-rated additional license for the remainder of the current billing interval. In the API call, do the following:
- Enter the new
Quantity
of licenses that the customer will have after the completion of this transaction (existing license + additional license). - Set
AlignToCurrentInterval
totrue
in theAlignmentSettings
argument to generate the pro-rated cost of shortening the billing interval of the additional license - Set
GetCustomerPricePreviewOnly
totrue
in theAlignmentSettings
argument and setGenerateMail
tofalse
to generate a preview that will not be processed or communicated via email. - Set
UpdateAction
toUpdate
for reporting purposes.
curl --request POST \
--url https://rest.cleverbridge.com/subscription/updatesubscriptionitem \
--header 'accept: application/json' \
--header 'content-type: application/json' \
--header 'authorization: Basic xxxxxxxxxxxxxxxxxxxxxxxxxxxxxxxxxxxx' \
--data '{
"AlignmentSettings": {
"AlignToCurrentInterval": true,
"ExtendInterval": true,
"GetCustomerPricePreviewOnly": true
},
"GenerateMail": false,
"ProductId": 123456,
"Quantity": 2,
"RunningNumber": 1,
"SubscriptionId": "S12345678",
"TriggerImmediateRenewal": false,
"UpdateAction": "Update"
}'
For more information about the AlignmentSettings
argument, see Alignment Settings.
Step 2: Process upgrade for customer
After the customer confirms the previewed price, set GetCustomerPricePreviewOnly
to false
in the AlignmentSettings
argument and set GenerateMail
to true
. Call the Update Subscription Item API endpoint again. Cleverbridge will process the transaction using the payment details that we have stored in our database and send a confirmation email to the customer.
curl --request POST \
--url https://rest.cleverbridge.com/subscription/updatesubscriptionitem \
--header 'accept: application/json' \
--header 'content-type: application/json' \
--header 'authorization: Basic xxxxxxxxxxxxxxxxxxxxxxxxxxxxxxxxxxxx' \
--data '{
"AlignmentSettings": {
"AlignToCurrentInterval": true,
"ExtendInterval": true,
"GetCustomerPricePreviewOnly": false
},
"GenerateMail": true,
"ProductId": 123456,
"Quantity": 2,
"RunningNumber": 1,
"SubscriptionId": "S12345678",
"TriggerImmediateRenewal": false,
"UpdateAction": "Upgrade"
}'
Step 3: Cleverbridge sends you a PaidOrderNotification
Cleverbridge sends you a PaidOrderNotification, which contains information that allows you to map the payment profile and update your local ecosystem (CRM, ERP, etc.). It includes:
subscriptionID
- the Cleverbridge subscription IDintervalNumber
- the current billing interval, which is always the same as the previous billing interval sinceAlignToCurrentInterval
was set totrue
nextBillingDate
- the next billing date, which is always the same as the previous billing date sinceAlignToCurrentInterval
was set totrue
{
"meta": {
"type": "PaidOrderNotification",
"date": "2019-03-19T14:47:34.857671",
"schemaUrl": "https://www.cleverbridge.com/JsonNotificationSchemas/PaidOrderNotification"
},
"purchaseId": 123456789,
...
"items": [{
...
"recurringBilling": {
"subscriptionId": "S12345678",
...
"intervalNumber": 1,
...
"nextBillingDate": "2020-01-01T12:59:59.111100",
...
}],
...
}
}
Retain Phase

If you allow your customers to take control of their personal data using traditional “My Account” functionality, you not only free up your customer service and tech support teams for more pressing tasks, but your customers are also more likely to remain subscribers to your product. To enable customers to change their contact information themselves, integrate the following flow into your system:
Step 1: Change contact information
If a customer would like to change their personal information (e.g., a new email address), call the Update Contact API endpoint. In the API call, do the following:
- Add the customer's
CountryId
andLanguageId
to theContact
argument, as well as the contact information that they would like to update or change. - Submit the
ContactType
to which you would like the changes to be applied.
curl --request POST \
--url https://rest.cleverbridge.com/subscription/updatecontact \
--header 'accept: application/json' \
--header 'content-type: application/json' \
--header 'authorization: Basic xxxxxxxxxxxxxxxxxxxxxxxxxxxxxxxxxxxx' \
--data '{
"Contact":{
"CountryId":"US",
"Email":"leia.organa@cleverbridge.com",
"LanguageId":"en"
},
"ContactType":"BillingContact"
}'
Step 2: Cleverbridge sends you a CustomerProfileUpdateNotification
Cleverbridge sends you a CustomerProfileUpdateNotification, which contains information that allows you to update your local ecosystem (CRM, ERP, etc.). It includes:
internalCustomer
: your unique customer identifier- the contact information that the customer updated
{
"meta": {
"type": "CustomerProfileUpdateNotification",
"date": "2019-03-19T14:47:34.857671",
"schemaUrl": "https://www.cleverbridge.com/JsonNotificationSchemas/CustomerProfileUpdateNotification"
},
"customer": {
"customerId: "123456789",
"internalCustomer": "UUID-YOUR-UNIQUE-ID-1234-5678",
"billingContact": {
...
"email": "leia.organa@cleverbridge.com"
},
...
}
}
}

If you've identified a customer as a churn risk, you can use a retention campaign to encourage this individual to remain subscribed to your product. One way to do this is by offering a customer a discount for the next billing interval, if they decide to stay subscribed to your product. To incorporate this strategy, integrate the following flow into your system:
Step 1: Set up a promotion in Commerce Assistant
To do so, click Marketing > Add a Promotion in the main menu.
Create and Savethe promotion, paying particular attention to the following:
In the Discount section, make the discount a one-time offer by clicking the Apply to one subscription billing interval only checkbox.
In the Coupon section, Generate one or more coupon codes to be used in the campaign.
Step 2: Send the promotion to the customer and trigger the change
If the customer confirms that they would like to accept the discount, make a call to the Update Subscription Item API endpoint. In the API call, do the following:
- Set all parameters in the
AlignmentSettings
argument tofalse
so that the change is applied to the next billing interval. - Add the promotional code that you created in Step 1 to
CouponCode
. - Set
GenerateMail
totrue
so that the customer receives a confirmation email that the discount was applied. - Set
UpdateAction
toUpdate
for reporting purposes.
curl --request POST \
--url https://rest.cleverbridge.com/subscription/updatesubscriptionitem \
--header 'accept: application/json' \
--header 'content-type: application/json' \
--header 'authorization: Basic xxxxxxxxxxxxxxxxxxxxxxxxxxxxxxxxxxxx' \
--data '{
"AlignmentSettings":{
"AlignToCurrentInterval":false,
"ExtendInterval":false,
"GetCustomerPricePreviewOnly":false
},
"CouponCode":"YMR-DZZ-Z5J",
"GenerateMail":true,
"ProductId":123456,
"Quantity":1,
"RunningNumber":1,
"SubscriptionId":"S12345678",
"TriggerImmediateRenewal":false,
"UpdateAction":"Update"
}
For more information about the AlignmentSettings
argument, see Alignment Settings.
Step 3: cleverbridge communicates the change to customer
Cleverbridge sends an email to the customer to confirm that the subscription was updated.

Many customers do not want to commit to automatic renewals of their subscriptions. As a result, making it easy for them to manually renew their subscriptions is essential to retaining their business. To enable customers to manually renew their subscriptions, integrate the following flow into your system:
Step 1: Process renewal for customer
If a customer would like to manually renew a subscription, call the Renew Subscription API endpoint and include the customer's SubscriptionId
. Cleverbridge immediately processes the renewal using the payment details that we have stored in our database. We immediately bill the customer the full price for the next billing interval. The next billing interval also starts immediately, but the billing date remains the same. Any time remaining from the previous billing interval is added to the next billing interval.
curl --request POST \
--url https://rest.cleverbridge.com/subscription/renewsubscription \
--header 'accept: application/json' \
--header 'content-type: application/json' \
--header 'authorization: Basic xxxxxxxxxxxxxxxxxxxxxxxxxxxxxxxxxxxx' \
--data '{
"SubscriptionId":"S12345678"
}'
Step 2: Confirm to customer that payment was processed
After receiving the response, forward the customer to the confirmation page The confirmation page is displayed after a customer makes a purchase. The confirmation page contains the order confirmation and delivery information. in the
ContinueUrl
field. If the transaction is not successful, the page linked in the ContinueUrl
field will inform the customer about the next steps, such as updating the payment details in case of a failed payment.
{
"ContinueUrl":"http://www.cleverbridge.com/2/p/123546-sf78g97sd897g8df"
"NextBillingDate":"2018-05-15T23:20:50.52+00:00"
"TransactionStatus":"Success"
"ResultMessage":"OK"
}
Step 3: Cleverbridge sends you a PaidOrderNotification
Cleverbridge sends you a PaidOrderNotification, which contains information that allows you to map the payment profile and update your local ecosystem (CRM, ERP, etc.). It includes:
subscriptionID
- the Cleverbridge subscription IDrenewalType
- whether the subscription has an automatic or manual renewal typeintervalNumber
- the current billing interval, which for renewals is always1
or morenextBillingDate
- the next billing date is calculated based on your product settings
{
"meta": {
"type": "PaidOrderNotification",
"date": "2019-03-19T14:47:34.857671",
"schemaUrl": "https://www.cleverbridge.com/JsonNotificationSchemas/PaidOrderNotification"
},
"purchaseId": 123456789,
...
"items": [{
...
"recurringBilling": {
"subscriptionId": "S12345678",
...
"intervalNumber": 1,
...
"nextBillingDate": "2020-03-19T14:47:34.857671",
...
"renewalType": "Automatic"
...
}],
...
}
}

Voluntary churn occurs if a customer actively chooses to cancel their subscription. To prevent voluntary churn, you can implement a number of prevention measures, including offering customers a discount if they renew early. To renew a customer's subscription early with a discount, integrate the following flow into your system:
Step 1: Set up a promotion in Commerce Assistant
To do so, click Marketing > Add a Promotion in the main menu.
Create and Savethe promotion, paying particular attention to the following:
In the Discount section, make the discount a one-time offer by clicking the Apply to one subscription billing interval only checkbox.
In the Coupon section, Generate one or more coupon codes to be used in the campaign.
Step 2: Add coupon code to existing subscription and trigger renewal
If a customer would like to renew early with a discount, call the Update Next Billing Date API endpoint to reset the next billing date to the current date and time. In the API call, do the following:
- Set all parameters in the
AlignmentSettings
argument tofalse
so that the change is applied to the next billing interval. - Add the promotional code that you created in Step 1 to
CouponCode
. - Set
GenerateMail
totrue
so that the customer receives a confirmation email that the transaction was applied. - Set
TriggerImmediateRenewal
totrue
so that an immediate renewal is triggered using the payment details that Cleverbridge has stored in our database. The billing interval is also updated. - Set
UpdateAction
toUpdate
for reporting purchases.
curl --request POST \
--url https://rest.cleverbridge.com/subscription/updatesubscriptionitem \
--header 'accept: application/json' \
--header 'content-type: application/json' \
--header 'authorization: Basic xxxxxxxxxxxxxxxxxxxxxxxxxxxxxxxxxxxx' \
--data '{
"AlignmentSettings":{
"AlignToCurrentInterval":false,
"ExtendInterval": false,
"GetCustomerPricePreviewOnly": false
},
"CouponCode": "YMR-DZZ-Z5J",
"GenerateMail": true,
"ProductId": 123456,
"Quantity": 1,
"RunningNumber": 1,
"SubscriptionId":"S12345678",
"TriggerImmediateRenewal": true,
"UpdateAction": "Update"
}'
For more information about the AlignmentSettings
argument, see Alignment Settings.
Step 3: Cleverbridge sends you a PaidOrderNotification
Cleverbridge sends you a PaidOrderNotification, which contains information that allows you to update your local ecosystem (CRM, ERP, etc.). It includes:
subscriptionID
- the Cleverbridge subscription IDrenewalType
- whether the subscription has an automatic or manual renewal typeintervalNumber
- the current billing interval, which for renewals is always1
or morenextBillingDate
- the next billing date is calculated based on your product settings
{
"meta": {
"type": "PaidOrderNotification",
"date": "2019-03-19T14:47:34.857671",
"schemaUrl": "https://www.cleverbridge.com/JsonNotificationSchemas/PaidOrderNotification"
},
"purchaseId": 123456789,
...
"items": [{
...
"recurringBilling": {
"subscriptionId": "S12345678",
...
"intervalNumber": 1,
...
"nextBillingDate": "2020-03-19T14:47:34.857671",
...
"renewalType": "Automatic"
...
}],
...
}
}

If you are a company that offers data-limited subscriptions, you may want to reset a customer’s billing interval when you renew, upgrade, or downgrade their data package. To do so, integrate one or more of the following flows into your system:

Step 1: Process renewal for customer
If a customer has a subscription whose data limit has run out, and the customer would like to do the following:
- Immediately renew the subscription at the full price so that they can continue using the service
Call the Renew Subscription API endpoint and do the following:
- Set
ResetBillingInterval
totrue
- Include the customer's
SubscriptionId
Cleverbridge immediately processes the renewal using the payment details that we have stored in our database. We immediately bill the customer the full price for the next billing interval. The next billing interval also starts immediately, and the next billing date changes.
curl --request POST \
--url https://rest.cleverbridge.com/subscription/renewsubscription \
--header 'accept: application/json' \
--header 'content-type: application/json' \
--header 'authorization: Basic xxxxxxxxxxxxxxxxxxxxxxxxxxxxxxxxxxxx' \
--data '{
"SubscriptionId": "S12345678",
"ResetBillingInterval": true
}'
Step 2: Confirm to customer that payment was processed
After receiving the response, forward the customer to the confirmation page in the ContinueUrl
field. If the transaction is not successful, the page linked in the ContinueUrl
field will inform the customer about the next steps, such as updating the payment details in case of a failed payment.
{
"ContinueUrl":"http://www.cleverbridge.com/2/p/123546-sf78g97sd897g8df"
"NextBillingDate":"2018-05-15T23:20:50.52+00:00"
"TransactionStatus":"Success"
"ResultMessage":"OK"
}
Step 3: Cleverbridge sends you a PaidOrderNotification
Cleverbridge sends you a PaidOrderNotification, which contains information that allows you to map the payment profile and update your local ecosystem (CRM, ERP, etc.). It includes:
subscriptionID
- the Cleverbridge subscription IDrenewalType
- whether the subscription has an automatic or manual renewal typeintervalNumber
- the current billing interval, which for renewals is always1
or morenextBillingDate
- the next billing date is calculated based on your product settings
{
"meta": {
"type": "PaidOrderNotification",
"date": "2019-03-19T14:47:34.857671",
"schemaUrl": "https://www.cleverbridge.com/JsonNotificationSchemas/PaidOrderNotification"
},
"purchaseId": 123456789,
...
"items": [{
...
"recurringBilling": {
"subscriptionId": "S12345678",
...
"intervalNumber": 1,
...
"nextBillingDate": "2020-03-19T14:47:34.857671",
...
"renewalType": "Automatic"
...
}],
...
}
}

Step 1: Show customer price of immediate renewal
If a customer has a subscription whose data limit has run out, and the customer would like to do the following:
- Immediately renew the subscription at custom price so that they can continue using the service
Call the Update Subscription Item API endpoint to generate a preview of the price that the customer will pay for the renewal. In the API call, do the following:
- Submit the
SubscriptionId
that belongs to the customer's subscription. - Submit the
ProductId
that belongs to the product. - Set
GetCustomerPricePreviewOnly
totrue
in theAlignmentSettings
argument and setGenerateMail
tofalse
to generate a preview that will not be processed or communicated via email. - Set the price that the customer will pay for the renewal in the
CustomerPrice
argument. - Set
TriggerImmediateRenewal
totrue
to trigger the renewal immediately. - Set
ResetBillingInterval
totrue
so that a new billing interval starts immediately. - Set
UpdateAction
toUpdate
for reporting purposes.
curl --request POST \
--url https://rest.cleverbridge.com/subscription/updatesubscriptionitem \
--header 'accept: application/json' \
--header 'content-type: application/json' \
--header 'authorization: Basic xxxxxxxxxxxxxxxxxxxxxxxxxxxxxxxxxxxx' \
--data '{
"AlignmentSettings": {
"AlignToCurrentInterval": false,
"ExtendInterval": false,
"GetCustomerPricePreviewOnly": true
},
"CustomerPrice" : {
"CurrencyId": USD,
"IsGross": true,
"Value": 75
}
"GenerateMail": false,
"ProductId": 123456,
"Quantity": 1,
"RunningNumber": 1,
"SubscriptionId": "S12345678",
"TriggerImmediateRenewal": true,
"ResetBillingInterval" : true,
"UpdateAction": "Update"
}'
For more information about the AlignmentSettings
argument, see Alignment Settings.
Step 2: Process upgrade for customer
After the customer confirms the previewed price, set GetCustomerPricePreviewOnly
to false
in the AlignmentSettings
argument and set GenerateMail
to true
. Call the Update Subscription Item API endpoint again. Cleverbridge will process the upgrade using the payment details that we have stored in our database and send a confirmation email to the customer.
curl --request POST \
--url https://rest.cleverbridge.com/subscription/updatesubscriptionitem \
--header 'accept: application/json' \
--header 'content-type: application/json' \
--header 'authorization: Basic xxxxxxxxxxxxxxxxxxxxxxxxxxxxxxxxxxxx' \
--data '{
"AlignmentSettings": {
"AlignToCurrentInterval": false,
"ExtendInterval": false,
"GetCustomerPricePreviewOnly": false
},
"CustomerPrice" : {
"CurrencyId": USD,
"IsGross": true,
"Value": 75
}
"GenerateMail": true,
"ProductId": 123456,
"Quantity": 1,
"RunningNumber": 1,
"SubscriptionId": "S12345678",
"TriggerImmediateRenewal": true,
"ResetBillingInterval": true,
"UpdateAction": "Update"
}'
Step 3: Cleverbridge sends you a PaidOrderNotification
Cleverbridge sends you a PaidOrderNotification, which contains information that allows you to update your local ecosystem (CRM, ERP, etc.). It includes:
subscriptionID
- the Cleverbridge subscription IDrenewalType
- whether the subscription has an automatic or manual renewal typeintervalNumber
- the current billing interval, which for renewals is always1
or morenextBillingDate
- the next billing date is calculated based on your product settings
{
"meta": {
"type": "PaidOrderNotification",
"date": "2019-03-19T14:47:34.857671",
"schemaUrl": "https://www.cleverbridge.com/JsonNotificationSchemas/PaidOrderNotification"
},
"purchaseId": 123456789,
...
"items": [{
...
"recurringBilling": {
"subscriptionId": "S12345678",
...
"intervalNumber": 1,
...
"nextBillingDate": "2020-03-19T14:47:34.857671",
...
"renewalType": "Automatic"
...
}],
...
}
}

Step 1: Show customer price of the upgrade and immediate renewal
If a customer has a subscription whose data limit has run out, and the customer would like to do the following:
- Upgrade to plan with higher data limit
- Immediately renew the subscription so that they can continue using the service
Call the Update Subscription Item API endpoint to generate a preview of the price that the customer will pay for the upgrade and renewal. In the API call, do the following:
- Submit the
SubscriptionId
that belongs to the customer's subscription. - Submit the
ProductId
that belongs to the product that the customer would like to upgrade to. - Set
GetCustomerPricePreviewOnly
totrue
in theAlignmentSettings
argument and setGenerateMail
tofalse
to generate a preview that will not be processed or communicated via email. - Set
TriggerImmediateRenewal
totrue
to trigger the renewal immediately. - Set
ResetBillingInterval
totrue
so that a new billing interval starts immediately. - Set
UpdateAction
toUpdate
for reporting purposes.
curl --request POST \
--url https://rest.cleverbridge.com/subscription/updatesubscriptionitem \
--header 'accept: application/json' \
--header 'content-type: application/json' \
--header 'authorization: Basic xxxxxxxxxxxxxxxxxxxxxxxxxxxxxxxxxxxx' \
--data '{
"AlignmentSettings": {
"AlignToCurrentInterval": false,
"ExtendInterval": false,
"GetCustomerPricePreviewOnly": true
},
"GenerateMail": false,
"ProductId": 123451,
"Quantity": 1,
"RunningNumber": 1,
"SubscriptionId": "S12345678",
"TriggerImmediateRenewal": true,
"ResetBillingInterval" : true,
"UpdateAction": "Update"
}'
For more information about the AlignmentSettings
argument, see Alignment Settings.
Step 2: Process upgrade for customer
After the customer confirms the previewed price, set GetCustomerPricePreviewOnly
to false
in the AlignmentSettings
argument and set GenerateMail
to true
. Call the Update Subscription Item API endpoint again. Cleverbridge will process the upgrade using the payment details that we have stored in our database and send a confirmation email to the customer.
curl --request POST \
--url https://rest.cleverbridge.com/subscription/updatesubscriptionitem \
--header 'accept: application/json' \
--header 'content-type: application/json' \
--header 'authorization: Basic xxxxxxxxxxxxxxxxxxxxxxxxxxxxxxxxxxxx' \
--data '{
"AlignmentSettings": {
"AlignToCurrentInterval": false,
"ExtendInterval": false,
"GetCustomerPricePreviewOnly": false
},
"GenerateMail": true,
"ProductId": 123451,
"Quantity": 1,
"RunningNumber": 1,
"SubscriptionId": "S12345678",
"TriggerImmediateRenewal": true,
"ResetBillingInterval": true,
"UpdateAction": "Update"
}'
Step 3: Cleverbridge sends you a PaidOrderNotification
Cleverbridge sends you a PaidOrderNotification, which contains information that allows you to update your local ecosystem (CRM, ERP, etc.). It includes:
subscriptionID
- the Cleverbridge subscription IDrenewalType
- whether the subscription has an automatic or manual renewal typeintervalNumber
- the current billing interval, which for renewals is always1
or morenextBillingDate
- the next billing date is calculated based on your product settings
{
"meta": {
"type": "PaidOrderNotification",
"date": "2019-03-19T14:47:34.857671",
"schemaUrl": "https://www.cleverbridge.com/JsonNotificationSchemas/PaidOrderNotification"
},
"purchaseId": 123456789,
...
"items": [{
...
"recurringBilling": {
"subscriptionId": "S12345678",
...
"intervalNumber": 1,
...
"nextBillingDate": "2020-03-19T14:47:34.857671",
...
"renewalType": "Automatic"
...
}],
...
}
}

Step 1: Show customer custom price of upgrade and immediate renewal
If a customer has a subscription whose data limit has run out, and the customer would like to do the following:
- Upgrade to custom-priced plan with higher data limit
- Immediately renew the subscription so that they can continue using the service
Call the Update Subscription Item API endpoint to generate a preview of the price that the customer will pay for the upgrade and renewal. In the API call, do the following:
- Submit the
SubscriptionId
that belongs to the customer's subscription. - Submit the
ProductId
that belongs to the product that the customer would like to upgrade to. - Set
GetCustomerPricePreviewOnly
totrue
in theAlignmentSettings
argument and setGenerateMail
tofalse
to generate a preview that will not be processed or communicated via email. - Set the price that the customer will pay for the renewal in the
CustomerPrice
argument. - Set
TriggerImmediateRenewal
totrue
to trigger the renewal immediately. - Set
ResetBillingInterval
totrue
so that a new billing interval starts immediately. - Set
UpdateAction
toUpdate
for reporting purposes.
curl --request POST \
--url https://rest.cleverbridge.com/subscription/updatesubscriptionitem \
--header 'accept: application/json' \
--header 'content-type: application/json' \
--header 'authorization: Basic xxxxxxxxxxxxxxxxxxxxxxxxxxxxxxxxxxxx' \
--data '{
"AlignmentSettings": {
"AlignToCurrentInterval": false,
"ExtendInterval": false,
"GetCustomerPricePreviewOnly": true
},
"CustomerPrice" : {
"CurrencyId": USD,
"IsGross": true,
"Value": 215
}
"GenerateMail": false,
"ProductId": 123451,
"Quantity": 1,
"RunningNumber": 1,
"SubscriptionId": "S12345678",
"TriggerImmediateRenewal": true,
"ResetBillingInterval" : true,
"UpdateAction": "Update"
}'
For more information about the AlignmentSettings
argument, see Alignment Settings.
Step 2: Process upgrade for customer
After the customer confirms the previewed price, set GetCustomerPricePreviewOnly
to false
in the AlignmentSettings
argument and set GenerateMail
to true
. Call the Update Subscription Item API endpoint again. Cleverbridge will process the upgrade using the payment details that we have stored in our database and send a confirmation email to the customer.
curl --request POST \
--url https://rest.cleverbridge.com/subscription/updatesubscriptionitem \
--header 'accept: application/json' \
--header 'content-type: application/json' \
--header 'authorization: Basic xxxxxxxxxxxxxxxxxxxxxxxxxxxxxxxxxxxx' \
--data '{
"AlignmentSettings": {
"AlignToCurrentInterval": false,
"ExtendInterval": false,
"GetCustomerPricePreviewOnly": false
},
"CustomerPrice" : {
"CurrencyId": USD,
"IsGross": true,
"Value": 215
}
"GenerateMail": true,
"ProductId": 123451,
"Quantity": 1,
"RunningNumber": 1,
"SubscriptionId": "S12345678",
"TriggerImmediateRenewal": true,
"ResetBillingInterval": true,
"UpdateAction": "Update"
}'
Step 3: Cleverbridge sends you a PaidOrderNotification
Cleverbridge sends you a PaidOrderNotification, which contains information that allows you to update your local ecosystem (CRM, ERP, etc.). It includes:
subscriptionID
- the Cleverbridge subscription IDrenewalType
- whether the subscription has an automatic or manual renewal typeintervalNumber
- the current billing interval, which for renewals is always1
or morenextBillingDate
- the next billing date is calculated based on your product settings
{
"meta": {
"type": "PaidOrderNotification",
"date": "2019-03-19T14:47:34.857671",
"schemaUrl": "https://www.cleverbridge.com/JsonNotificationSchemas/PaidOrderNotification"
},
"purchaseId": 123456789,
...
"items": [{
...
"recurringBilling": {
"subscriptionId": "S12345678",
...
"intervalNumber": 1,
...
"nextBillingDate": "2020-03-19T14:47:34.857671",
...
"renewalType": "Automatic"
...
}],
...
}
}

Step 1: Show customer price of the downgrade and immediate renewal
If a customer has a subscription whose data limit has run out, and the customer would like to do the following:
- Downgrade to plan with lower data limit
- Immediately renew the subscription so that they can continue using the service
Call the Update Subscription Item API endpoint to generate a preview of the price that the customer will pay for the downgrade and renewal. In the API call, do the following:
- Submit the
SubscriptionId
that belongs to the customer's subscription. - Submit the
ProductId
that belongs to the product that the customer would like to downgrade to. - Set
GetCustomerPricePreviewOnly
totrue
in theAlignmentSettings
argument and setGenerateMail
tofalse
to generate a preview that will not be processed or communicated via email. - Set
TriggerImmediateRenewal
totrue
to trigger the renewal immediately. - Set
ResetBillingInterval
totrue
so that a new billing interval starts immediately. - Set
UpdateAction
toUpdate
for reporting purposes.
curl --request POST \
--url https://rest.cleverbridge.com/subscription/updatesubscriptionitem \
--header 'accept: application/json' \
--header 'content-type: application/json' \
--header 'authorization: Basic xxxxxxxxxxxxxxxxxxxxxxxxxxxxxxxxxxxx' \
--data '{
"AlignmentSettings": {
"AlignToCurrentInterval": false,
"ExtendInterval": false,
"GetCustomerPricePreviewOnly": true
},
"GenerateMail": false,
"ProductId": 123450,
"Quantity": 1,
"RunningNumber": 1,
"SubscriptionId": "S12345678",
"TriggerImmediateRenewal": true,
"ResetBillingInterval" : true,
"UpdateAction": "Update"
}'
For more information about the AlignmentSettings
argument, see Alignment Settings.
Step 2: Process downgrade for customer
After the customer confirms the previewed price, set GetCustomerPricePreviewOnly
to false
in the AlignmentSettings
argument and set GenerateMail
to true
. Call the Update Subscription Item API endpoint again. Cleverbridge will process the downgrade using the payment details that we have stored in our database and send a confirmation email to the customer.
curl --request POST \
--url https://rest.cleverbridge.com/subscription/updatesubscriptionitem \
--header 'accept: application/json' \
--header 'content-type: application/json' \
--header 'authorization: Basic xxxxxxxxxxxxxxxxxxxxxxxxxxxxxxxxxxxx' \
--data '{
"AlignmentSettings": {
"AlignToCurrentInterval": false,
"ExtendInterval": false,
"GetCustomerPricePreviewOnly": false
},
"GenerateMail": true,
"ProductId": 123450,
"Quantity": 1,
"RunningNumber": 1,
"SubscriptionId": "S12345678",
"TriggerImmediateRenewal": true,
"ResetBillingInterval": true,
"UpdateAction": "Update"
}'
Step 3: Cleverbridge sends you a PaidOrderNotification
Cleverbridge sends you a PaidOrderNotification, which contains information that allows you to update your local ecosystem (CRM, ERP, etc.). It includes:
subscriptionID
- the Cleverbridge subscription IDrenewalType
- whether the subscription has an automatic or manual renewal typeintervalNumber
- the current billing interval, which for renewals is always1
or morenextBillingDate
- the next billing date is calculated based on your product settings
{
"meta": {
"type": "PaidOrderNotification",
"date": "2019-03-19T14:47:34.857671",
"schemaUrl": "https://www.cleverbridge.com/JsonNotificationSchemas/PaidOrderNotification"
},
"purchaseId": 123456789,
...
"items": [{
...
"recurringBilling": {
"subscriptionId": "S12345678",
...
"intervalNumber": 1,
...
"nextBillingDate": "2020-03-19T14:47:34.857671",
...
"renewalType": "Automatic"
...
}],
...
}
}

If a customer has deactivated a subscription, you can use a winback campaign to encourage this individual to resubscribe to your product. To enable customers to reactivate their subscriptions, integrate the following flow into your system:
Step 1: Reactivate subscription item for customer
If a customer would like to reactivate a subscription, call the Reinstate Subscription Items API endpoint to reactivate the deactivated items in a subscription. In the API call, do the following:
- Include the
SubscriptionId
pertaining to the customer's subscription. - Set
GenerateMail
totrue
so that the customer receives a confirmation email that their subscription itemA subscription item is component of a subscription with its own set of attributes including price, description and feature set. was reinstated.
- Add the subscription item running number of the deactivated subscription item to the
Items
array.
curl --request POST \
--url https://rest.cleverbridge.com/subscription/reinstatesubscriptionitems \
--header 'accept: application/json' \
--header 'content-type: application/json' \
--header 'authorization: Basic xxxxxxxxxxxxxxxxxxxxxxxxxxxxxxxxxxxx' \
--data '{
"GenerateMail":true,
"Items":[
1
],
"SubscriptionId":"S12345678"
}'
Step 2: Process the renewal for the customer
Call the Update Next Billing Date API endpoint to reset the NextBillingDate
to the current date and time. This triggers an immediate transaction using the payment details that Cleverbridge has stored in our database.
curl --request POST \
--url https://rest.cleverbridge.com/subscription/updatenextbillingdate \
--header 'accept: application/json' \
--header 'content-type: application/json' \
--data '{
"NextBillingDate":"2019-08-03T11:20:34.15Z",
"SubscriptionId":"S12345678"
}'
Step 3: Cleverbridge sends you a PaidOrderNotification
Cleverbridge sends you a PaidOrderNotification, which contains information that allows you to update your local ecosystem (CRM, ERP, etc.). It includes:
subscriptionID
- the Cleverbridge subscription IDrenewalType
- whether the subscription has an automatic or manual renewal typeintervalNumber
- the current billing interval, which for renewals is always1
or morenextBillingDate
- the next billing date is calculated based on your product settings
{
"meta": {
"type": "PaidOrderNotification",
"date": "2019-03-19T14:47:34.857671",
"schemaUrl": "https://www.cleverbridge.com/JsonNotificationSchemas/PaidOrderNotification"
},
"purchaseId": 123456789,
...
"items": [{
...
"recurringBilling": {
"subscriptionId": "S12345678",
...
"intervalNumber": 1,
...
"nextBillingDate": "2020-03-19T14:47:34.857671",
...
"renewalType": "Automatic"
...
}],
...
}
}

Automated renewal programs help you retain subscribers longer, while lowering your marketing costs and increasing customer lifetime value. One way to convince customers to switch to automatic renewal is by offering them a period of free usage if they do switch. To incorporate this strategy, integrate the following flow into your system:
Step 1: Change renewal type for the customer
If a customer would like to take advantage of your offer to switch to automatic renewal, call the Update Subscription Renewal Type API endpoint to change the customer's subscription renewal type from manual
to automatic
. In the API call, include the customer's SubscriptionId
and indicate that RenewalType
should be changed to Automatic
.
curl --request POST \
--url https://rest.cleverbridge.com/subscription/updatesubscriptionrenewaltype \
--header 'accept: application/json' \
--header 'content-type: application/json' \
--header 'authorization: Basic xxxxxxxxxxxxxxxxxxxxxxxxxxxxxxxxxxxx' \
--data '{
"SubscriptionId": "S12345678",
"RenewalType": "Automatic"
}'
Step 2: Cleverbridge sends you a SubscriptionRenewalTypeChangedNotification
Cleverbridge sends you a SubscriptionRenewalTypeChangedNotification, which contains information that allows you to update your local ecosystem (CRM, ERP, etc.). It includes:
subscriptionID
- the Cleverbridge subscription IDrenewalType
- whether the subscription now has anAutomatic
orManual
renewal type
{
"meta": {
"type": "SubscriptionRenewalTypeChangedNotification",
"date": "2019-03-19T14:47:34.857671",
"schemaUrl": "https://www.cleverbridge.com/JsonNotificationSchemas/SubscriptionRenewalTypeChangedNotification"
},
...
"items": [{
...
"recurringBilling": {
"subscriptionId": "S12345678",
...
"renewalType": "Manual"
...
}],
...
}
}
Step 3: Extend next billing date for the customer
After that, call the Update Next Billing Date endpoint to extend the next billing date, free of charge (e.g., for 30 days). In the API call, include the new NextBillingDate
and SubscriptionId
.
curl --request POST \
--url https://rest.cleverbridge.com/subscription/updatenextbillingdate \
--header 'accept: application/json' \
--header 'content-type: application/json' \
--header 'authorization: Basic xxxxxxxxxxxxxxxxxxxxxxxxxxxxxxxxxxxx' \
--data '{
"NextBillingDate":"2019-09-01T12:20:50.52Z",
"SubscriptionId":"S12345678"
}'
Step 4: Cleverbridge sends you a SubscriptionBillingDateExtendedNotification
Cleverbridge sends you a SubscriptionBillingDateExtendedNotification, which contains information that allows you to update your local ecosystem (CRM, ERP, etc.). It includes:
subscriptionID
- the Cleverbridge subscription IDnextBillingDate
- the next billing date
{
"meta": {
"type": "SubscriptionBillingDateExtendedNotification",
"date": "2019-03-19T14:47:34.857671",
"schemaUrl": "https://www.cleverbridge.com/JsonNotificationSchemas/PaidOrderNotification"
},
...
"items": [{
...
"recurringBilling": {
"subscriptionId": "S12345678",
...
"nextBillingDate": "2020-01-01T12:59:59.111100",
...
}],
...
}
}
Important
It is only possible to integrate this flow if you are using Subscription Management 2.0. For more information, see Subscription Management 1.0 and 2.0.

Many customers, particularly those in the B2B industry, do not want to commit to automatic renewals of their subscriptions. As a result, making it easy for them to switch from automatic to manual renewal is essential to retaining their business. To enable customers to switch to the manual renewal type, integrate the following flow into your system:
Step 1: Change renewal type for the customer
If a customer would like to turn on or off automatic renewal, call the Update Subscription Renewal Type API endpoint to change the customer's subscription renewal type. Include the customer's SubscriptionId
in the API call and indicate that RenewalType
should be changed to Manual
.
curl --request POST \
--url https://rest.cleverbridge.com/subscription/updatesubscriptionrenewaltype \
--header 'accept: application/json' \
--header 'content-type: application/json' \
--header 'authorization: Basic xxxxxxxxxxxxxxxxxxxxxxxxxxxxxxxxxxxx' \
--data '{
"SubscriptionId": "S12345678",
"RenewalType": "Manual"
}'
Step 2: Cleverbridge sends you a SubscriptionRenewalTypeChangedNotification
Cleverbridge sends you a SubscriptionRenewalTypeChangedNotification, which contains information that allows you to update your local ecosystem (CRM, ERP, etc.). It includes:
subscriptionID
- the Cleverbridge subscription IDrenewalType
- whether the subscription now has anAutomatic
orManual
renewal type
{
"meta": {
"type": "SubscriptionRenewalTypeChangedNotification",
"date": "2019-03-19T14:47:34.857671",
"schemaUrl": "https://www.cleverbridge.com/JsonNotificationSchemas/SubscriptionRenewalTypeChangedNotification"
},
...
"items": [{
...
"recurringBilling": {
"subscriptionId": "S12345678",
...
"renewalType": "Manual"
...
}],
...
}
}

To enable customers to downgrade their plans, integrate the following flow into your system:
Step 1: Downgrade plan for customer (effective next billing date)
If the customer would like to downgrade to a cheaper plan, call the Update Subscription Item API endpoint using the ProductId
that belongs to the cheaper plan. In the API call, do the following:
- Set all parameters in the
AlignmentSettings
argument tofalse
so that the change is applied to the next billing interval. - Set
GenerateMail
totrue
so that the customer receives a confirmation email that the change was applied. - Set
TriggerImmediateRenewal
tofalse
so that an immediate renewal is not triggered. - Set
UpdateAction
toDowngrade
for reporting purchases.
curl --request POST \
--url https://rest.cleverbridge.com/subscription/updatesubscriptionitem \
--header 'accept: application/json' \
--header 'content-type: application/json' \
--header 'authorization: Basic xxxxxxxxxxxxxxxxxxxxxxxxxxxxxxxxxxxx' \
--data '{
"AlignmentSettings": {
"AlignToCurrentInterval": false,
"ExtendInterval": false,
"GetCustomerPricePreviewOnly": false
},
"GenerateMail": true,
"ProductId": 123456,
"Quantity": 1,
"RunningNumber": 1,
"SubscriptionId": "S12345678",
"TriggerImmediateRenewal": false,
"UpdateAction": "Downgrade"
}'
For more information about the AlignmentSettings
argument, see Alignment Settings.
Step 2: Cleverbridge processes the downgrade (on next billing date)
Cleverbridge processes the downgrade using the payment details that we have stored in our database and sends a confirmation email to the customer.
Step 3: Cleverbridge sends you a PaidOrderNotification (on next billing date)
Cleverbridge sends you a PaidOrderNotification, which contains information that allows you to update your local ecosystem (CRM, ERP, etc.). It includes:
subscriptionID
- the Cleverbridge subscription IDrenewalType
- whether the subscription has an automatic or manual renewal typeintervalNumber
- the current billing interval, which for renewals is always1
or morenextBillingDate
- the next billing date is calculated based on your product settings
{
"meta": {
"type": "PaidOrderNotification",
"date": "2019-03-19T14:47:34.857671",
"schemaUrl": "https://www.cleverbridge.com/JsonNotificationSchemas/PaidOrderNotification"
},
"purchaseId": 123456789,
...
"items": [{
...
"recurringBilling": {
"subscriptionId": "S12345678",
...
"intervalNumber": 1,
...
"nextBillingDate": "2020-03-19T14:47:34.857671",
...
"renewalType": "Automatic"
...
}],
...
}
}

To enable customers who are subscribed to multiple subscription items to deactivate one of the items, integrate the following flow into your system:
Step 1: Deactivate item for customer (effective next billing date)
If a customer would like to deactivate one of their subscription items, call the Deactivate Subscription Item API endpoint. In the API call, do the following:
- Submit the
SubscriptionId
pertaining to the customer's subscription. - Set
GenerateMail
totrue
so that the customer receives a confirmation email that their subscription item was deactivated. - Add the subscription item running number of the subscription item that you want to deactivate to the
Items
array.
curl --request POST \
--url https://rest.cleverbridge.com/subscription/deactivatesubscriptionitems \
--header 'accept: application/json' \
--header 'content-type: application/json' \
--header 'authorization: Basic xxxxxxxxxxxxxxxxxxxxxxxxxxxxxxxxxxxx' \
--data '{
"GenerateMail":true,
"Items":[
3
],
"SubscriptionId":"S12345678"
}'
Step 2: Cleverbridge communicates the change to the customer
Cleverbridge sends an email to the customer to confirms that the subscription was updated.
Migrate Existing Customers

To automate your subscription renewal process, move your existing subscriptions to the Cleverbridge platform using the following flow:
Step 1: Create a purchase link
Create a link and add the following parameters for mapping and customer experience purposes:
internalcustomer
- assign your unique customer identifier (UUID) to the parameter so that you can map the individual within your systemdp
- add a unique renewal date for the customer using the dynamic product parameterlanguageid
- assign the language code to the parameter. This corresponds to the customer's preferred language (ISO 639-1)currencyid
- assign the currency code to the parameter. This corresponds to the customer's preferred currency (ISO 4217)
You should also add the customer's existing billing profile to make the renewal as seamless as possible.
https://www.cleverbridge.com/864/purl-checkout
?internalcustomer=UUID-YOUR-UNIQUE-ID-1234-5678
&dp_97771=__RENEWALDATE:20201015__CHECKSUM:71B696A71870AF93636EDD23E88B7789
¤cy=EUR
&language=de
&billingCity=Bonn
&billingCompany=Acme%20Inc.
&billingCountryId=DE
&billingEmail=han.solo%40cleverbridge.com
&billingFirstname=Han
&billingLastname=Solo
&billingPostalcode=53123
&billingStreet1=123%20Falcon%20Way
&deliveryCity=Bonn
&deliveryCompany=Acme%20Inc.
&deliveryEmail=han.solo%40cleverbridge.com
&deliveryFirstname=Han
&deliveryLastname=Solo
&deliveryPostalcode=53123
&deliveryStreet1=123%20Kessel%20Run%20Way
Step 2: Protect the purchase link
Call the Generate User Session URL API endpoint to protect the parameters in the TargetURL
.
curl --request POST \
--url 'https://rest.cleverbridge.com/urlgenerator/generateusersessionurl' \
--header 'accept: application/json' \
--header 'content-type: application/json' \
--header 'authorization: Basic xxxxxxxxxxxxxxxxxxxxxxxxxxxxxxxxxxxx' \
--data '{
"TargetUrl": "https%3A%2F%2Fwww.cleverbridge.com%2F864%2Fpurl-checkout%3Finternalcustomer%3DUUID-YOUR-UNIQUE-ID-1234-5678%0A%09%09%09%09%09%26amp%3Bdp_97771%3D__RENEWALDATE%3A20201015__CHECKSUM%3A71B696A71870AF93636EDD23E88B7789%0A%09%09%09%09%09%26amp%3Bcurrency%3DEUR%0A%09%09%09%09%09%26amp%3BLanguage%3Dde%0A%09%09%09%09%09%26amp%3BbillingCity%3DBonn%0A%09%09%09%09%09%26amp%3BbillingCompany%3DAcme%2520Inc.%0A%09%09%09%09%09%26amp%3BbillingCountryId%3DDE%0A%09%09%09%09%09%26amp%3BbillingEmail%3Dhan.solo%2540cleverbridge.com%0A%09%09%09%09%09%26amp%3BbillingFirstname%3DHan%0A%09%09%09%09%09%26amp%3BbillingLastname%3DSolo%0A%09%09%09%09%09%26amp%3BbillingPostalcode%3D53123%0A%09%09%09%09%09%26amp%3BbillingStreet1%3D123%2520Falcon%2520Way%0A%09%09%09%09%09%26amp%3BdeliveryCity%3DBonn%0A%09%09%09%09%09%26amp%3BdeliveryCompany%3DAcme%2520Inc.%0A%09%09%09%09%09%26amp%3BdeliveryEmail%3Dhan.solo%2540cleverbridge.com%0A%09%09%09%09%09%26amp%3BdeliveryFirstname%3DHan%0A%09%09%09%09%09%26amp%3BdeliveryLastname%3DSolo%0A%09%09%09%09%09%26amp%3BdeliveryPostalcode%3D53123%0A%09%09%09%09%09%26amp%3BdeliveryStreet1%3D123%2520Kessel%2520Run%2520Way%0A%09%09%09%09%09%26amp%3BcopyBillingToLicenseeOut%3Dfalse%0A%09%09%09%09%09%26amp%3Bshowrcl%3Dfals"
}'
Step 3: Forward the customer to checkout process with protected link
In the checkout process, the customer is instructed on how to complete the transaction and submit their payment information. If the payment is successful, the customer receives a payment confirmation, as well as delivery details. If a key generator is configured for your account, a license key is generated in this process, and the license key is displayed in the delivery details.
Step 4: Cleverbridge sends you a PaidOrderNotification
Cleverbridge sends you a PaidOrderNotification, which contains information that allows you to map the payment profile and update your local ecosystem (CRM, ERP, etc.). It includes:
internalCustomer
- your unique customer identifiersubscriptionID
- the Cleverbridge subscription IDrenewalType
- whether the subscription has an automatic or manual renewal typeintervalNumber
- the current billing interval, which for initial sign-ups is always0
nextBillingDate
- the next billing date is calculated based on your product settings
{
"meta": {
"type": "PaidOrderNotification",
"date": "2019-03-19T14:47:34.857671",
"schemaUrl": "https://www.cleverbridge.com/JsonNotificationSchemas/PaidOrderNotification"
},
"purchaseId": 123456789,
...
"internalCustomer": "UUID-YOUR-UNIQUE-ID-1234-5678",
...
"items": [{
...
"recurringBilling": {
"subscriptionId": "S12345678",
...
"intervalNumber": 0,
...
"nextBillingDate": "2020-03-19T14:47:34.857671",
...
"renewalType": "Automatic"
...
}],
...
}
}
Note
This integration guide demonstrates how to accomplish a variety of subscription-related use cases using our REST APIs. To learn how to implement particular use cases using our GraphQL API, see GraphQL Use Cases.