Get Started with REST APIs
Cleverbridge offers a variety of APIs, notifications, and other tools to help you to integrate your front-end and back-end systems with our platform.
The modular, API-oriented architecture of the Cleverbridge platform makes integration straightforward and efficient.
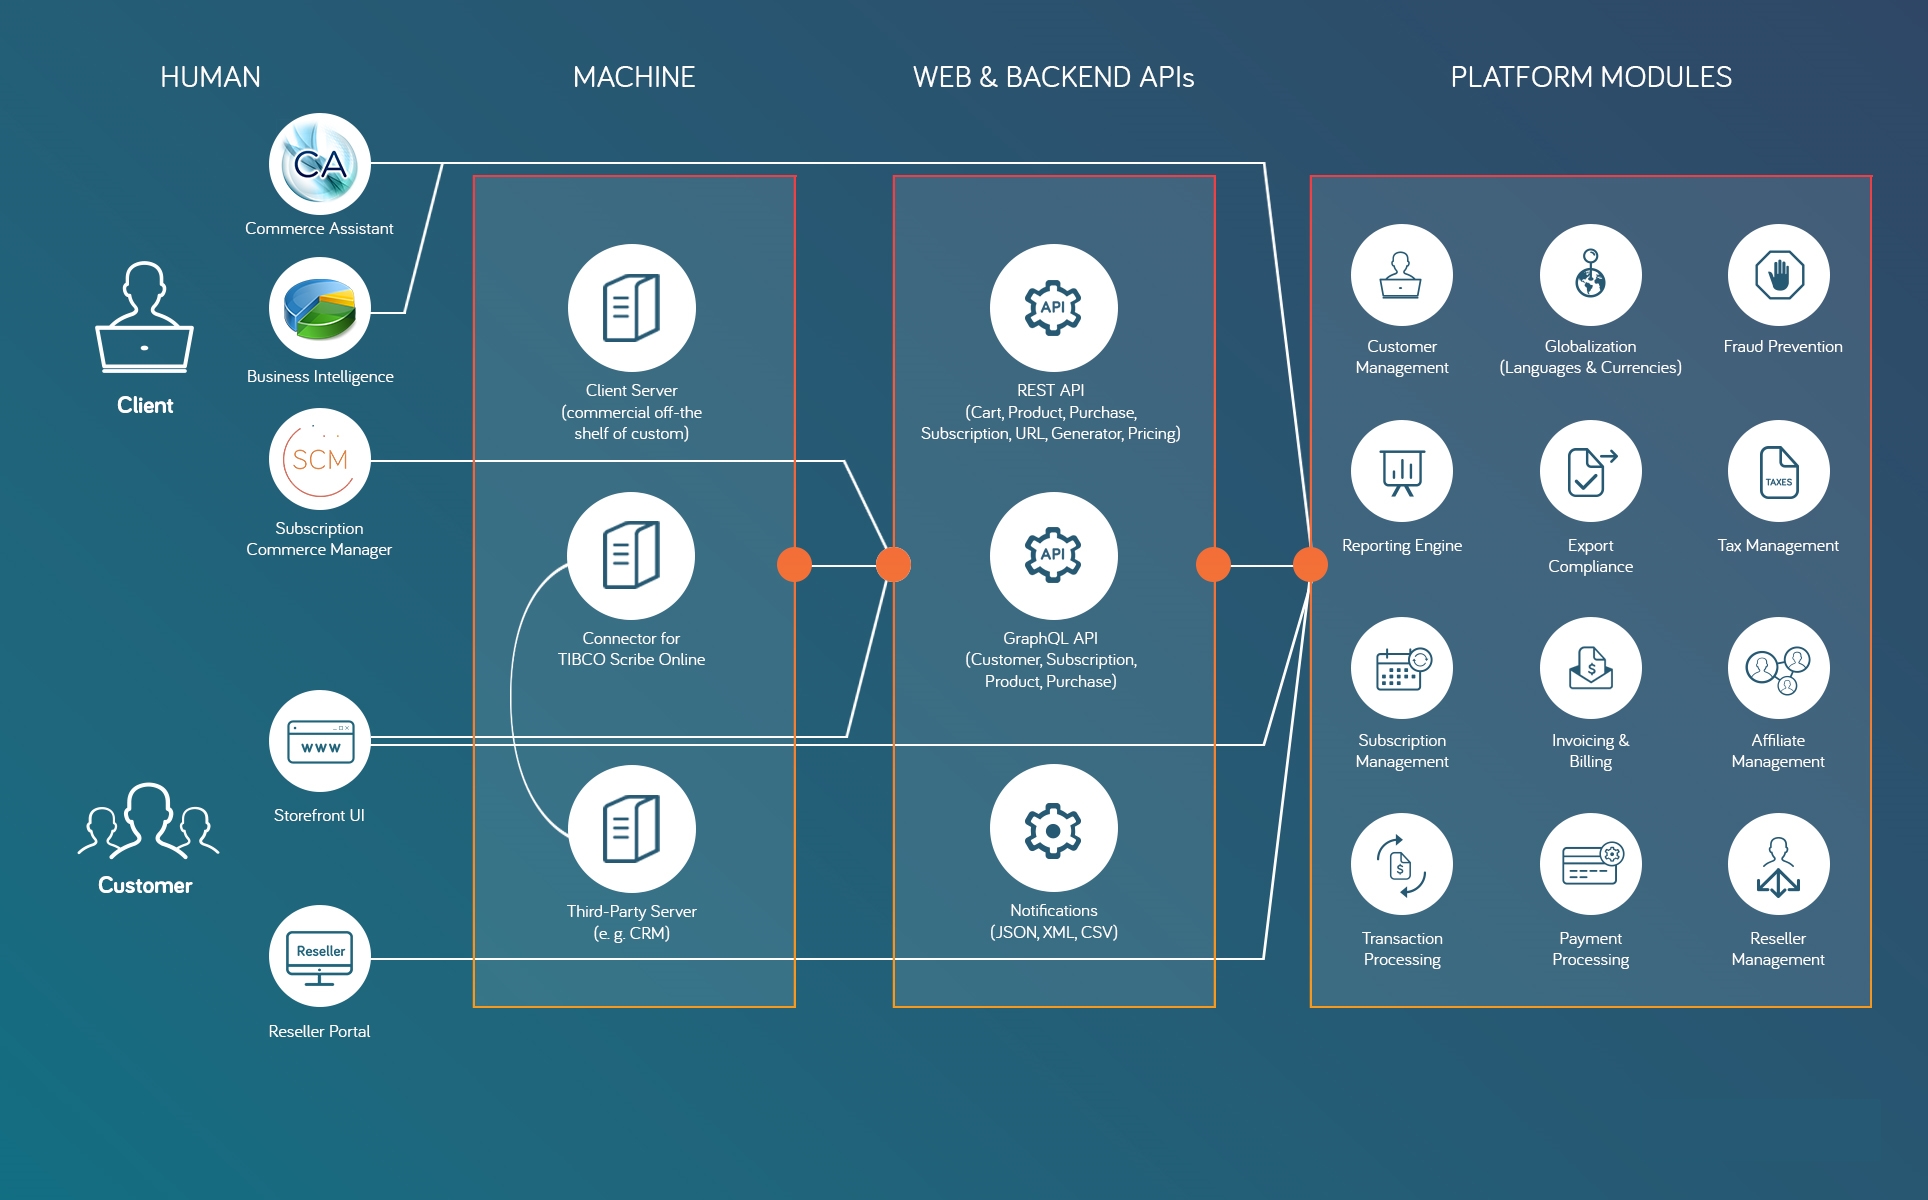
Our back-end REST APIs enable you to upgrade subscriptions, generate checkout process URLs, and generate shopping cart previews. After integration, you can also use these tools to create customer self-service options and ensure that your transactional database is up-to-date.
Read through the following article to help you get started:
Updated 7 months ago