✱
To access this content, log in.
Open a Search
The Commerce Assistant provides the following ways to open a search:
- In the main menu, select a category, and select the search item from the drop-down list.
- In the Worksheets & Windows section of the Navigation Bar, click the
 button on the right and select the search item from the drop-down list.
Filter Search Results
The Commerce Assistant provides the following ways to filter search results:
Search results can be refined to give you the exact results you need by using search criteria. In every worksheet tab, you can filter the results in the following ways:
- Define a search parameter to be filtered
- Narrow the results by activating criteria in filters
The following describes how to filter search results.
For some criteria, such as Partner![]() A company that buys your products in bulk for a discounted price and resells them to their customers for a profit. In legal terms, a partner is a regular customer as there is no partnership agreement with Cleverbridge in place. type, the search field for that filter pre-populates with a list of options for fast filtering. Examples are ASP, Distributor, and Key Account.
A company that buys your products in bulk for a discounted price and resells them to their customers for a profit. In legal terms, a partner is a regular customer as there is no partnership agreement with Cleverbridge in place. type, the search field for that filter pre-populates with a list of options for fast filtering. Examples are ASP, Distributor, and Key Account.
For all other criteria, enter an alphanumeric data string to filter search results.
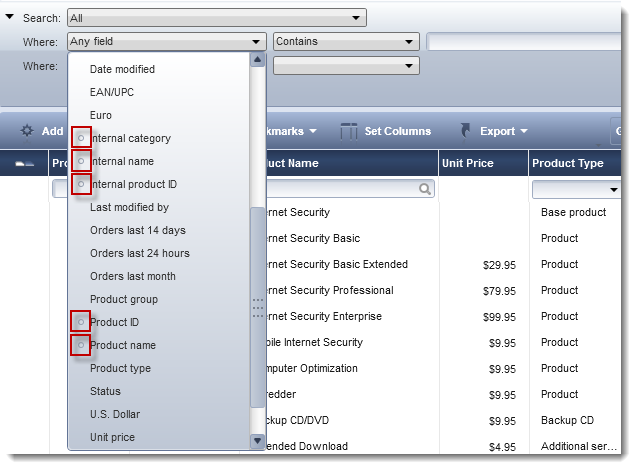
All Where field filters contain the option Any Field, which narrows the search results to the criteria you enter that occurs in any data field. Click the drop-down list on the Any Field option to view which fields are affected by the search. The fields relevant to the Any Field search display with a circle in the drop-down list.
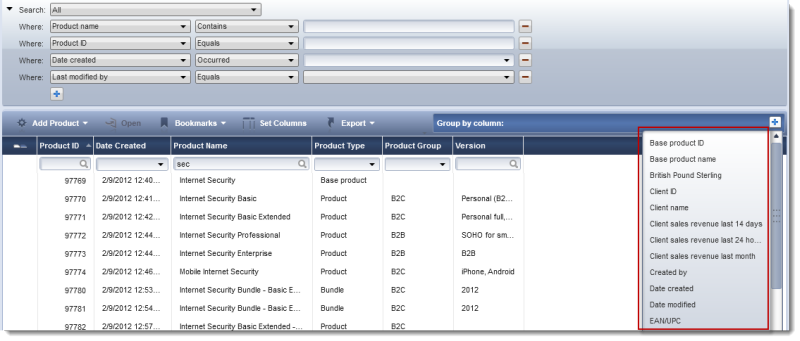
Search results can be refined to give you the exact results you need using the grouping feature. With grouping you can organize your results into logical classes of data.
Click the  button by Group by column to select a search category.
Group Display
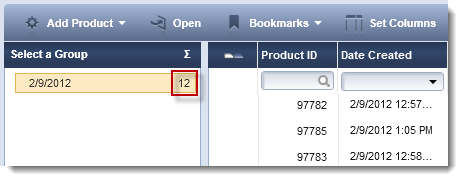
This category displays as a new column to the left of the search results. This new column provides an easy way to navigate within the selected category. As you click every result the search updates to reflect that selection.
Number of Records
The number to the right of the column results is the number of records for that selection.
Example
In the Products worksheet, if you select Version in the Group by column menu, the new column displays the versions of the products on the left of the column, and the number of products with that version.
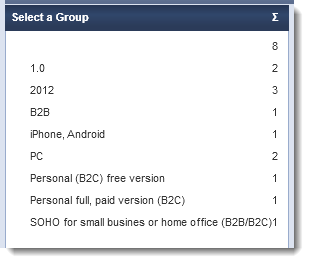
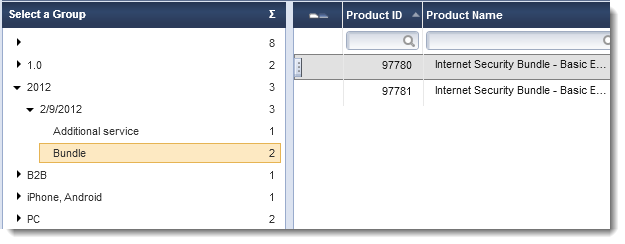
Click the  button again to add another parameter to narrow results. You can have up to three groups running simultaneously to customize your search. When a second criteria is selected from Group by column, the first criteria is marked with an arrow for drilling down into the next data layer.
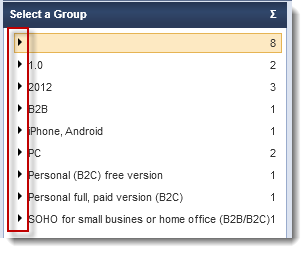
Group Display
Click the arrow to view the result of the second criteria. Likewise, a third criteria adds another filter. Click the result in the column to view the refined search results.
Quickly filter search results in these three ways:
- Enter alphanumeric search criteria directly into the fields in the search results area
- Click a drop-down list to scan for the needed criteria
- Click a drop-down list to select a calendar date and time
Locate Quick Filters
Quick filters are located between the search result headings and the search results.
Note
All columns do not contain a quick search row.
Partial Input
Partial input is also valid for refining search results using quick filters.
Organize Search Results Using Columns
You can organize the columns of your search results so that the data you need most is easily accessible. The Commerce Assistant stores your search layout so that you only need to do this once.
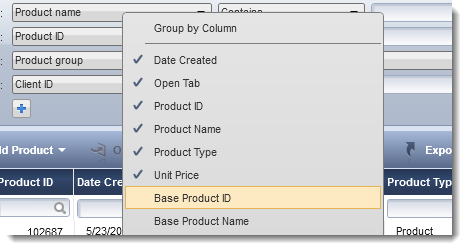
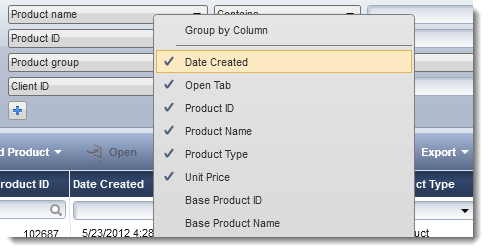
To add a new column, right-click an existing column heading and select a data type from the drop-down list. The new column displays in place of the existing column and the existing column moves to the right.
You can also add columns for some of the Business Intelligence reporting dimensions as shown below:
To sort the columns, click a column heading and use the up or down arrows to view results in ascending or descending order![]() An agreement between a seller and a buyer to exchange goods and/or services for money. An order can: - contain multiple products and quantities; - have multiple financial transactions. A preorder authorization is considered an order.. You can also drag-and-drop the columns to reorder them.
An agreement between a seller and a buyer to exchange goods and/or services for money. An order can: - contain multiple products and quantities; - have multiple financial transactions. A preorder authorization is considered an order.. You can also drag-and-drop the columns to reorder them.

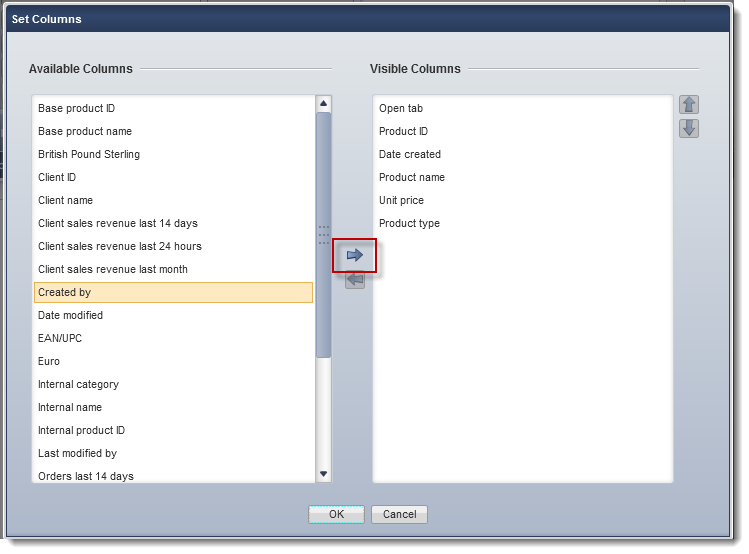
Set Columns is used to configure which columns are visible in the worksheet from a list of all available columns. Perform these steps as often as necessary to configure the columns you would like to view for each worksheet.
- In the action bar, click Set Columns.
- To select columns, in the Available Columns area, select a column and click the button
 to move it into the Visible Columns area.
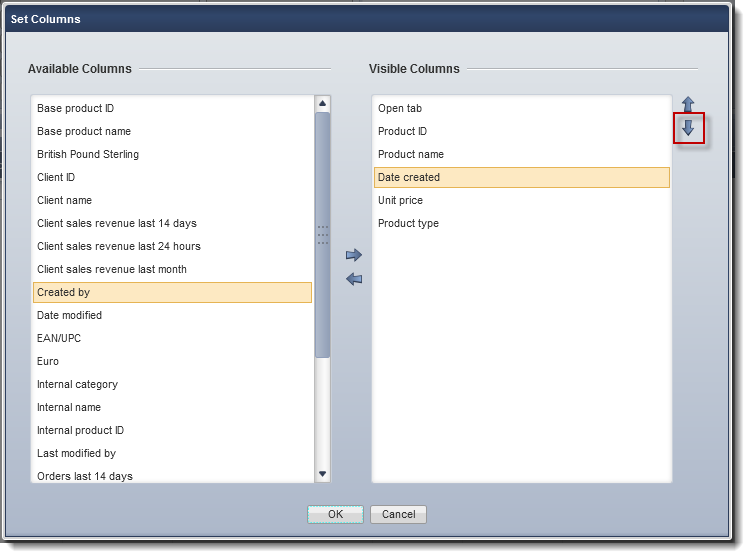
- To determine the order of the columns in the worksheet, in the Visible Columns area, select a column and click the
 and
and  buttons to the right until it is in the desired position.
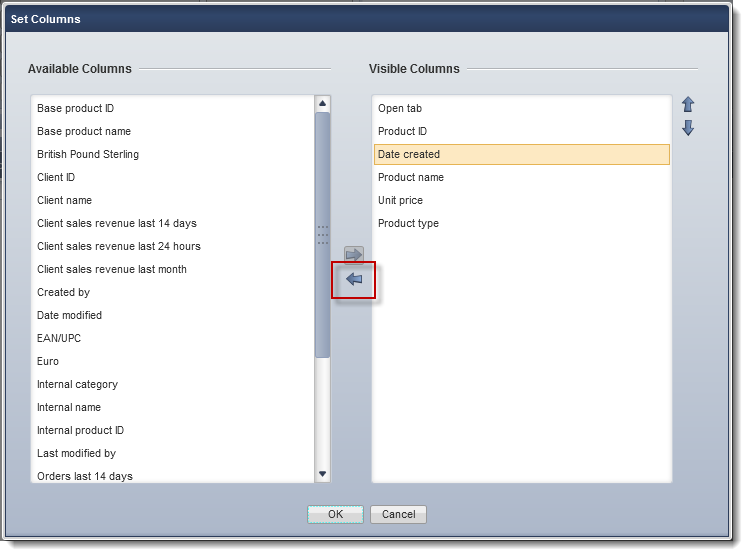
- To remove a column, in the Visible Columns area, select the column and click the
 button to move it to the Available Columns area.
- Click OK.
Export Data from Search Results
Search results can be exported with three external editors.
Open Data
Open is used to display search results in an environment outside the Commerce Assistant.
- After executing a search, click the Export menu item to display the results in the following formats:
- Open as Excel workbook
- Open as PDF
- Open as Word document
- You can rename, save, or simply close the file when done.
Save Data
Save is used to send search results to a destination outside the Commerce Assistant.
- After executing a search, click the Export menu item to send the results the following ways:
- Save as Excel workbook
- Save as PDF
- Save as Word document
- Select a destination for the export file.
- Enter a name for the export file.
- Click Save.
Open Item in Search Results
- Select one or more line items in the search results.
- Double-click to open the item(s).
Duplicate Item in Search Results
- To make a duplicate of an entire item, such as a product, recommendation, or shipping configuration, right-click item in the search results and select Create Copy. The item opens.
- Give the duplicate item a unique name.
- Click Save.
Delete Item in Search Results
- To permanently delete an entire item, such as a product, recommendation, or shipping configuration, right-click the item in the search results and select Delete.
- In the confirmation dialog box, click Yes.
View Details of Item in Search Results
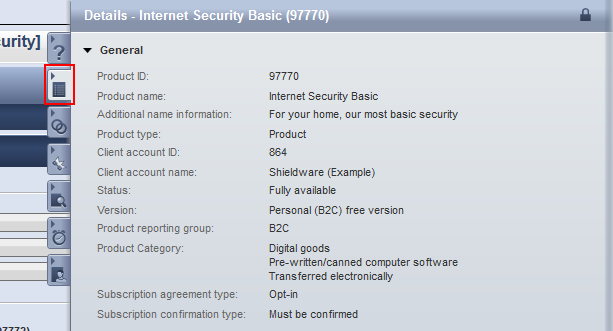
The Details contextual panel is used to access supplementary information about a portal or search result. Depending on the item selected, the panel contains different types of information. This panel updates as you change portals or move from line item to line item in the search results list.
View Details
Click the Details tab to open the Details panel. Expand and contract this information using the arrow buttons.
Copy Information from Search Results List
Content can be copied from search lists or other lists throughout the application, such as the product list in Link Generator. The copy options are available in the context menu by right-clicking an item.
There are several ways to copy content from a list:
- To copy an individual cell, select the cell, right-click, and select Copy Cell.
-
To copy an entire column:
- In the list, select a column, right-click, and select Copy Column or
- Right-click a column header and select Copy Column.
- To copy one or more rows, select the row(s), right-click, and select Copy Row(s).
View Items Related to Item in Search Results
The Related Items contextual panel is used to view and access other items in the Commerce Assistant that are related to an open portal or a search result line item. Depending on the item selected, the panel contains different types of information. The panel updates as you change portals or move from line item to line item in the search results list.
Example
When the Product portal is open to a particular product, the Related Items panel displays which promotions and recommendations are associated with that product, which price and commission configurations are associated with it, and which product lists it is included in.
View Related Items
Click  to open the Related Items panel. Expand and contract this information using the arrow buttons.
Open a Related Item
Click a related item to open it in a new worksheet.
Save Default View of Search
You can save a default view of a search so that it keeps any customized settings such as filter and column settings. Every time you open the search, it opens with that view. This view overrides the Commerce Assistant's stickiness, or ability of the application to "remember" how you last left it. You can also reset the view to default and the application's stickiness again.
Example
In the Products search, you change the filters and the order of the columns. You also group the list by a certain column. You save this configuration as your default view. Every time you open the Products search, it opens with this view.
Save the Default View
- In an open search, configure the search to your preferences.
- In the list, right-click and select Save View as Default.
Reset the Default View
- In an open search, in the list, right-click and select Reset View.
Bookmark Searches
Save popular searches in a customized format using the Bookmark option. You can set up bookmarks for your personal use, or make bookmarks available to all users.


 buttons.
