Important
As of March 31, 2020, Cleverbridge no longer issues payouts to affiliates through the Affiliate![]() An individual or a company that markets a product to potential customers. The Affiliate receives a commission on a specific action (also called event: e.g., sale, lead, click, visit etc.) previously agreed upon with you, the advertiser. Each action is tracked via a unique tracking link from Partnerize.
An affiliate is also called a publisher. Center. If you choose to continue using the Affiliate Center to manage your affiliates, you are responsible for paying them out based on the performance reports generated by the Cleverbridge platform.
An individual or a company that markets a product to potential customers. The Affiliate receives a commission on a specific action (also called event: e.g., sale, lead, click, visit etc.) previously agreed upon with you, the advertiser. Each action is tracked via a unique tracking link from Partnerize.
An affiliate is also called a publisher. Center. If you choose to continue using the Affiliate Center to manage your affiliates, you are responsible for paying them out based on the performance reports generated by the Cleverbridge platform.
If you no longer want to handle affiliate payouts yourself, ask us about upgrading to Partnerize, our newest performance marketing solution.
You can add online marketing materials to the Affiliate Center’s Get Links page for individual products. The campaigns are displayed and selected below a product's description information.
Add a Simple Banner Campaign to a Product
- In the Commerce Assistant main menu, select Channel Management > Affiliate Center Setup.
- Select the Campaigns portal item.
- In the Product field, select a product from the drop-down list. This list is populated from the products selected in the Products section of Affiliate Center Setup.
- Click Add, then Add Simple Banner Campaign. A new campaign is added to the product.
- On the right, enter the following settings for this campaign:
Name
Enter a name for the campaign. This displays in the Affiliate Center.
Language
Specify a language for the campaign. This allows affiliates to filter campaigns by language in the Affiliate Center.
Recommended
Select to display this campaign in the Get Links page's Recommended Campaigns tab. Use this to mark high-conversion rate campaigns or seasonal campaigns as recommended for affiliates. This is an optional field.
Example
Two campaigns with high conversion rates are marked as Recommended. They display in the Recommended Campaigns tab in addition to the Banner Campaigns tab.

Banner
Insert a banner image for the campaign. The banner image must first be uploaded to the web files before it can be selected for use. For more information, see Web Files ✱.
Target URL
The URL to be used when a customer
 An individual or business purchasing your product or service by placing an order through Cleverbridge. The customer is the end user of this product, as they are not allowed to resell the purchased products or services.
A customer is unique per client. If a customer purchases products or services from two different clients, there are 2 separate records of said customer. clicks the banner. This can be a:
An individual or business purchasing your product or service by placing an order through Cleverbridge. The customer is the end user of this product, as they are not allowed to resell the purchased products or services.
A customer is unique per client. If a customer purchases products or services from two different clients, there are 2 separate records of said customer. clicks the banner. This can be a:- Checkout URL
- URL that directs to your website, an executable file, or another landing page
Tip
Use display URLs in the Saved Links portal of the Commerce Assistant to conveniently store URLs. You can maintain URLs in the Saved Links portal and update them as needed without requiring affiliates to update the URLs on their websites. For more information about saved links, see Create a Display URL (PURL).
Description
Enter a description of the campaign to give affiliates more information about how to use it. The description displays below the banner image in the Get Links page. This is an optional field.
- To add another campaign to this product, repeat the steps above.
- To remove a campaign, click Delete.
- To change the order An agreement between a seller and a buyer to exchange goods and/or services for money. An order can: - contain multiple products and quantities; - have multiple financial transactions. A preorder authorization is considered an order. of how the campaigns appear in the Affiliate Center, click Move Up and Move Down.
- Click Save.

Add a Banner Template Campaign to a Product
- In the Commerce Assistant main menu, select Channel Management > Affiliate Center Setup.
- Select the Campaigns portal item.
- In the Product field, select a product from the drop-down list. This list is populated from the products selected in the Products section of Affiliate Center Setup.
- Click Add, then Add Banner Template Campaign. A new campaign is added to the product.
- On the right, enter the following settings for this campaign:
Name
Enter a name for the campaign. This displays in the Affiliate Center.
Language
Specify a language for the campaign. This allows affiliates to filter campaigns by language in the Affiliate Center.
Recommended
Select to display this campaign in the Get Links page's Recommended Campaigns tab. Use this to mark high-conversion rate campaigns or seasonal campaigns as recommended for affiliates. This is an optional field.
Example
Two campaigns with high conversion rates are marked as Recommended. They display in the Recommended Campaigns tab in addition to the Banner Campaigns tab.
Template HTML
Enter the HTML code for the campaign. Add the affiliate ID using the tag
<cb:AffiliateId />, which is case- and space-sensitive. This allows the system to assign the correct affiliate to the URL. If you would like to include a graphic that has already been uploaded in the Commerce Assistant, refer to this image using the Cleverbridge hostnamestatic.cb-content.com.Example
In the example HTML code below, the
<cb:AffiliateId />tag is included, as well as a cookie expiration time of 90 days and a reference to an image from the web files.<a href="https://www.cleverbridge.com/864/cookie?affiliate=<cb:AffiliateId />&expiry=90&redirectto=https%3A%2F%2Fwww.cleverbridge.com%2F889%2F%3Fscope%3Dcheckout%26cart%3D123095&redirecthash=9D962EB57D6F00A8809BE7A3242D5286"><img src="http://static.cb-content.com/mycontent/864/Leaderboard.png" width="728" height="90"/></a>Thumbnail
Select an image that displays with the code in the Affiliate Center. This allows affiliates to see what the banner looks like.
Width
Width of the campaign banner.
Height
Height of the campaign banner.
Description
Enter a description of the campaign to give affiliates more information about how to use it. The description displays below the banner image in the Get Links page. This is an optional field.
- To add another campaign to this product, repeat the steps above.
- To remove a campaign, click Delete.
- To change the order of how the campaigns appear in the Affiliate Center, click Move Up and Move Down.
- Click Save.
Add a Text Template Campaign to a Product
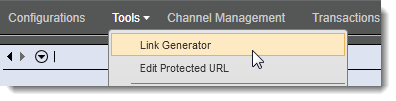
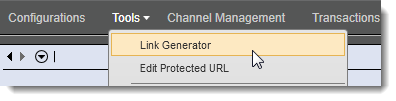
- In the Commerce Assistant main menu, select Tools > Link Generator.
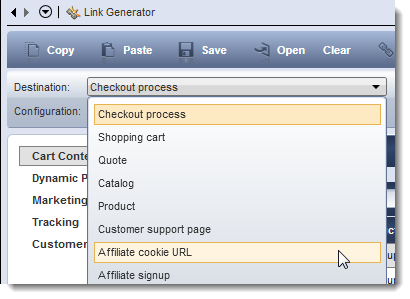
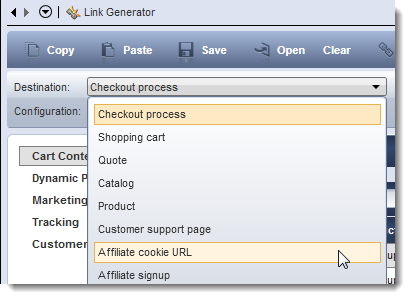
- In the Destination drop-down list, select Affiliate cookie URL.
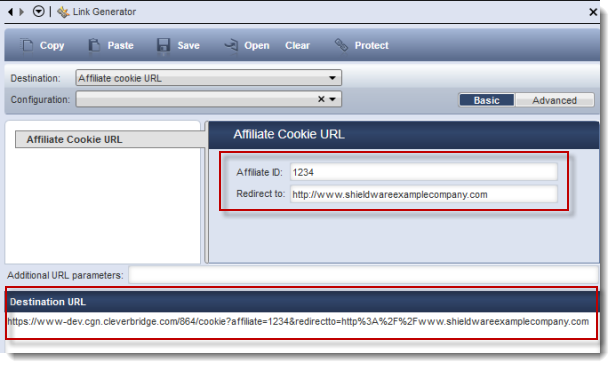
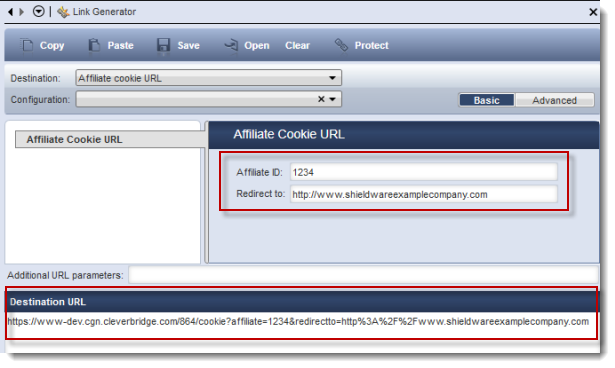
- In the Affiliate ID field, enter 1234 instead of a real affiliate ID. This will be edited later.
- In the Redirect to field, enter the URL that you want the link to direct customers to. Use the format
http://www.xyz.com.Example
Common destination URLs are:
- Checkout page
- Your website
- Landing page
- Trial download
The URL displays in the Destination URL field at the bottom of the Link Generator, showing the parameters you entered.
- Click Copy to copy the link, or click Save to save it in the Saved Links feature for future use.
Tip
Use display URLs in the Saved Links portal of the Commerce Assistant to conveniently store URLs. You can maintain URLs in the Saved Links portal and update them as needed without requiring affiliates to update the URLs on their websites. For more information about saved links, see Create a Display URL (PURL).
- In the main menu, select Channel Management > Affiliate Center Setup.
- Select the Campaigns portal item.
- In the Product field, select a product from the drop-down list. This list is populated from the products selected in the Products section of Affiliate Center Setup.
- Click Add, then Add Text Template Campaign. A new campaign is added to the product.
- On the right, enter the following settings for this campaign:
Name
Enter a name for the campaign. This displays in the Affiliate Center.
Language
Specify a language for the campaign. This allows affiliates to filter campaigns by language in the Affiliate Center.
Recommended
Select to display this campaign in the Get Links page's Recommended Campaigns tab. Use this to mark high-conversion rate campaigns or seasonal campaigns as recommended for affiliates. This is an optional field.
Example
A campaign with a high conversion rate is marked as Recommended. It displays in the Recommended Campaigns tab in addition to the Text Campaigns tab.

Template HTML
Enter the HTML code for the campaign, with the following steps:
- Enter
<a></a>. - After the
<a, enter a space andhref=". - Paste the URL from the Link Generator, and include a quotation mark at the end. It should look like this:
<a href=”URL”></a> - Add a text portion of the URL after
”>and before the closing</a>HTML tag, for example:>Buy Shieldware Internet Security today</a>. - Replace the 1234 in the affiliate cookie URL with the tag
<cb:AffiliateId />, which is case and space sensitive. This allows the system to assign the correct affiliate to the URL.
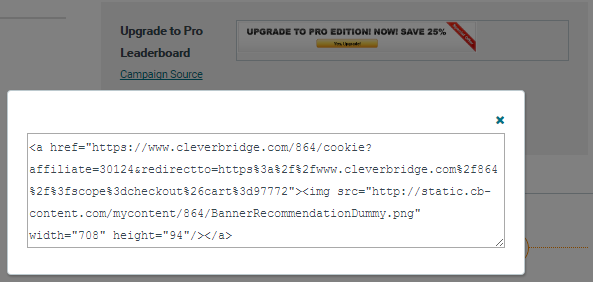
Example
The following is an example of a complete HTML template.
<a href="https://www.cleverbridge.com/864/cookie?affiliate=<cb:AffiliateId />&redirectto=https%3A%2F%2Fwww.cleverbridge.com%2F864%2F%3Fscope%3Dcheckout%26cart%3D97772">Buy Shieldware Internet Security today</a>Description
Enter a description of the campaign to give affiliates more information about how to use it. The description displays below the campaign in the Get Links page. This is an optional field.
- Enter
- To add another campaign to this product, repeat the steps above.
- To remove a campaign, click Delete.
- To change the order of how the campaigns appear in the Affiliate Center, click Move Up and Move Down.
- Click Save.