Advertise Incentive Banners
Incentive banners are used to encourage your customers to purchase![]() An order made by a customer and the records associated with it. your products. You can use incentive banners to:
An order made by a customer and the records associated with it. your products. You can use incentive banners to:
- Create urgency within the customer
 An individual or business purchasing your product or service by placing an order through Cleverbridge. The customer is the end user of this product, as they are not allowed to resell the purchased products or services.
A customer is unique per client. If a customer purchases products or services from two different clients, there are 2 separate records of said customer. by highlighting limited offers.
An individual or business purchasing your product or service by placing an order through Cleverbridge. The customer is the end user of this product, as they are not allowed to resell the purchased products or services.
A customer is unique per client. If a customer purchases products or services from two different clients, there are 2 separate records of said customer. by highlighting limited offers. - Elevate trust in a product and build brand awareness by using social proof.
- Call the customer to action by alerting of upcoming changes.
Easily implementable on the Cleverbridge platform, you can activate incentive banners in the cart by using a parameter.
Example
You are a software-selling company and you want to use incentive banners to let the customers know about an ongoing sale that is coming to an end, so they close the purchase promptly.
Incentive Banner Setup
You can set up an incentive banner in the Cleverbridge platform in a few steps:
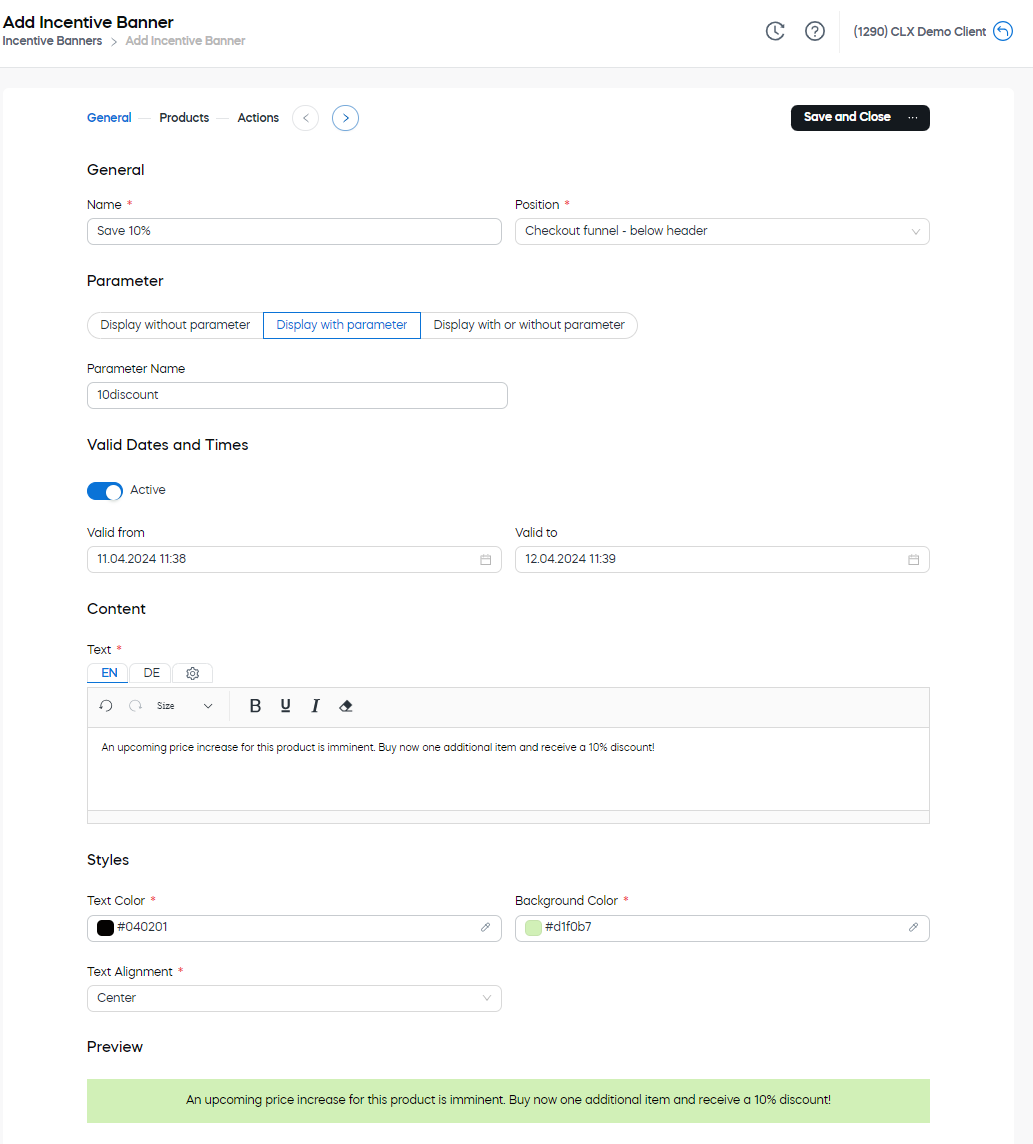
1. Enter General Information
Open Optimize > Incentive Banners in our web admin tool and do the following:
- Click Add Banner and give a name to your banner configuration.
- Select a position for the banner to be displayed in the cart.
- Under Parameter, select a parameter option and enter a parameter name for your banner configuration, if need be.
- Under Valid from and Valid to, pick a time period when you want the banner to be displayed in the cart.
- Enter text for the banner to be displayed in the cart.
- Select text and background color for the banner.
- Align text banner in the cart. A preview will be shown for better visualization.
Note
If you don't enter valid dates and times, the banner is always available to be displayed in the cart when active.
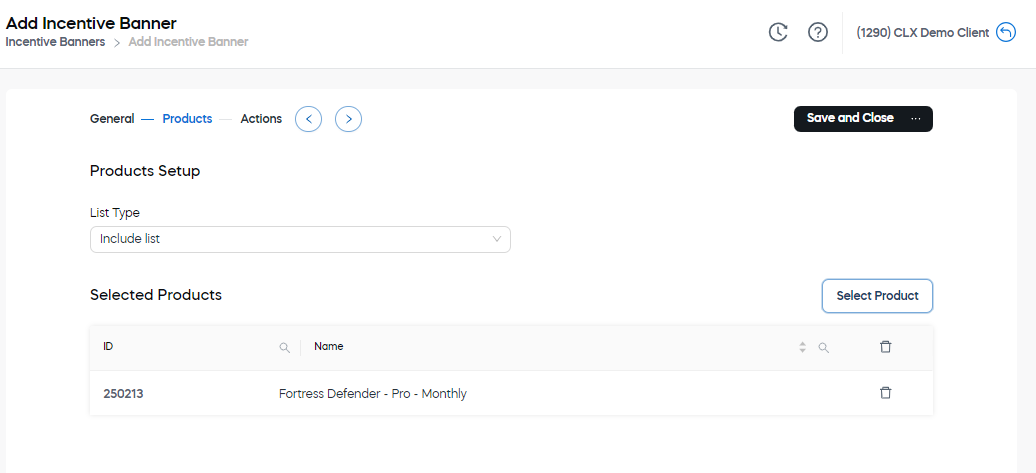
2. Select Products
- Under List type, select one of the following options:
- Include List to include specific products to trigger the banner.
- Exclude List to exclude specific products from triggering the banner.
- Click Select Product and pick one or several products.
Important
If you would like to include all products, just ignore the product list altogether and leave it empty.
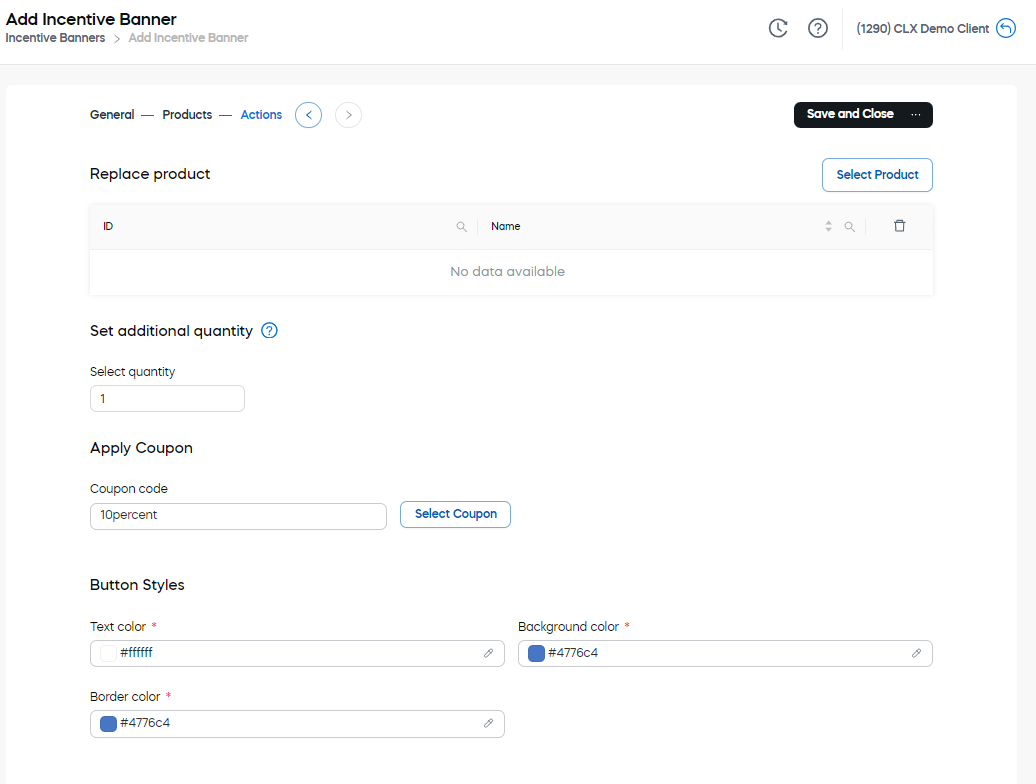
3. Select Actions
Important
Assigning an actionable offer to an incentive banner is part of our CleverEssentials product offering. To get started with actions and offers on incentive banners, reach out to Client Experience.
- Specify actions for your incentive banner. These actions are optional.
- In the Replace Product section, you can:
- specify which product will be added to a subscription when a customer accepts the incentive banner offer.
- enable the Add all products toggle button to add all recommended products to the shopping cart. This feature is helpful if you want to encourage customers to purchase additional items on the checkout page. The additional products need to be configured separately in our web admin tool, under the Optimize > Cross / Up & Subsells section.
- In the Set Quantity section, you can:
- increase the quantity of your product by enabling the Set additional quantity toggle button and entering the desired amount. This specified number will be added to the customer's current quantity.
- adjust the customer's quantity offer to a predetermined amount by enabling the Set total quantity toggle button and entering the desired quantity. This is useful when you want to sell a specific volume at a certain price, regardless of the customer's current quantity.
- In the Apply Coupon section, you can:
- create a new coupon code that will appear in the cart by filling in the Coupon code field.
- select the coupon code from the list of already set promotions by clicking Select Coupon.
- When any of the actions is specified, you can manage the button characteristics under Button Styles.
- Click Save and Close. Your banner configuration is now complete.
4.Visualisation
To try out your newly created incentive banner, add the &banner=<banner-param-name> parameter to your URL.
Example
Example URL
https://www.cleverbridge.com/<clientID>/?scope=checkout&cart=<productId>&banner=<banner-param-name>
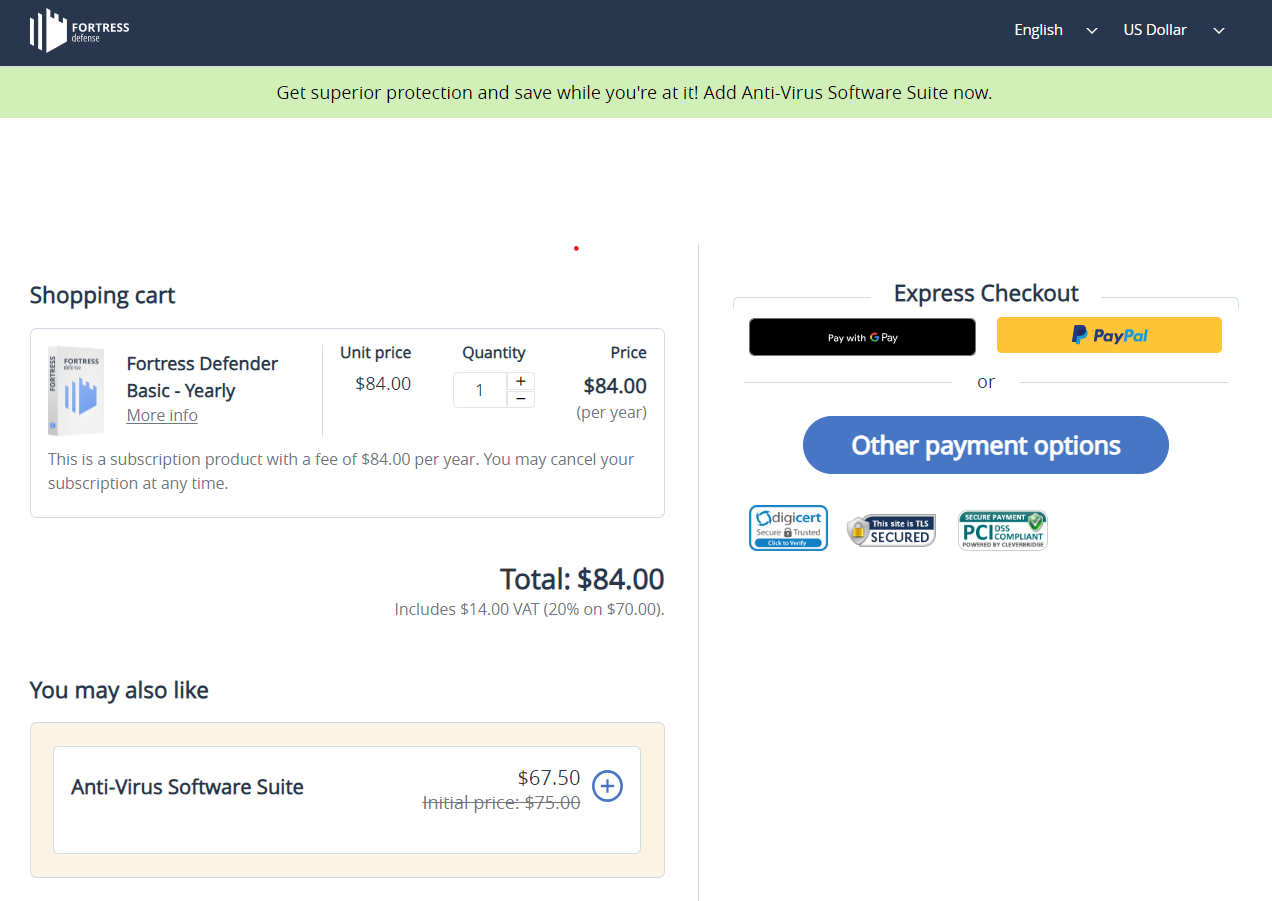
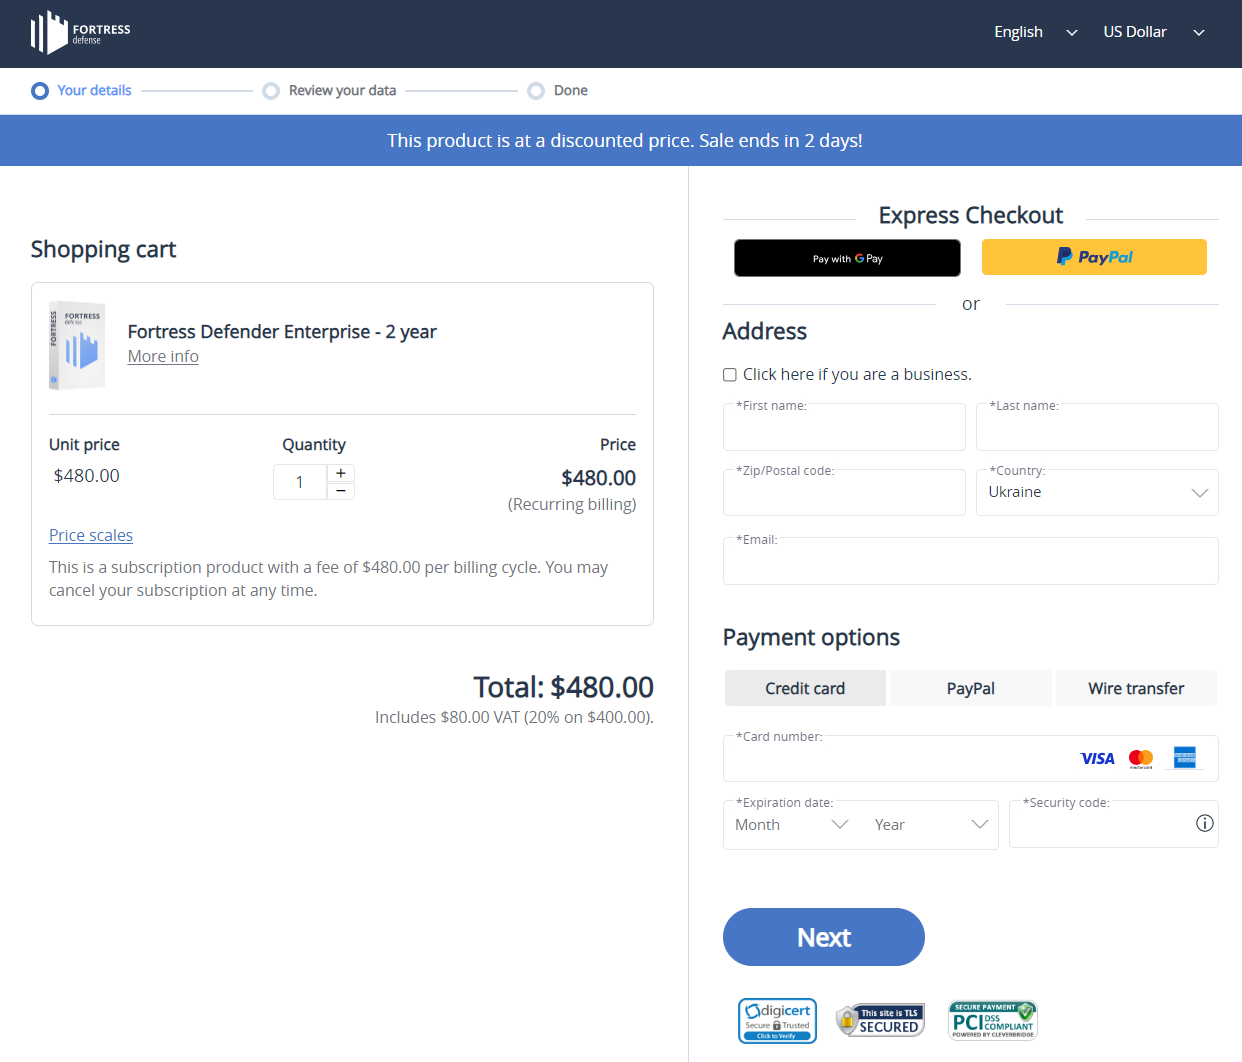
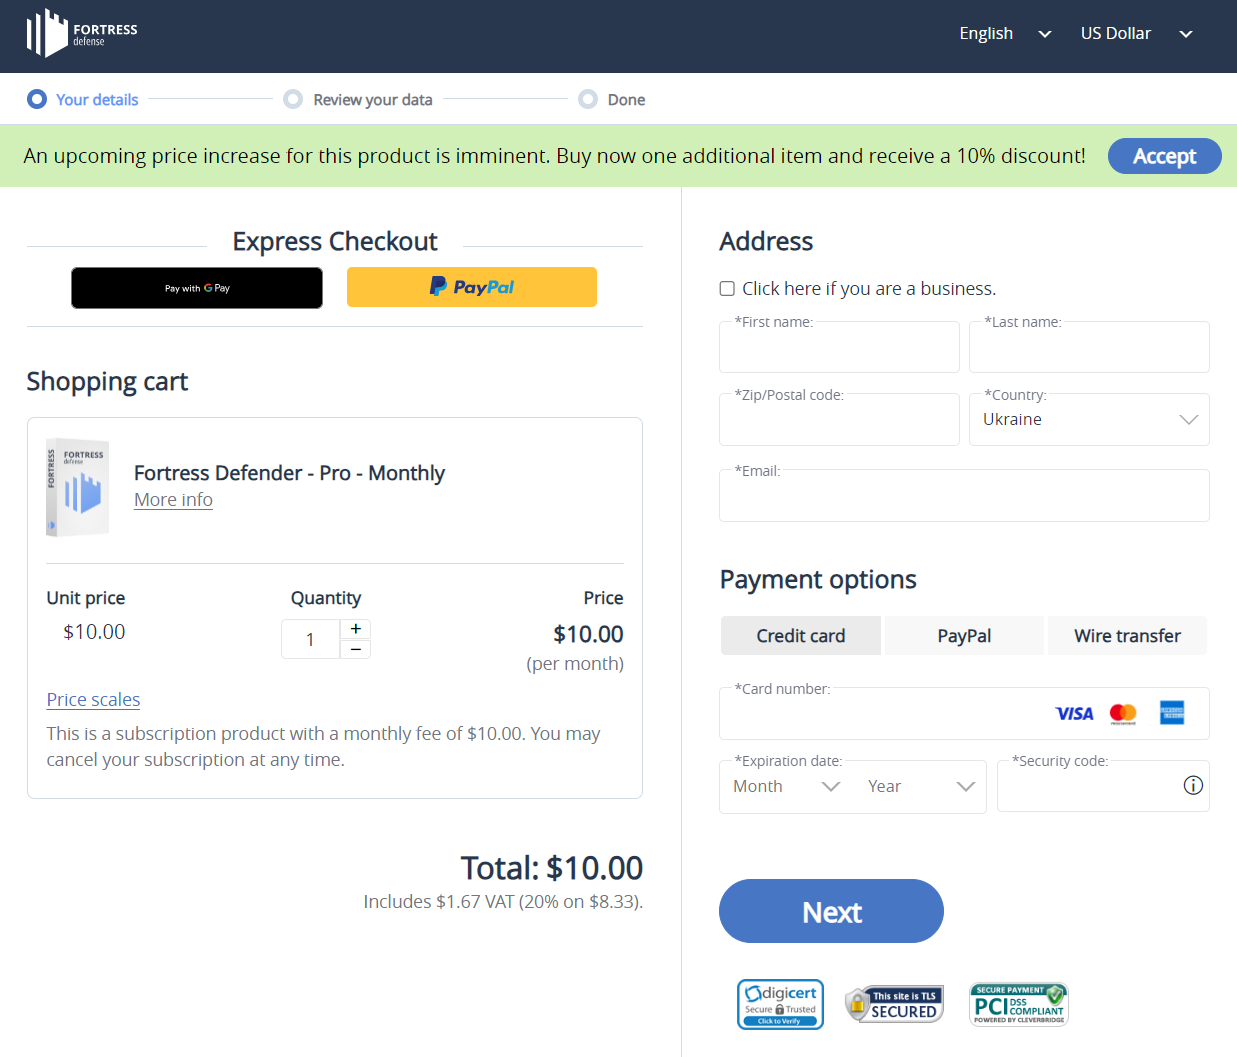
Advertised incentive banner in cart
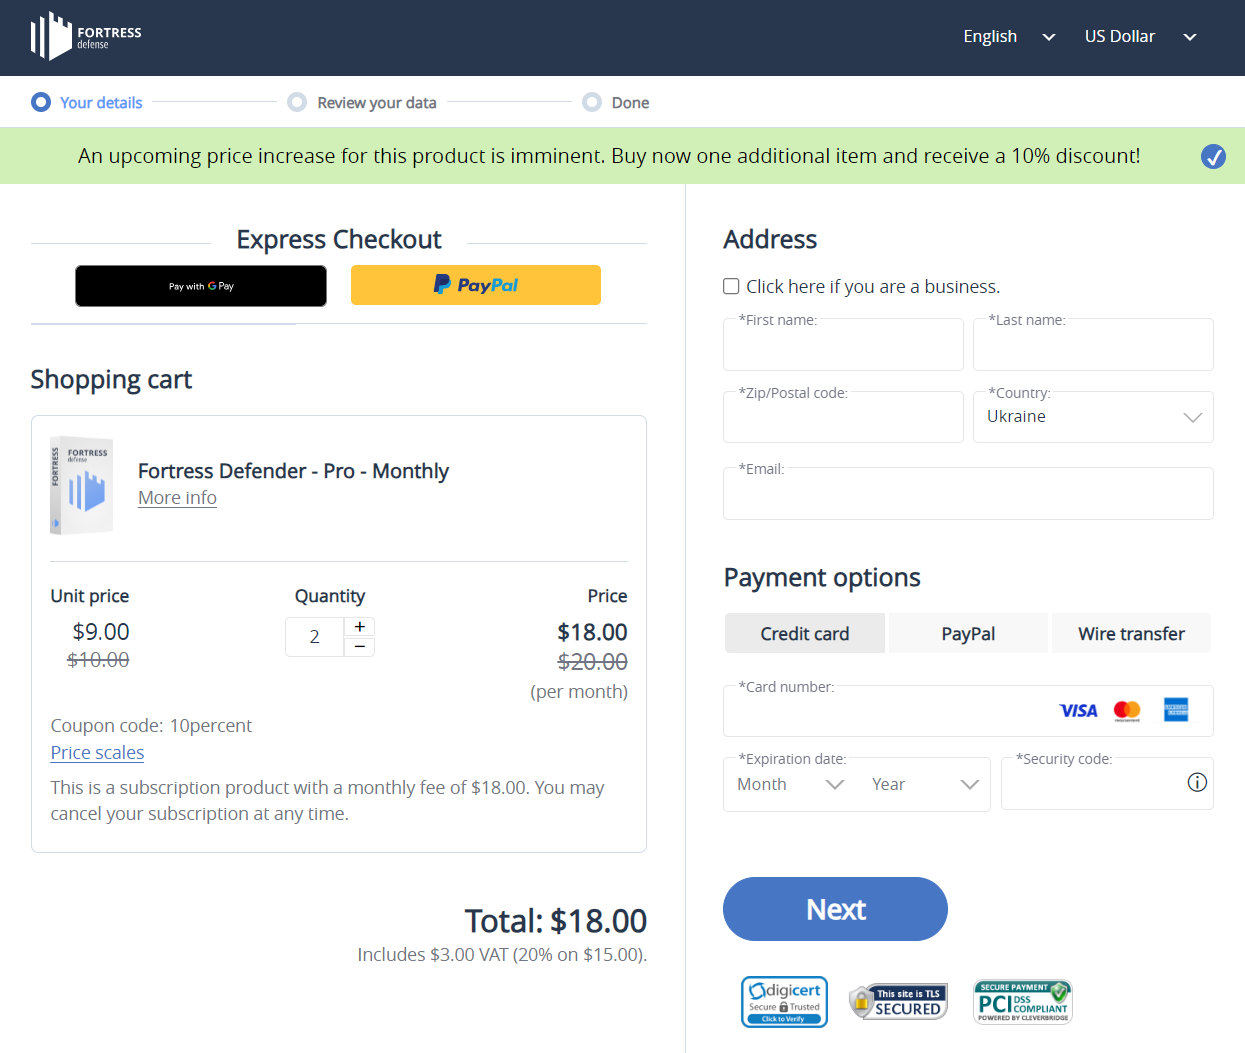
Incentivised customer accepts offer in cart
Use Case: Display Recommendation with IB
To leverage IBs best, you could customize your incentive banner to inform customers about saving opportunities for additional products and display a recommendation to further convince customers to buy more products without breaking the bank.
To achieve this use case, complete the following steps:
1. Set up an Incentive Banner
Follow the steps shown in the previous section to set up your banner. For this use case:
- We've selected Display with parameter under Parameter.
- We introduced the banner parameter name: summersale.
2. Set up a Cross-Sell
To set up a cross-sell, open Optimize > Cross / Up & Subcells in our web admin tool and do the following:
- Click Add Cross-Sell and give a name to your cross-sell configuration.
- Select a position for the recommendation to be displayed in the cart. For this use case, we’ve selected Area below cart.
- Select a template to control how the recommendation is displayed in the cart.
- Under Valid from and Valid to options, pick a time period when the recommendation is available to be displayed in the cart. If you don't enter valid dates and times, the recommendation is always available to be displayed in the cart when active.
- Under Parameter, enter a parameter name for your cross-sell configuration. For this use case, we’ve selected Display with parameter and introduced the recommendation parameter name: fortress_xsell.
- Select an Opt type to give the customer an option to purchase the recommendation or not. For this use case, we’ve selected Opt-in, so the recommendation is not automatically added to the purchase.
- In the Discount & Price tab, choose a discount pricing method. For this use case, we’ve selected Percentage Discount and entered the desired discount for the recommended products.
- In the Products tab, select the original product and recommended products that should be used for the recommendation in the cart. For more details, see Optimize > Add a Cross-Sell.
- Click Save and Close. Your recommendation configuration is now complete.
Note
With the Opt-in type, customers must add the product to the purchase manually.
You can now generate a URL and offer recommendations displayed by an incentive banner to your customers. For more information on how to generate URLs for the checkout process, see Create Links Using Link Generator.
Important
The banner and the recommendation are activated in the cart when passing the previously set &banner=summersale and &recommendation=fortress_xsell parameters in the URL.
Example URL
https://www.cleverbridge.com/<clientID>/?scope=checkout&cart=<productId>&banner=<banner-param-name>&recommendation=<recommendation-param-name>
where:
<clientID>is your account ID.<productId>is the ID of the product you want to include in the cart.<banner-param-name>is a value of the banner parameter that you define in the web admin tool to track your banners; in the above example that issummersale.<recommendation-param-name>is a value of the recommendation parameter that you define in the web admin tool to track your recommendations; in the above example that isfortress_xsell.
Example Cart