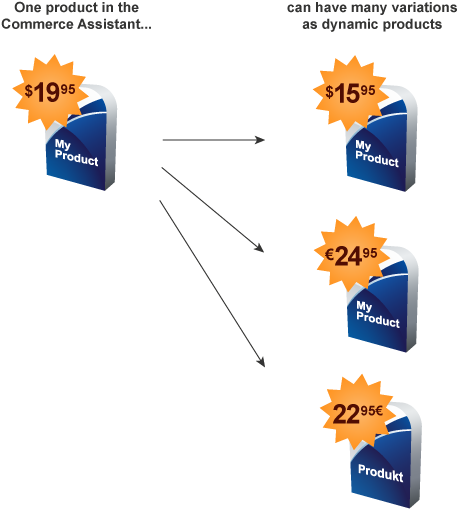
A dynamic product is a variation of an original product that you can use in the checkout process. When offering dynamic products, you can change a product's name, price, currency and so on, without permanently altering your original product setup, creating an additional product, or creating a promotion in the Commerce Assistant.
Note
It is best to use dynamic products for special, one-time use, such as one special pricing deal with a specific customer![]() An individual or business purchasing your product or service by placing an order through Cleverbridge. The customer is the end user of this product, as they are not allowed to resell the purchased products or services.
A customer is unique per client. If a customer purchases products or services from two different clients, there are 2 separate records of said customer.. Dynamic products can also be useful when you have several products in your catalog or when your products change frequently. In such circumstances, you can maintain a core group of products in the Commerce Assistant and create variations of those products to suit your business needs.
An individual or business purchasing your product or service by placing an order through Cleverbridge. The customer is the end user of this product, as they are not allowed to resell the purchased products or services.
A customer is unique per client. If a customer purchases products or services from two different clients, there are 2 separate records of said customer.. Dynamic products can also be useful when you have several products in your catalog or when your products change frequently. In such circumstances, you can maintain a core group of products in the Commerce Assistant and create variations of those products to suit your business needs.
To configure a dynamic product, complete the following:
Step 1: Configure your account to allow for dynamic products
- In the main menu of Commerce Assistant, select Setup > Account Setup.
- Click the General > Additional Details tab.
- Select the Allow dynamic products checkbox.
- Enter a Seed for dynamic products.
- Click Save.
For more information on these fields, see Account Setup ✱.
Step 2: Configure your original product to allow dynamic product pricing (optional)
Important
Perform the following steps if you want to override the standard product price or add a dynamic discount.
If you only want to customize other information, such as the product name or additional name information, proceed to Step 3: Create the dynamic product.
To enable dynamic product pricing for a specific product, you have two options:
- Allow dynamic product pricing in our web admin tool:
- From the left-side menu, select Products > Products.
- In the products table, find the product for which you want to enable dynamic pricing, and from the ellipsis on the right, select Edit.
- Go to the Pricing tab and enable the Allow custom product price toggle.
- Click Save in the top-right corner.
- Allow dynamic product pricing in Commerce Assistant:
- In the main menu of Commerce Assistant, select Products & Delivery > Products.
- Select a product from the list. The product setup page opens.
- Select the Suggested Retail Price > Price Options tab.
- Select the Allow dynamic product price checkbox.
- Click Save.
Step 3: Create the dynamic product
To create a dynamic product, you have two options:
- Use the dynamic product parameter in the checkout process. For more information, see List of Checkout Process Parameters > Dynamic Products.
- Open Commerce Assistant and select Tools > Link Generator. Override the standard product information in the Dynamic Products section of Link Generator. For more information, see the Create a Link for the Checkout Process section in Create Links Using Link Generator > Create Links Using Link Generator.
