Manage user privileges
Introduction
Privileges are the foundation of secure and tailored user access in the Cleverbridge platform. They allow you to precisely control which areas of the system each user can access and what they are allowed to do—such as viewing reports, managing products, or using APIs. With privileges, you can confidently delegate responsibilities while keeping sensitive areas protected.
By using privileges effectively, you can ensure users have the exact level of access they need—no more, no less.
Terms and definitions
Privilege: In this document refers to a defined set of access rights for a user. It determines which areas of the Cleverbridge platform a user can see and what actions they can perform (for example, view, edit, delete). It can also be referred to as set of privileges. The terms Privilege and set of privileges are used interchangeably throughout this document as needed for clarity and simplicity.
This document covers two types of privileges available in the system:
- Client User Privileges: Fully configurable privileges created per client account. These allow you to define custom access structures based on your specific operational needs.
- Predefined Privileges: A set of ready-to-use access profiles provided by Cleverbridge. These cover common roles and use cases—such as Marketing Manager or Customer Support—and help you quickly onboard users with standard responsibilities. You will only see those in the Privileges drop-down, for example, when creating a new user.
Access User Privileges
You can only view and manage privileges for a specific client account. This ensures that access rights are securely separated and configured according to each client's operational scope.
To access privileges:
- In the left-hand navigation menu, go to Settings > Privileges.
The system will load the privileges defined for the selected client. From here, you can review existing privileges or add new ones tailored to that client's needs.
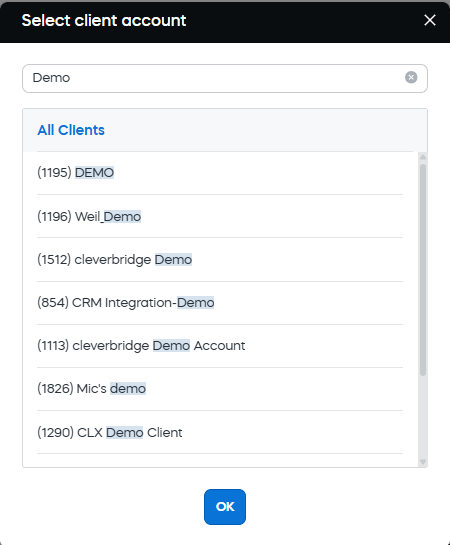
If you are using a multi-client set-up, you also need to select a specific client:
- Click the client name icon in the top right corner of the page.
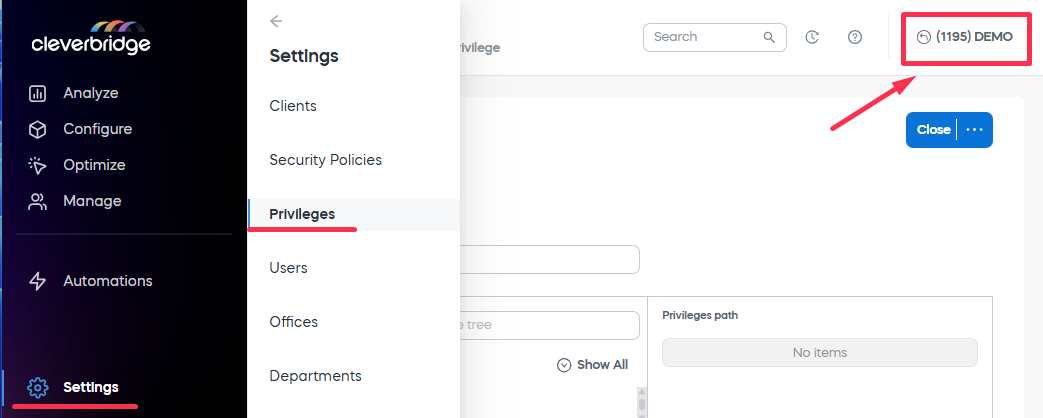 .
. - In the Select client account dialog, search for and select the client you want to manage.
- Click OK to proceed.
Add a new client user privilege
To define a new client user privilege:
- In the main menu, go to Settings > Privileges and select the corresponding client.
- Click the Add Client User Privilege button in the top-right corner.
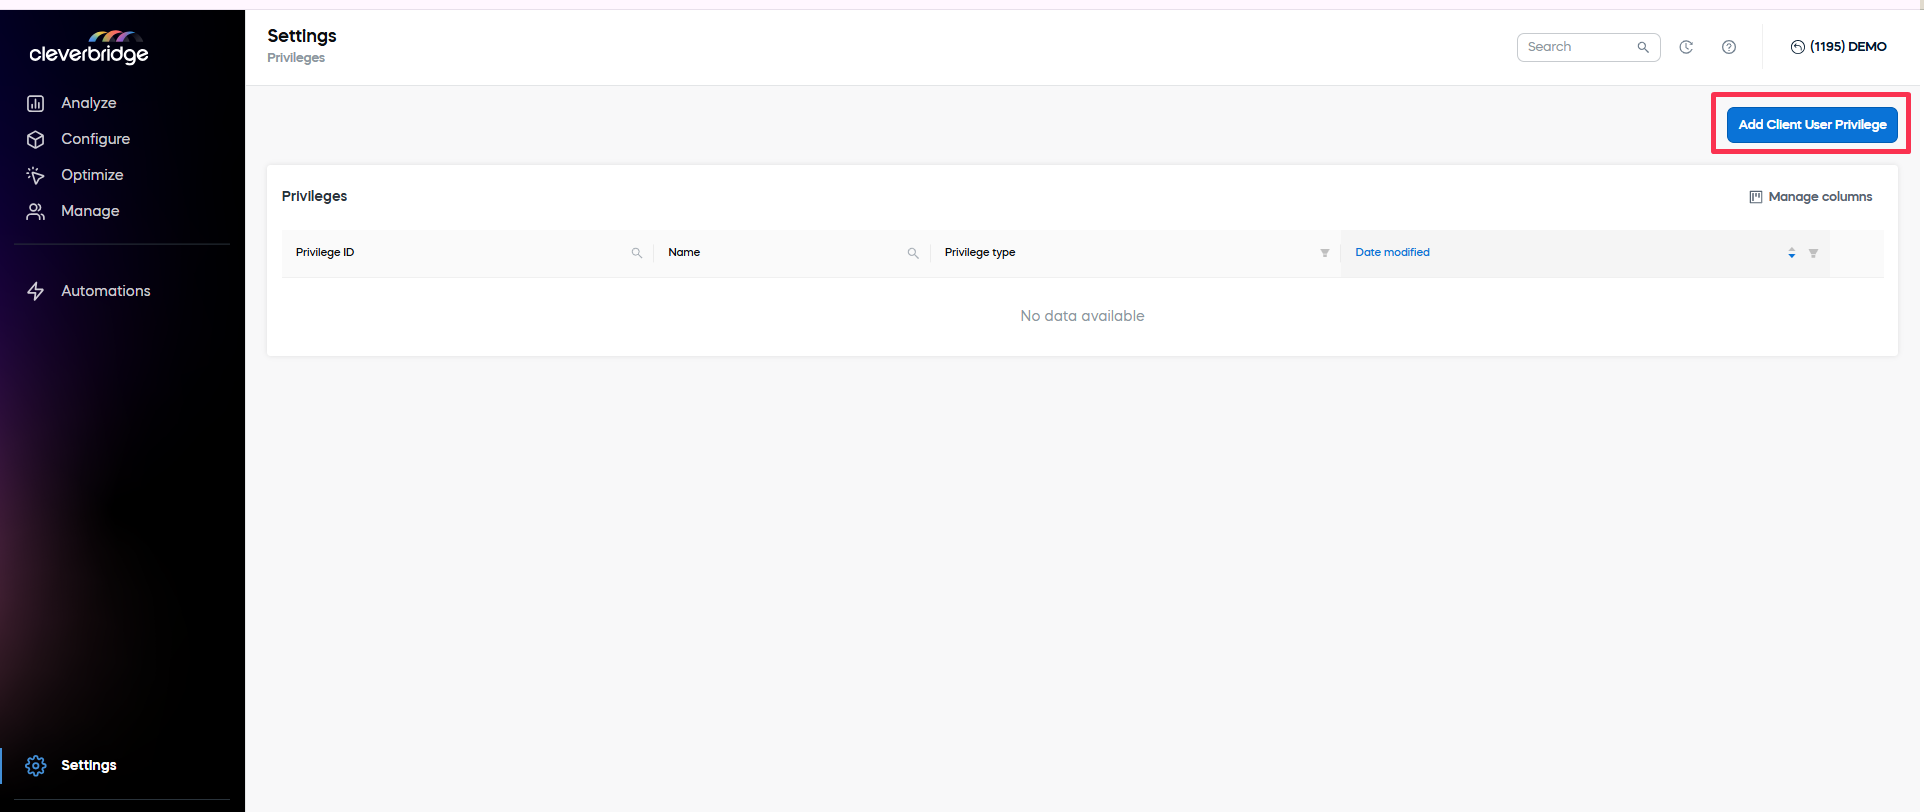
- Define the settings in the Add Privilege page as described in the subsections below.
Define the privilege settings
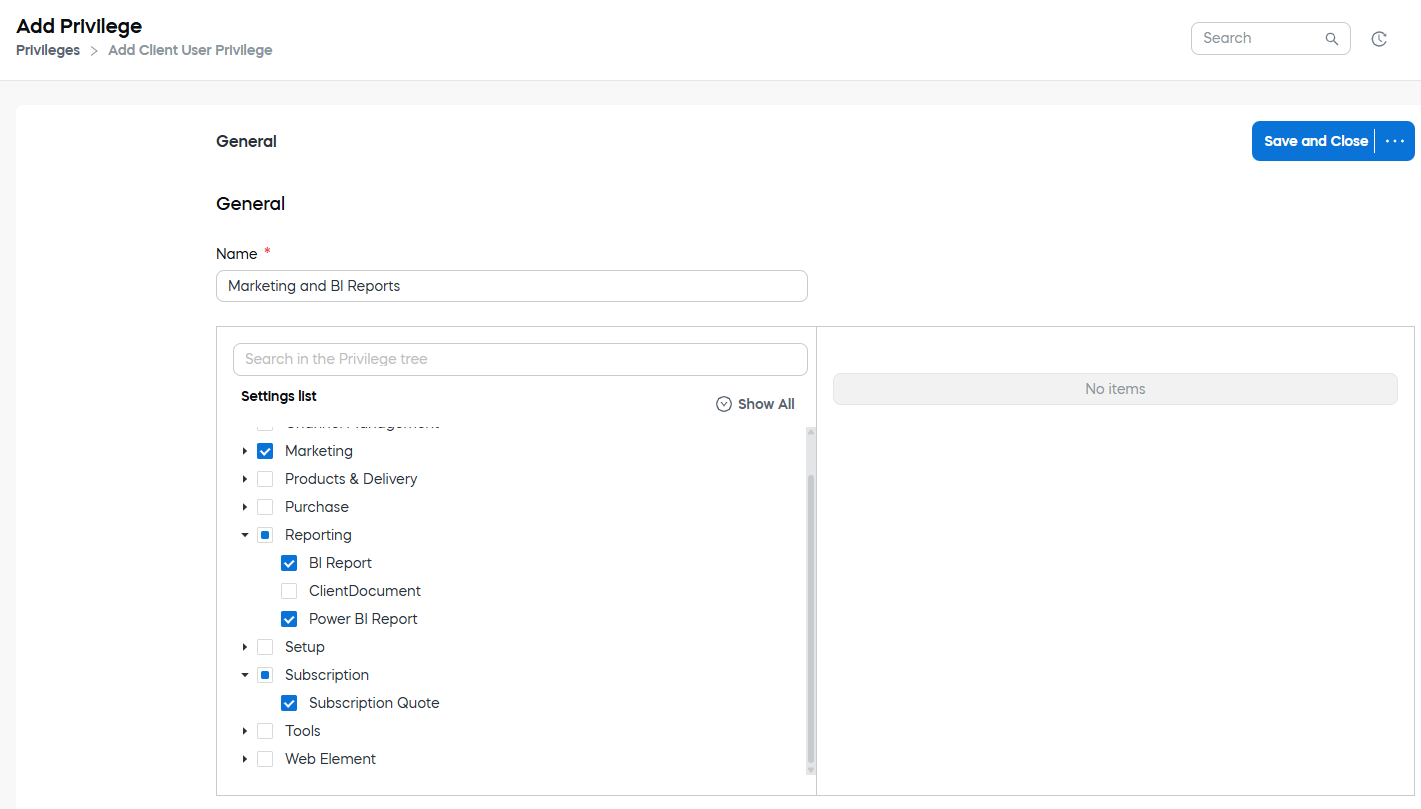
Initially, the Add Privilege page is empty. 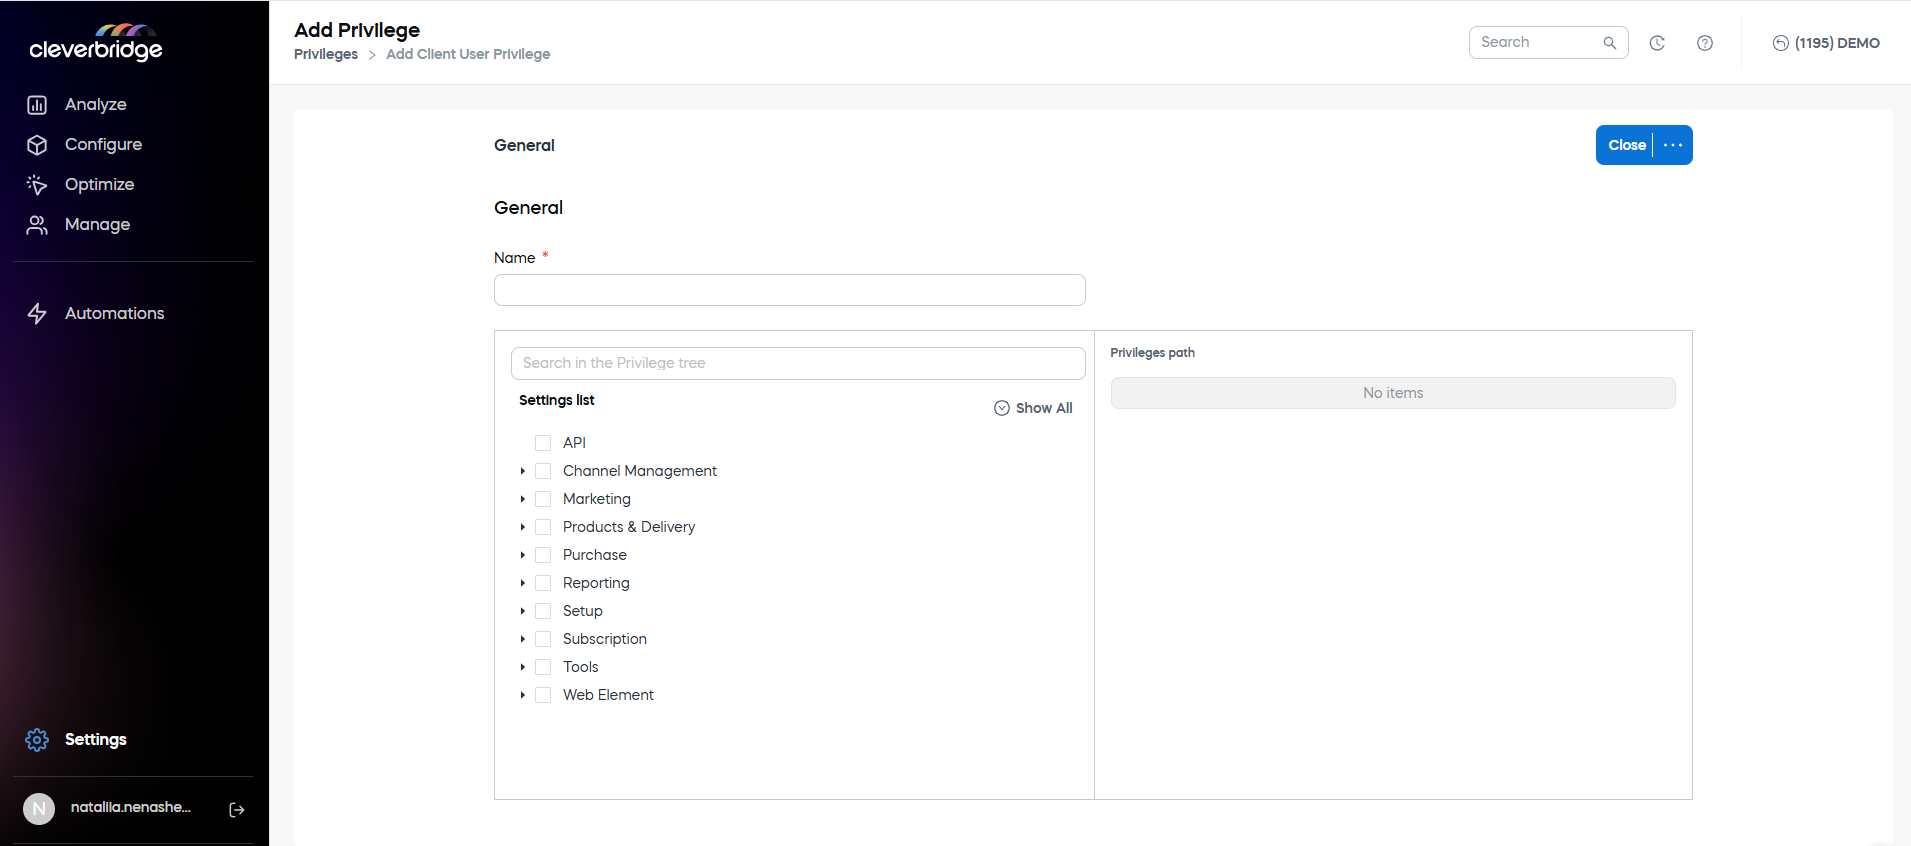 .
.
Define the name
Enter a unique and descriptive name for the privilege set (the Client User Privilege) created. This name will be used to identify and assign the privilege set when creating or editing user accounts—make sure it clearly reflects the scope or purpose of access.
Select the privileges
Use the Settings list on the left to select what the users assigned this Privilege will be able to access:
- Expand any top-level group to view its sub-sections.
- Check the boxes next to the sections or individual items you want to include in the privilege.
- Use the Search in the Privilege tree bar to quickly locate specific settings.
 .
.
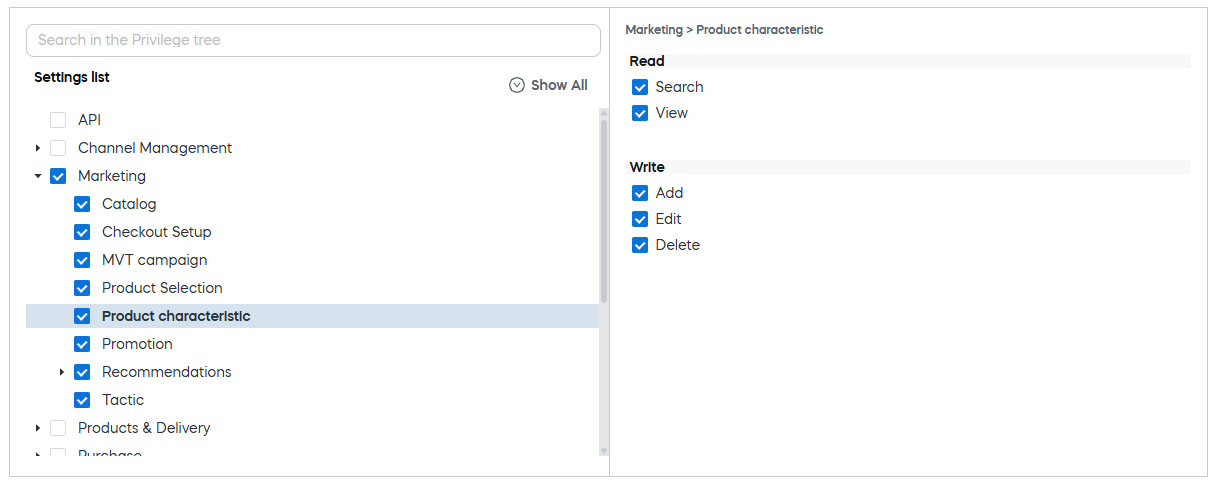
Manage permitted actions
Once you select a feature from the Settings list, the available actions for that feature can be defined in the panel on the right. These actions define what the user can do within that specific part of the platform.
When you select the checkbox for a top-level section (for example, Marketing), it automatically selects all of its sub-items. However, you can still edit each sub-item individually. Expand the section and fine-tune the permissions for each feature separately.
 .
.
The list of available actions depends on the functionality you select. Some areas include just basic read/write actions, while others may have additional operation-specific rights like Accept.
Most common permission are:
-
Read: Grants access to view data without making changes. This is typically used when you want users to have visibility but not editing rights.
- Search: Allows the user to run searches within this area.
- View: Grants read-only access to individual records or content.
-
Write: Provides permissions to make changes in the system.
- Add: Enables creation of new items (for example, new products, campaigns).
- Edit: Allows modification of existing items.
- Delete: Permits removal of items.
-
Acceptance: Only shown for specific features, for example, Subscription Quote, controls confirmation or approval rights.
- Accept: Grants the right to confirm or approve items, such as quotes or proposals.
Finalize the privilege set creation
Once you have entered a name, selected relevant features, and configured the permitted actions, you can complete the privilege creation using the options in the top-right corner:
 .
.
- Save and Close: Saves your changes and returns you to the main Privileges list.
- Save and Stay: Saves the current configuration and keeps the privilege editor open, allowing you to continue working.
Once saved, the new privilege will be available for assignment to users in the Settings > Users.
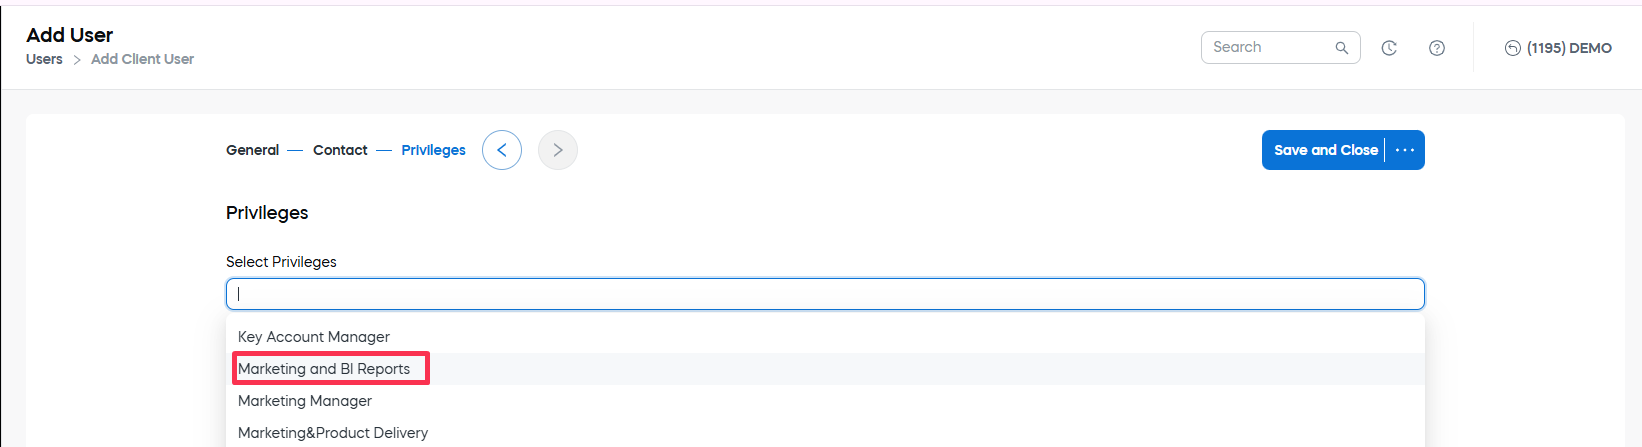
To learn more about creating and editing users, see Manage users.
You can also select the Discard and Close option to exit the privilege editor without saving the changes made in the current session.
View and manage privileges
The Privileges grid displays all client-level privileges configured for the selected account. It allows you to view, filter, search, and take actions on existing privilege entries.
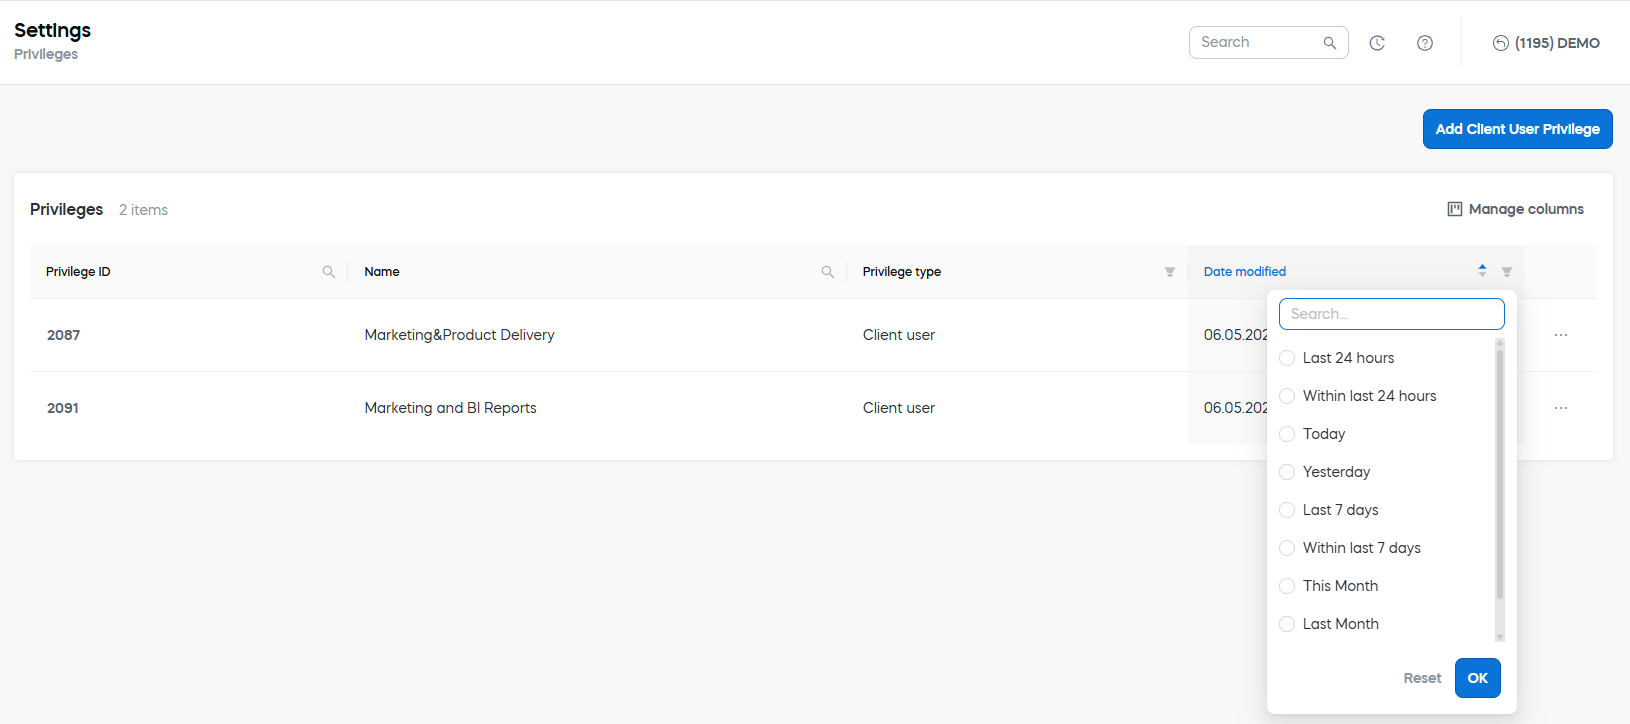
Search and filter privileges
Use the search fields under the Privilege ID or Name columns to find privileges by exact or partial values. 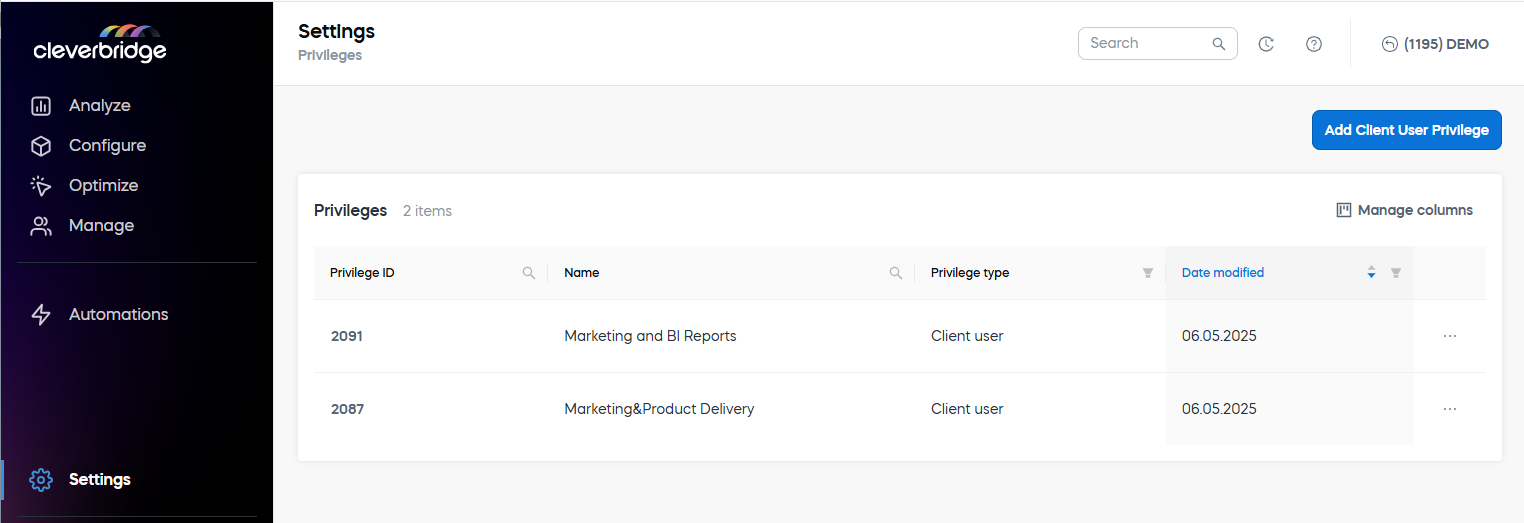
You can also use filters to narrow down results. For example, use the Date modified column to filter by relative time periods.
 .
.
Actions on privileges
Click the three-dot menu at the end of a privilege row to open the available actions:
- View details: Opens a read-only view of the selected privilege.
- Create copy: Opens the Add Client User Privilege screen with all details prefilled from the selected privilege. You can then adjust and save it under a new name.
- Edit: Opens the privilege in editing mode, allowing changes to the name, feature access, or actions.
- Delete: Removes the privilege. This action is irreversible.
Manage columns
Click Manage columns in the top-right corner of the grid to show or hide columns based on your needs. This allows you to customize the table view to focus on the most relevant data.
- Privilege ID: A system-generated identifier that uniquely distinguishes each privilege.
- Name: The display name of the privilege, as defined during creation. This name will appear when assigning privileges to users.
- Privilege type: Indicates the category of the privilege. The only option is Client user, i.e. privileges created for you users of the specific client.
- Date modified: The last date the privilege was created or updated.
When assigning privileges to a user, you will see more option, as it will include predefined privileges available in the system by default and described further.
Predefined privileges
The platform includes a set of predefined privileges that cover the most common roles and responsibilities within a typical organization. These privileges provide a quick way to assign consistent access rights to users without the need to manually configure each permission.
Predefined privileges cannot be modified, but they can be assigned to users as needed. If additional customization is required, you can create and manage your own client-specific privileges.
Some predefined privileges are designed for specific technical or administrative use cases and should be assigned with caution. For example, it is strongly recommended to create a dedicated user account that is only used for the API User privilege. This account should not be granted any additional privileges beyond API access to ensure security and prevent unintended system interactions.
The following table describes available predefined privileges.
| Privilege | Description |
|---|---|
| Administrator | Provides full access to all features, including user management. |
| Affiliate Program Manager | Provides full access to affiliate management features, Link Generator, and Logbook. |
| API User | Provides full access to the API. The API access right is not assigned to any other privilege, including the administrator. Use this for API-only service accounts. |
| ClientDocumentApiUser | Provides API access for managing client documents. Typically used for backend integrations that require secure document exchange. |
| Customer Support | Provides full access to purchase-related features and Link Generator, and read-only access to product information and marketing campaigns. |
| Ecommerce Manager | Provides full access to all features, except for user management. |
| Financial / Accounting | Provides full access to reporting. |
| Key Account Manager | Provides full access to partner management features, Link Generator, and Logbook. |
| Marketing Manager | Provides full access to marketing features, reporting, and Link Generator, and read-only access to product information and purchase overviews. |
| Pdf Templating | Grants access to manage PDF template configurations used for customer communications and order confirmations. |
| Product Manager | Provides full access to product and delivery features. |
| Quality Assurance Manager | Provides read-only access to all features except reporting. |
| Reporting – Execute Power BI | Provides access to execute embedded Power BI reports. No edit rights are granted. |
| Top-Level Management | Provides full access to reporting and Link Generator, and read-only access to all other features. |
| Web Designer | Provides full access to:
|