Create and manage quotes for initial orders
Corporations, government agencies, and educational institutions often require a formal price quote before making a purchase decision. These quotes are typically used for internal approval processes, budgeting, or procurement procedures.
To support this, our platform provides two entry points for generating quotes:
- Using the Quote Links feature in SCM, account managers can generate quotes based on external communication or sales es initiatives.
- If enabled, customers can request a quote during checkout, triggering a quote request flow.
The functionality let you define key details such as product pricing, applicable terms, and validity period. Once generated, the quote can be shared with the customer via a link, email, or as a downloadable document in the Subscription Portal. The customer is then provided all relevant information in a clear and friendly format—making it easy to review, approve, and complete the purchase.
Enable customer quote requests for initial orders
To allow customers to request a quote for new purchases, contact Cleverbridge to have the quote request flow enabled on your checkout. This setting is configured by the Cleverbridge team and can be activated per client.
If activated, Request a quote button will be added to your checkout page. 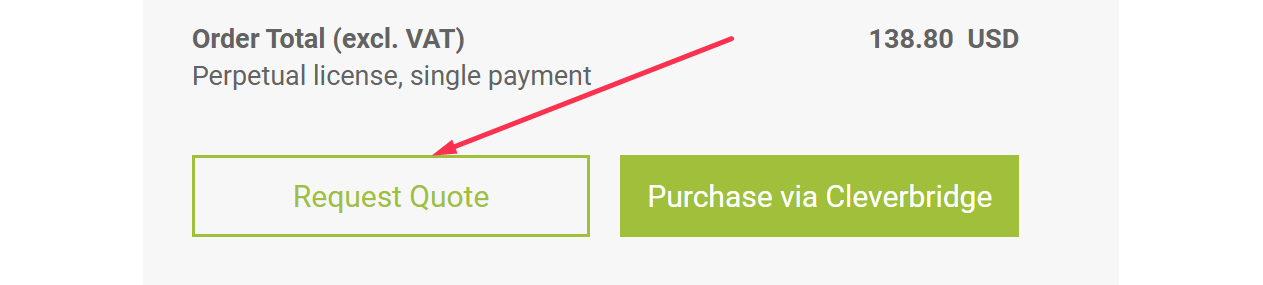
Create a new quote for an initial order
- Start creating the quote for a specific customer.
- Specify which products and prices should appear in the quote for the customer.
- Adjust the quote link settings.
- Save and use the quote.
1. Start creating the quote for a specific customer.
When creating a new quote, you need to identify the customer. This way, the quote is personalized and includes the correct contact details for billing, delivery, and licensing. You can either select an existing customer from your database or enter new contact information manually. Both flows are described below.
Create a quote from Quote Links page
-
Go to Manage > Quote Links.
-
Click Create Quote Link.

-
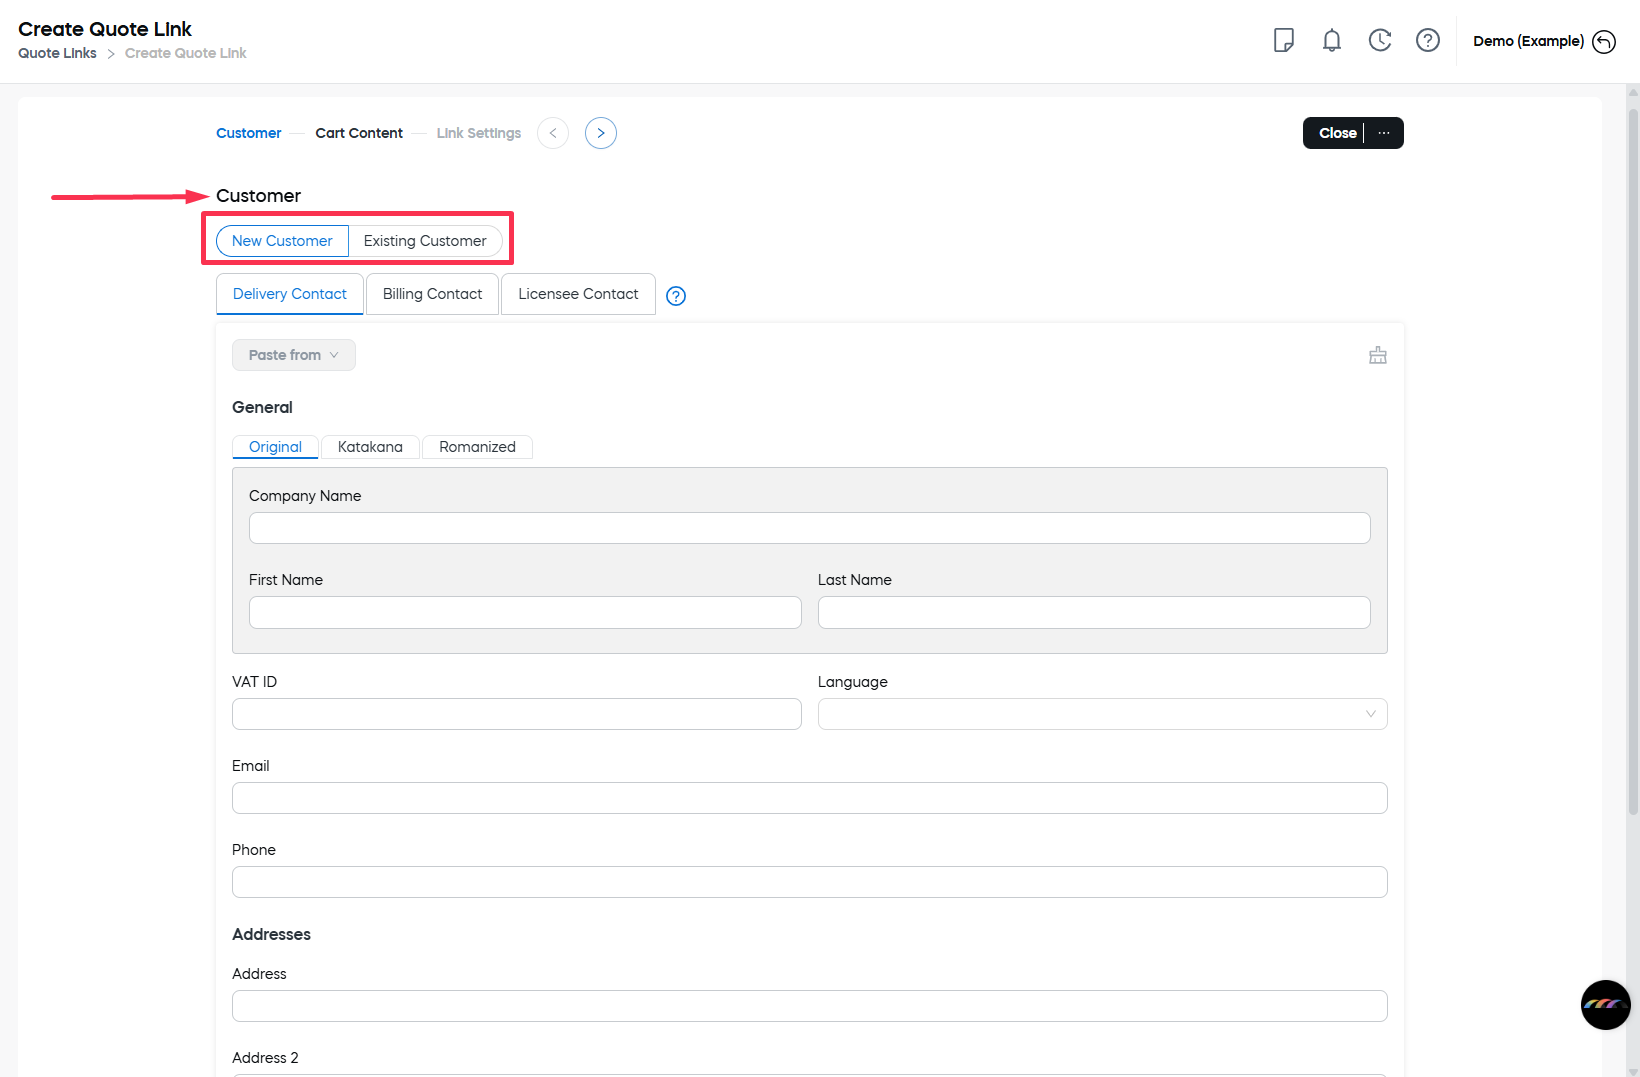
In the Customer area, select an existing customer or enter the contact information to automatically prefill in the cart linked to the quote.
-
If the customer contact information is available in SCM:
- Select the Existing Customer tab.
- Click the Select Customer button.
- Select the customer in the grid and click OK. You can search by customer last name or ID, company name, or email.
-
To add a new customer:
-
Select the New Customer tab.
-
Define the contact details. There are three tabs:
-
Billing: Person or company that purchases the software or signs up for the subscription. Their contact information is used for communication about payments. They receive the invoice (receipt) email after a purchase.
-
Delivery: Person or company to whom the software or service is delivered. Their contact information is used for physical shipments, electronic delivery, and communication concerning the delivery of licensing information.
-
Licensee: Person or company that the software license is registered to. Their contact information is used for generating the licensing information.
tipOnce contact details are defined for at least one of the types, you can copy them to another type using the Paste from option.
-
-
Select the alphabet used. Available options include:
- Original: The language used by the customer. For example, enter the details with Polish, German, or Greek alphabets, use Cyrillic, etc.
- Katakana: Use the Katakana set if you need to transcribe the information into Japanese.
- Romanized: Use the Romanized version of the original details.
-
Fill in the details.
noteWhen defining the customer details, state-level submissions are supported for Australia, Brazil, Canada, India, Ireland, Japan, the UAE, and the USA.
-
-
Create a quote from the Customer's page
To start creating a quote link for a specific customer:
- In the main menu of SCM, go to Manage > Search
- Open the Customers tab and find the desired customer.
- Click the customer ID link.

- Click the Create Quote Link button.
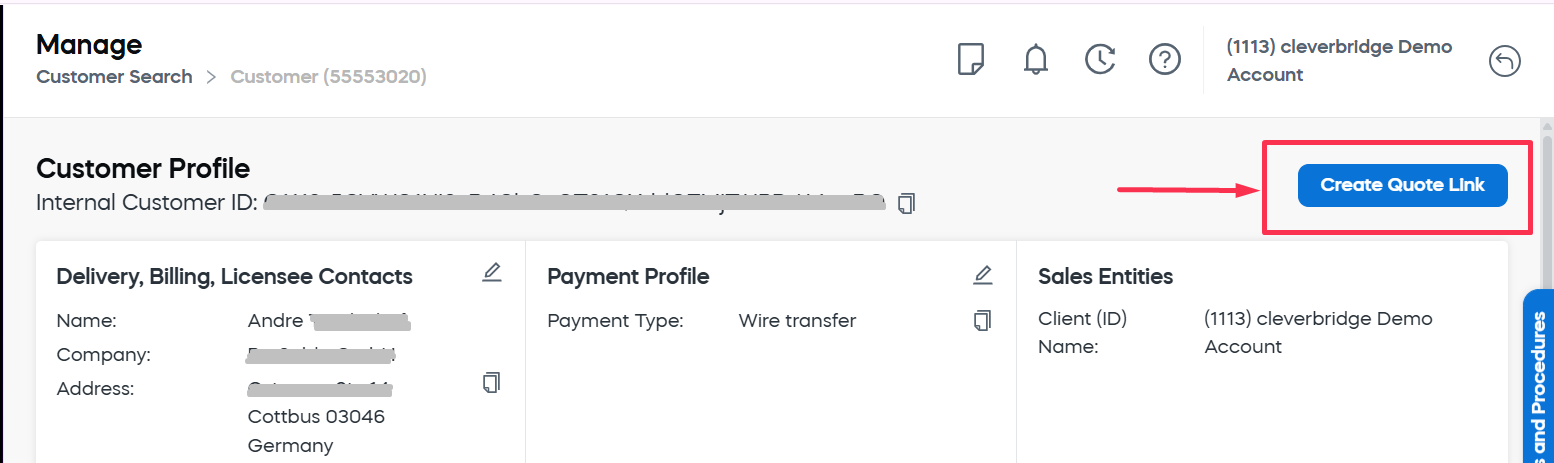
You'll be redirected to the quote link creation screen with prefilled customer details.
2. Define the cart content and pricing
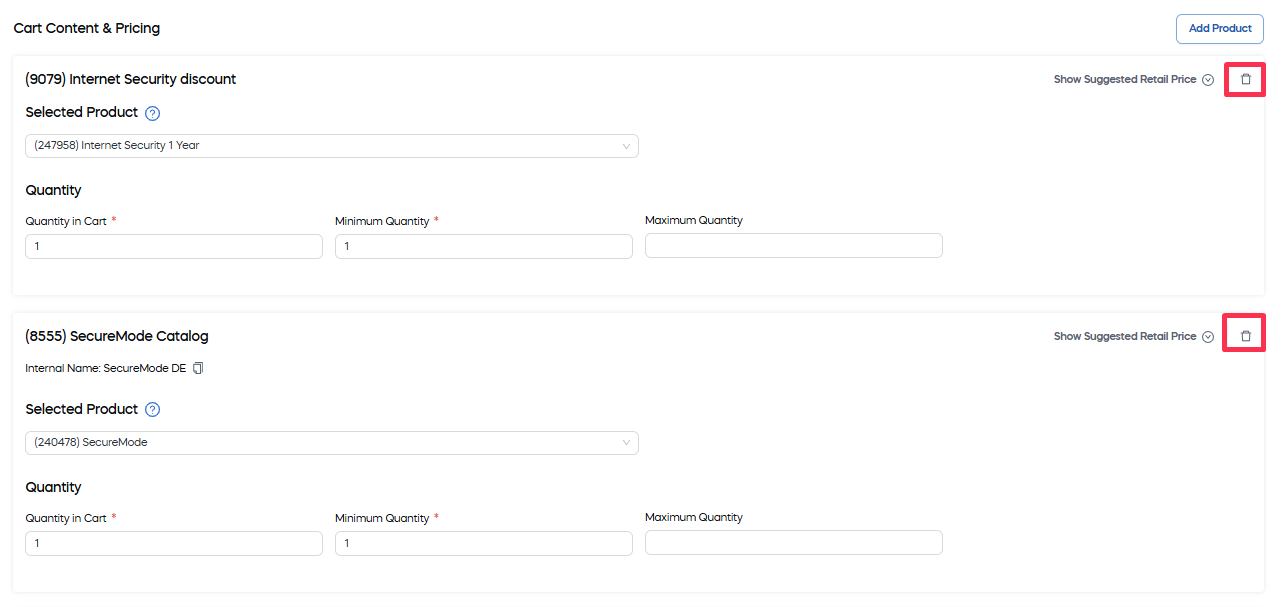
The Cart Content & Pricing area is where you configure the core structure of the quote. It allows you to define which products are offered, how they are priced, and how they appear to the end customer.
You can add products or product selections, customize the product names and descriptions, and configure quantities, currencies, and discounts. This section also supports setting custom prices and gross pricing strategies to match your business and tax requirements. All of these configurations collectively determine what the customer sees when they open the quote link.
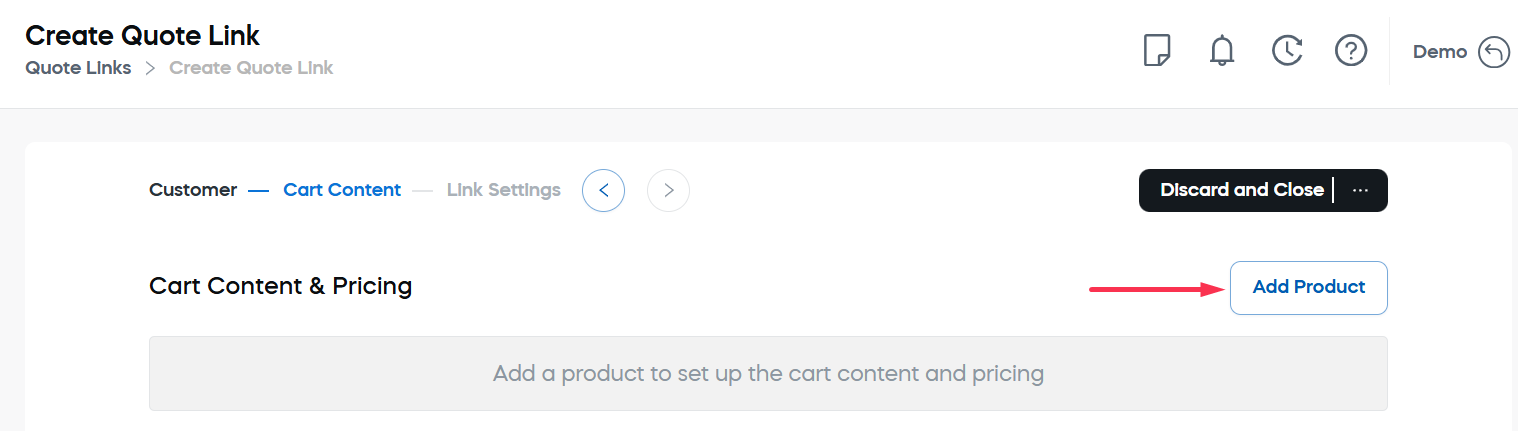
2.1. Add product
First, you need to add the products that will appear in the quote.
- Click the Add Product button.
- Select the products.
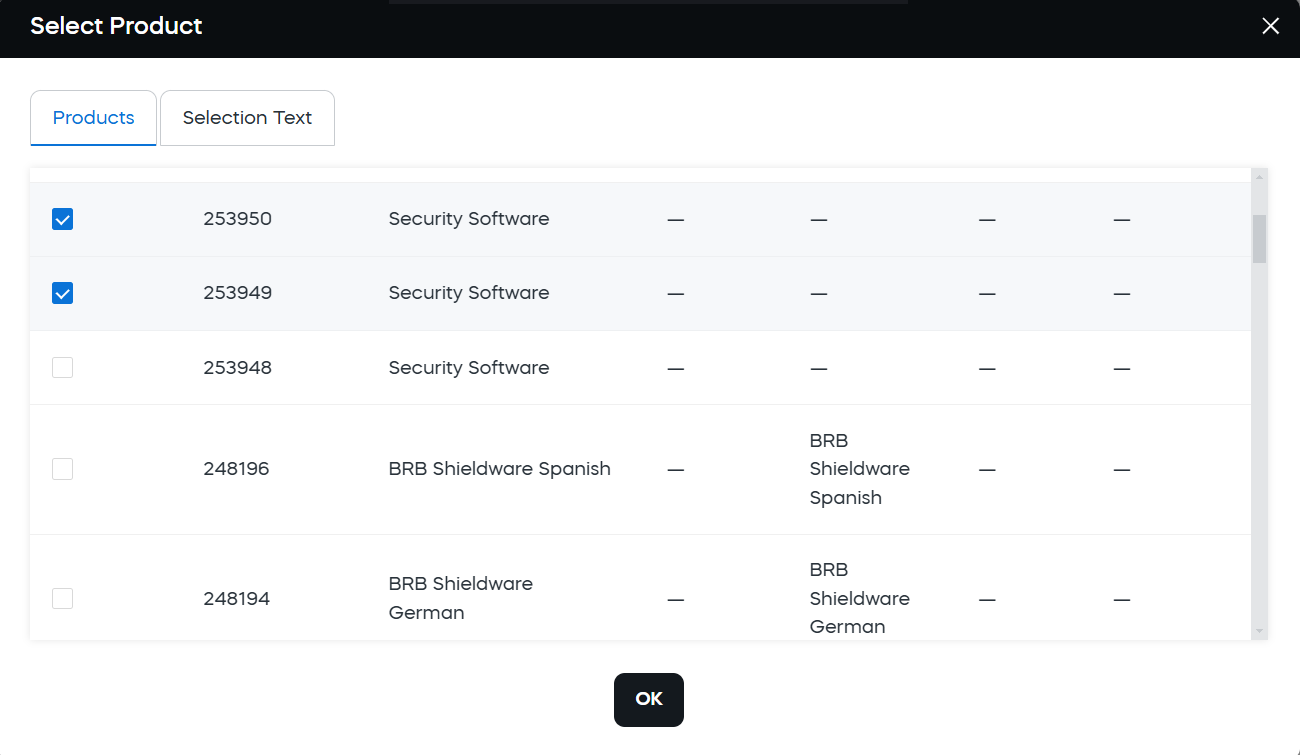
- Click OK. The products will be added to the Cart Content & Pricing area.
For each of the added products, you can define the quantity and apply custom settings such as alternative names,detailed descriptions, or tailored pricing.
2.2. Define the quantity settings
The quantity settings control how many units of each product are shown in the cart by default, and the limits customers must follow when placing an order through the quote.
As soon as the product is added, the quantity values are filled in according to the product settings. You can redefine them for a specific quote link.
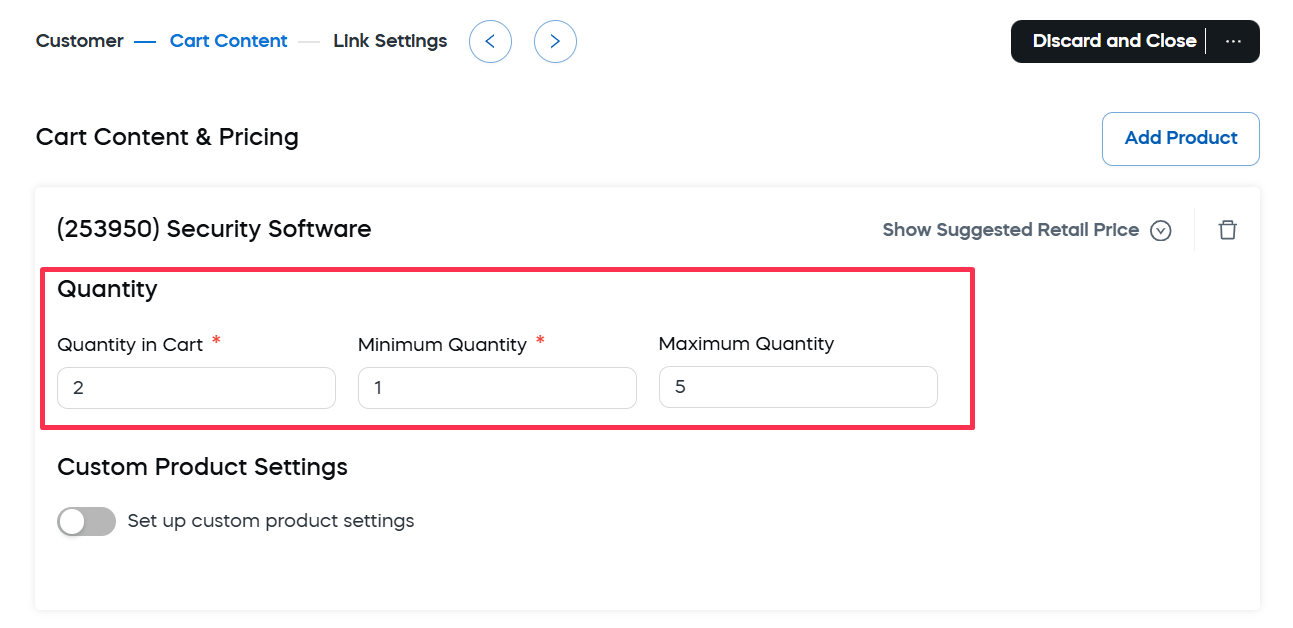
- Quantity in Cart: Number of product units displayed in the cart when the quote is accessed.
- Minimum Quantity: The lowest number of units the customer can order for this product within the quote.
- Maximum Quantity: The highest number of units the customer can order for this product within the quote.
2.3. Define custom product settings
Enable the Custom Product Settings toggle to define product-specific details and pricing for this quote. Any values set here will override the default product configuration.
When the toggle is enabled, the following sections are displayed:
-
Custom product information: Use this section to modify how this product is displayed in this quote, including its name, internal identifier, and descriptive details.

- New Product Name: Specify the name that will be shown to customers instead of the default product name.
- Internal Product ID: Identify a unique identifier used internally by the system to track the product. It cross-references the purchases for this product with your own internal number helping you to easily recognize your products and keep track of them.
- Additional Product Information: Describe the key features of the product. This description appears below the product name and helps customers better understand what they’re purchasing.
Due to legal requirements for Cleverbridge as an online reseller, customers must be provided with a clear and concise description of the product's essential features immediately before making a purchase. This description must offer enough detail to enable customers to make an informed decision. If the product name is self-explanatory, no additional explanation is required. However, if the product’s functionality is not evident from its name alone, the Additional Product Information field in the Custom product information section must be defined and clearly outline the key features.
For more information, please contact the Client Experience team.
2.4. Define custom price settings
The custom price settings let you override the default product pricing for this specific quote. You can adjust prices per currency, apply discounts, and control how taxes are displayed to create a tailored offer for the customer.
Custom pricing cannot be defined unless it is allowed by the product configuration. Otherwise, the settings are blocked. For more information, see Configure a product list.
When enabled, the Custom Price Settings becomes available.
Here you can:
-
Manage currencies: Select which currencies are available for pricing in the quote. You can enable one or multiple currencies depending on your sales regions, allowing the customer to view prices and complete their purchase using them.
Use the Manage Currencies option to select which currencies are available for pricing in the quote.
- Click Manage Currencies in the top right corner of the Price settings table.
- Select the currencies you want to enable for the product.
- Click OK.
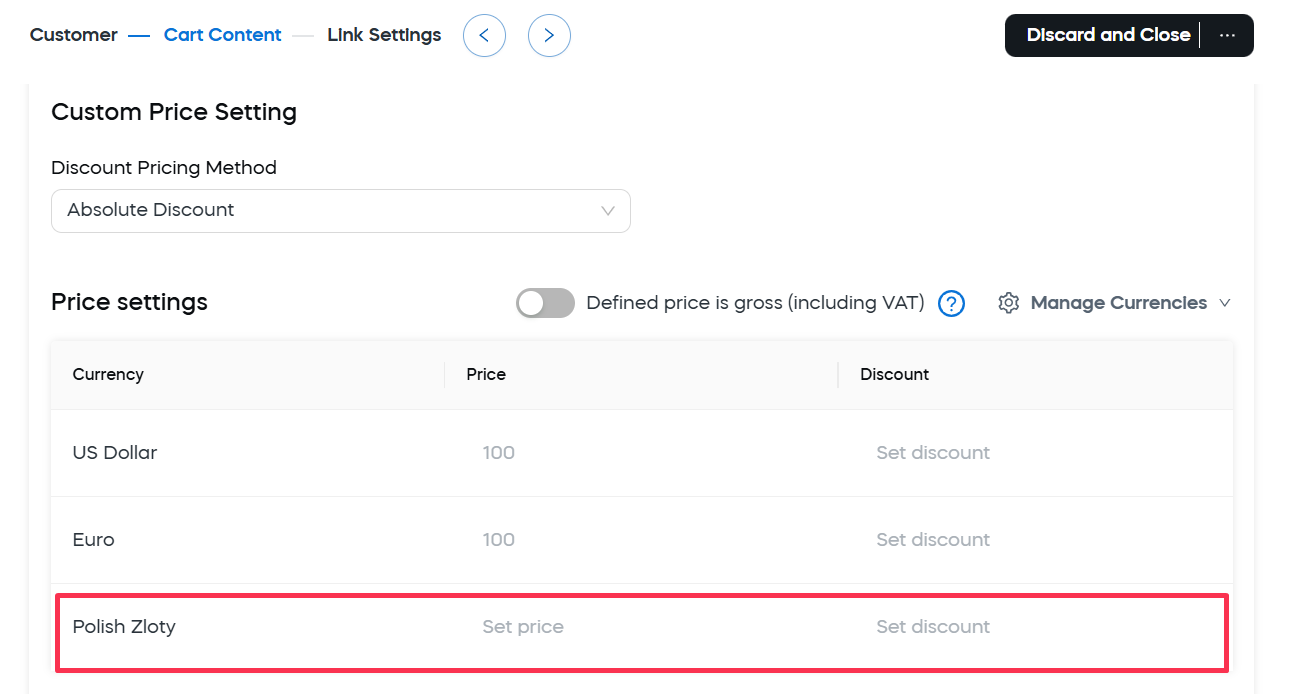
Selected currencies will appear in Price Settings with their price and discount undefined.
tipTo revert to the original currency settings defined for the product, click Manage Currencies again, then select Reset.
-
Add percentage discount: Use the Add Discounts setting to apply percentage-based discounts to the product price in the quote. If defined, it subtracts a specific percentage from the price of the product.
To define a percentage discount:
- Select the ""Percentage Discount** option in the Discount Pricing Method list.
- Define the value in the Percentage field that will appear to the right.
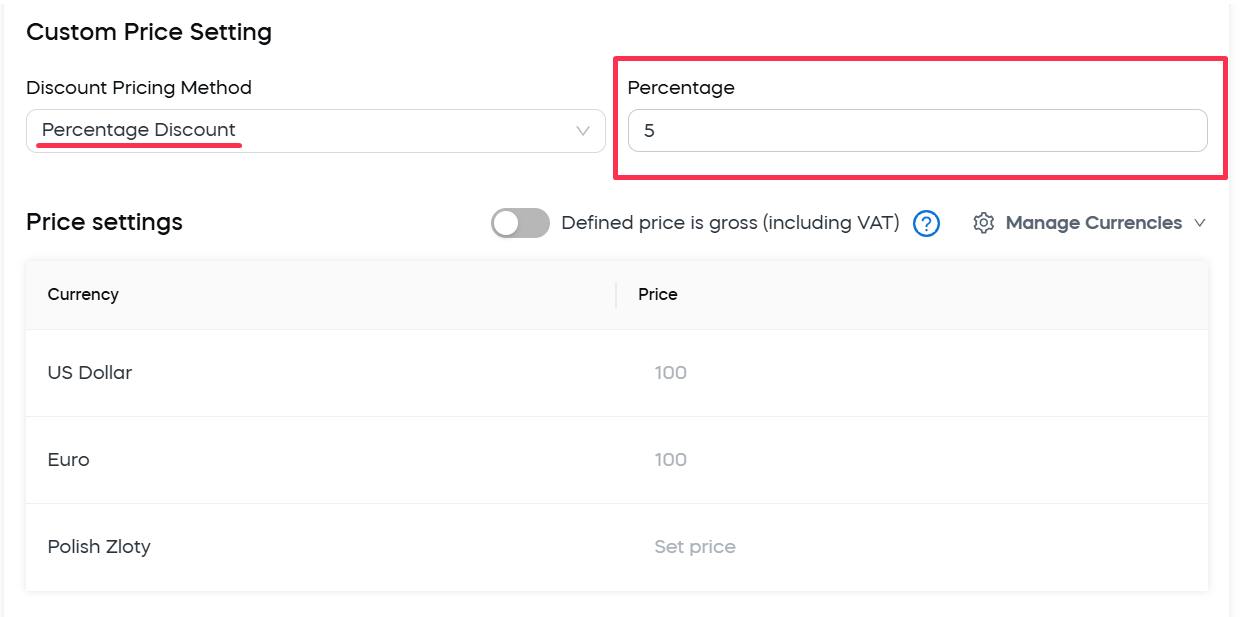
The discount will be applied to all currencies enabled for the quote.
-
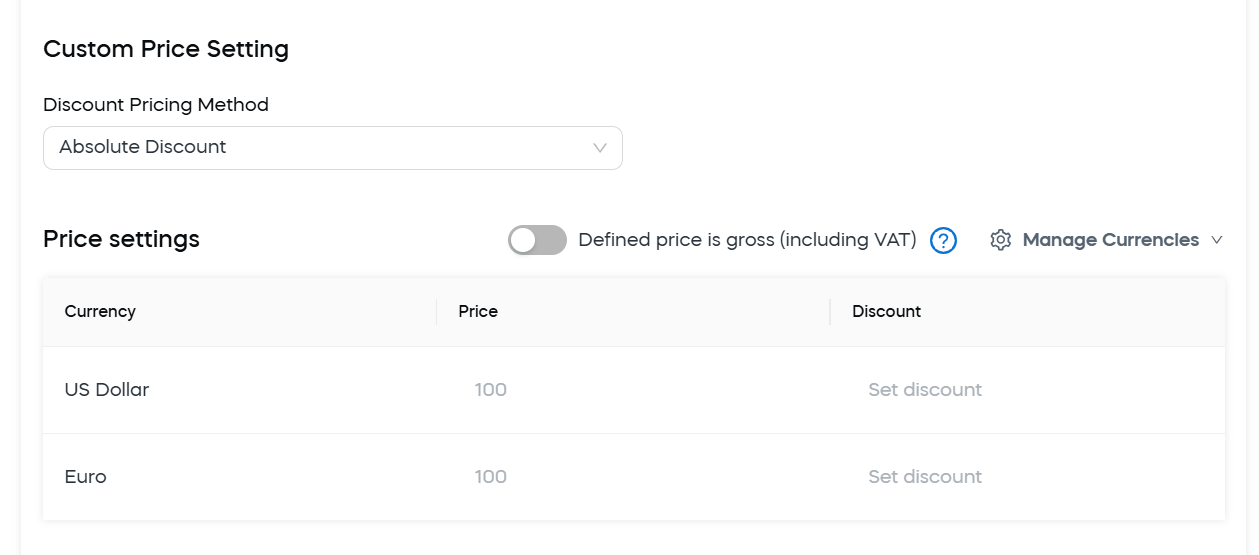
Add absolute discount: Use the Add Discounts setting to define absolute discount. If defined, it subtracts a fixed amount from the product price for the corresponding currency.
To define an absolute discount:
- Select the Absolute Discount option in the Discount Pricing Method list.
- Enter the absolute discount values into the Discount column of the Price settings table.
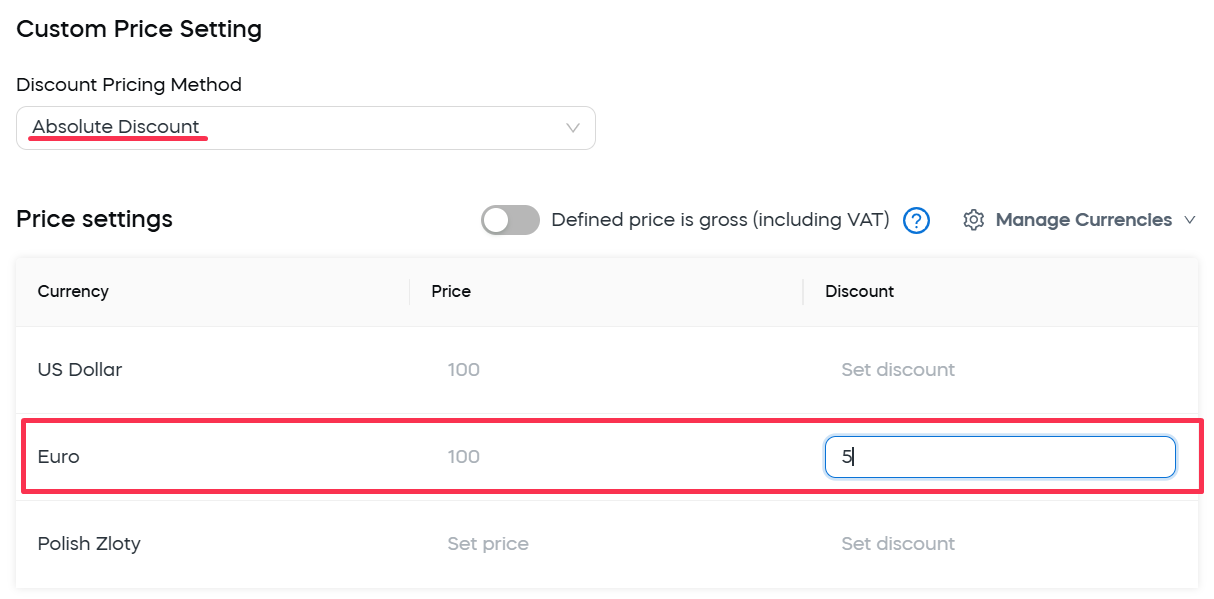
The discount will be applied to the corresponding currency. If for some currency there is no discount defined, it will not be provided.
warningA dynamic discount created for a quote link in the Custom Price Settings will also work in addition to a promotional discount defined with a coupon code in the Link Setting area, even if the Can't be combined with other discounts option is selected. To avoid this scenario, don't use a dynamic discount along with the Coupon Code option.
-
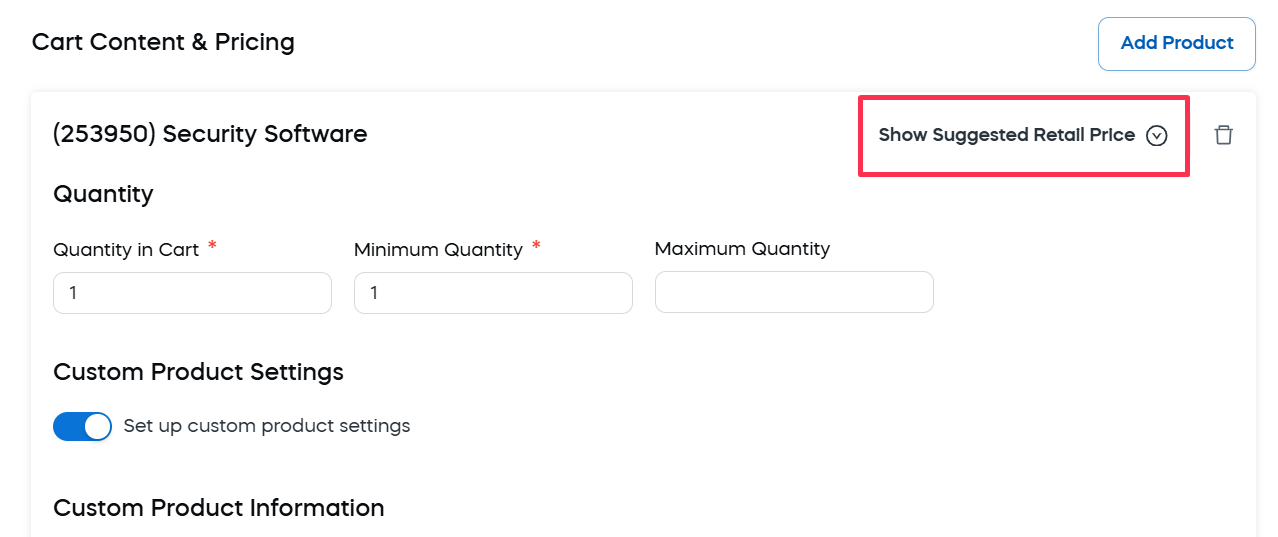
Modify prices: You can define a specific new price of the product in the Price column of the Price settings table. The price is defined for the currency specified in the previous column. If there is a default price setting, it is displayed in the column in gray. Otherwise, "Set price" is displayed.
To define the price:
- Click in the corresponding Price column.
- Enter the price.
tipWhen defining prices, you can look up the base retail price for the goods. To do so, click the Show Suggested Retail Price button to the right of the product name.
-
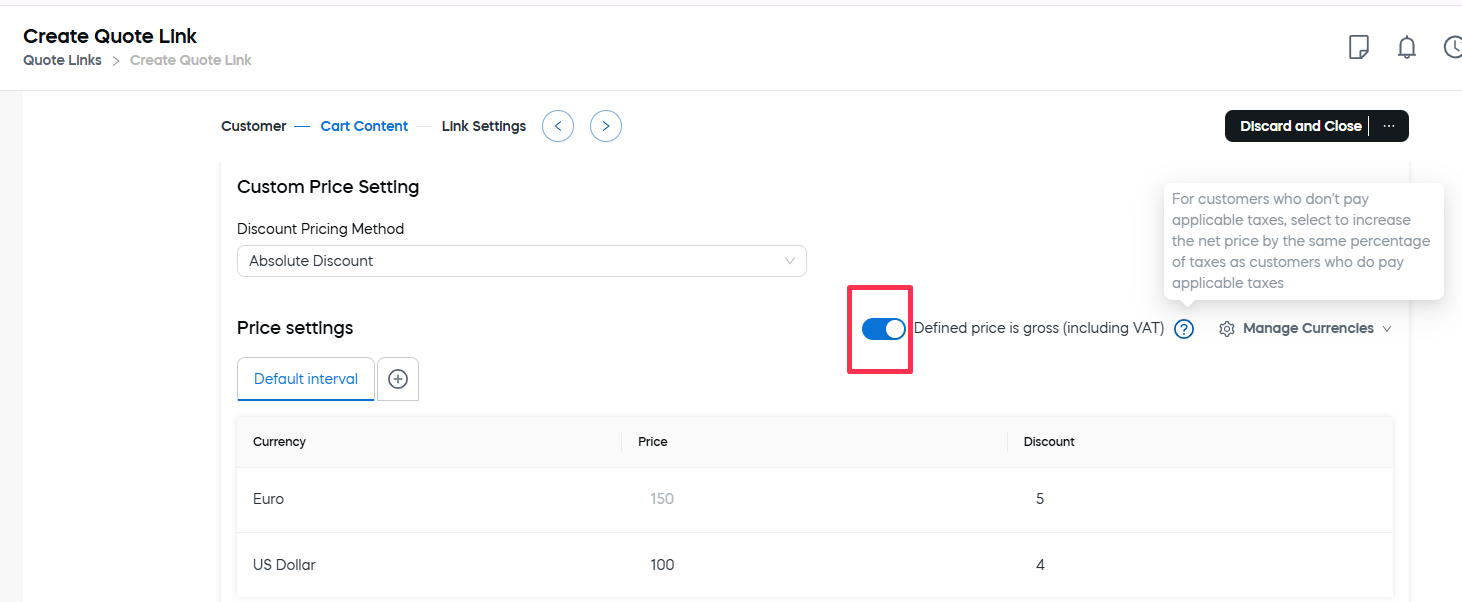
Apply gross pricing: The *Defined price is gross (including VAT) toggle lets you configure the quote link to always display a single tax-inclusive price. The gross price approach can be used to maintain a uniform price presentation and create a consistent customer experience; however, it also means that if German customers (19% VAT) pay the same gross price as Danish customers (25% VAT), the VAT rates will impact the revenue you receive.
If the toggle is enabled, the same price will be quoted for all customers using the corresponding currency regardless of their tax rules.
 Example
In the following example, the customer in a country with no taxation obligation doesn't pay tax, but the gross price remains the same as for EU customers who do pay tax.
Customer Type Gross Price TAX Net Price EU Customer 1 in Germany 39€ 6,22€ 32,78€ EU Customer 2 in Denmark 39€ 9,75€ 29,25€ Non-EU Customer in a non-tax country 39€ 0 39€ In other words, your revenue will fluctuate if you select this option, but you’ll display “marketing-friendly” pricing.
-
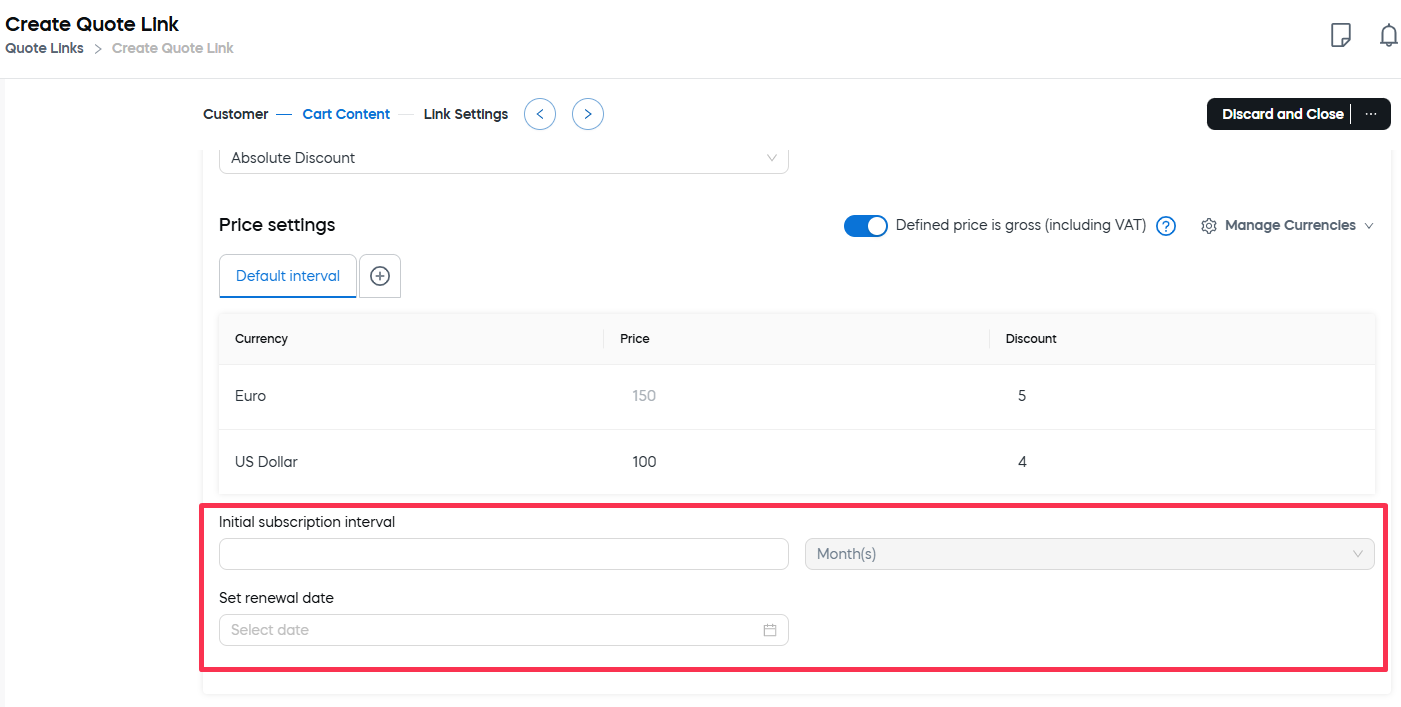
Define subscription setting: If the quote is created for a subscription, you can define the initial subscription interval and the renewal date.These settings help control how long the initial subscription runs and when the recurring billing or service should restart.
- Initial subscription interval: Specifies the duration of the initial subscription period. Define the number of months or days in the interval, and select the measurement unit. For example, if it is set to 5 months, meaning the first billing period will last five months from the start date.
- Set renewal date: Defines the exact calendar date when the renewal must start.
2.5. Manage product selections
Product selections offer variations of a single product, which means that let customers choose between different options—such as versions, formats, or configurations—within the same product listing. These selections are defined in the Configure > Selection Text page. For more information, see Manage selection text.
When creating a quote, you can:
-
Add a product selection: Let customers choose between predefined product options directly within the quote.
To add a product selection to your quote:
- Go to Cart Content & Pricing.
- Click the Add Product button.
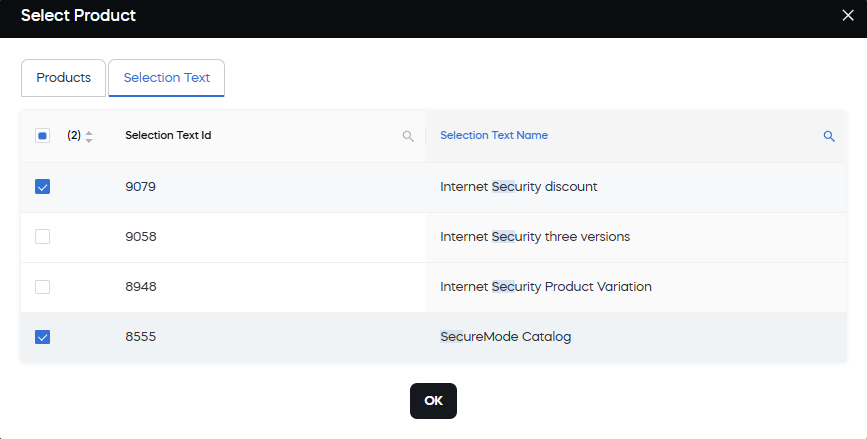
- Switch to the Selection Text tab.
- Check the selections to be added. If needed, use search boxes in the grid column headers.
- Click OK.
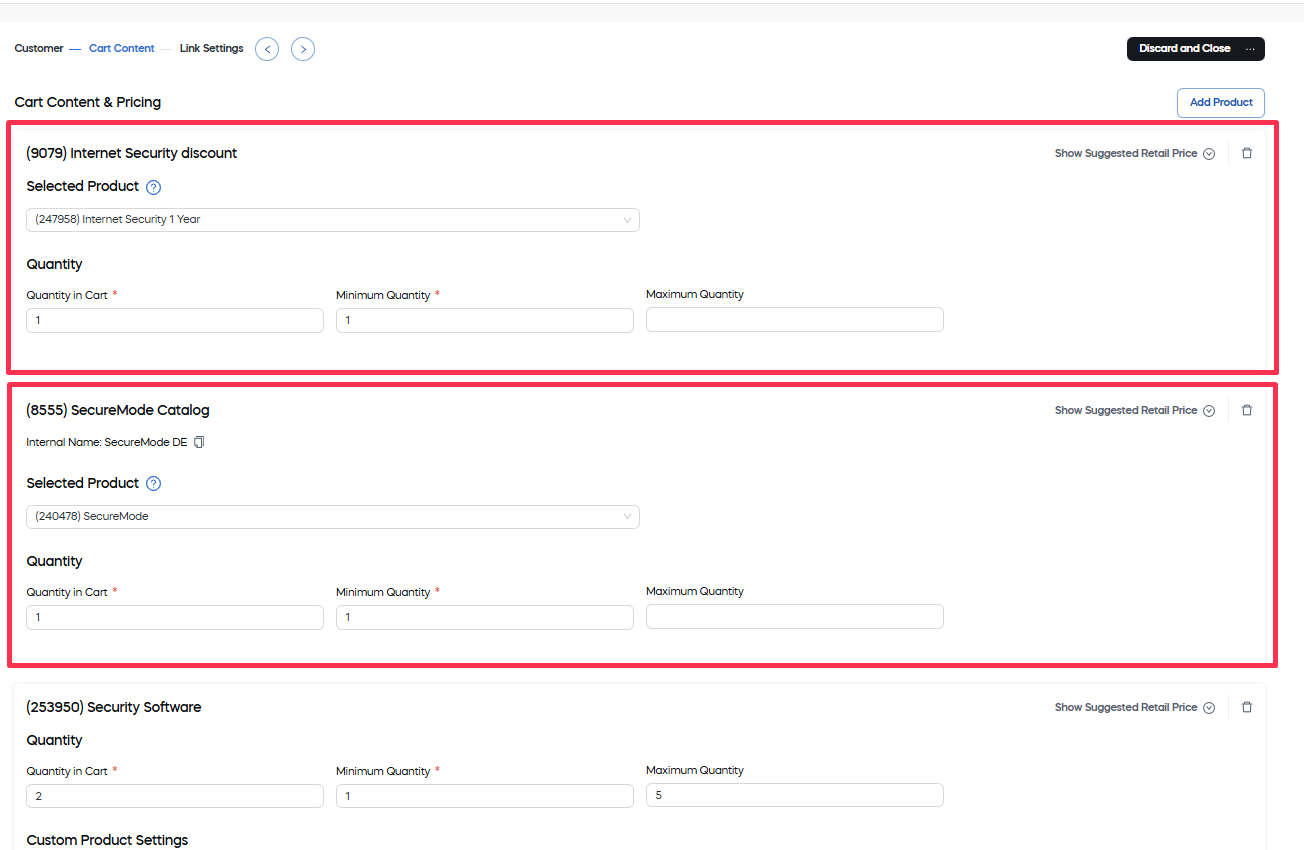
The selection will be added to the list on the left (along with the products added for the link).
-
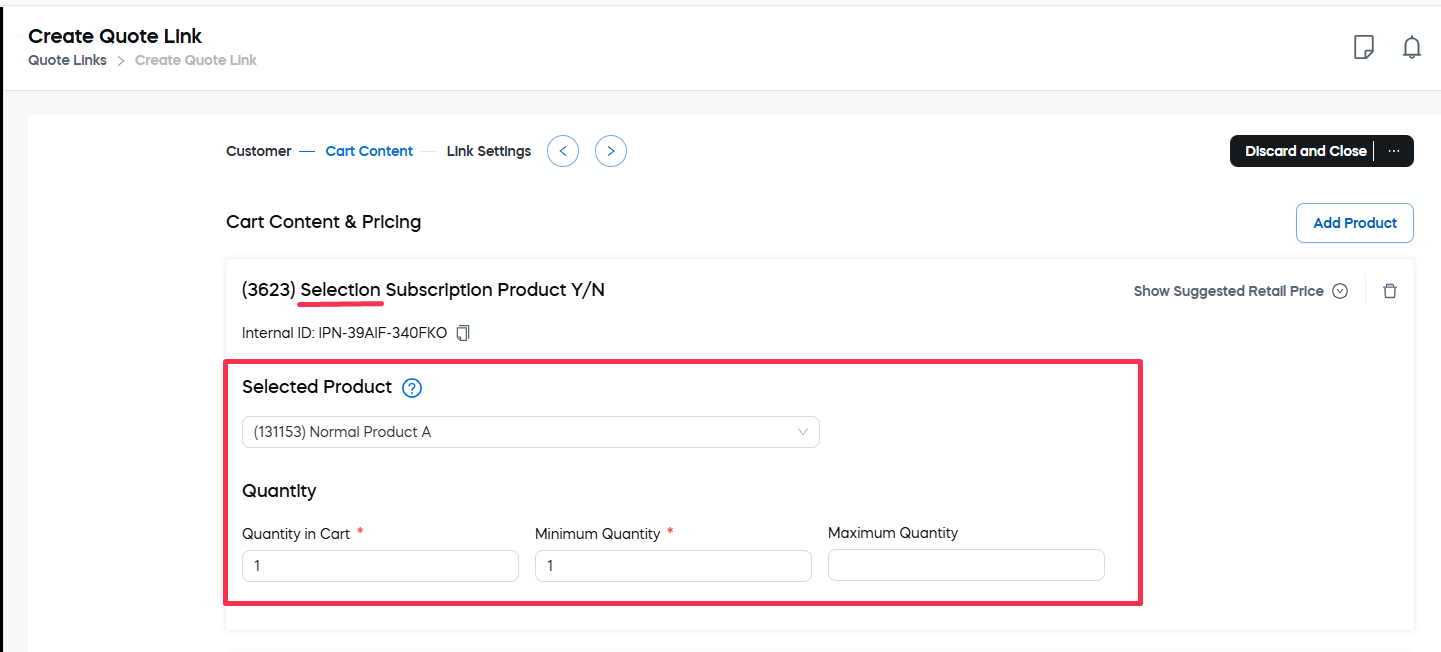
Modify the product selection for this quote: When the selection is added, you can update the default selected product and the quantity settings for this quote.
For each selection, you can change the following settings
- Selected Product: Choose the specific product that will be added to the cart when this selection is chosen. Available options are shown in a drop-down list, and, by default, the first product in the selection hierarchy is preselected.
- Quantity: Define the default, minimum, and maximum number of units the customer can order for this selection.
-
Delete products and product selections: You can any added products or product selections from the quote if they are no longer relevant or were added by mistake.
To delete a product or a product selection, click the bin icon in the top right corner of this product or selection area.
3. Adjust the Quote Link settings
The Link Settings section allows you to configure how the quote link behaves and appears to the customer—including delivery method, discount options, and additional parameters that control access and visibility.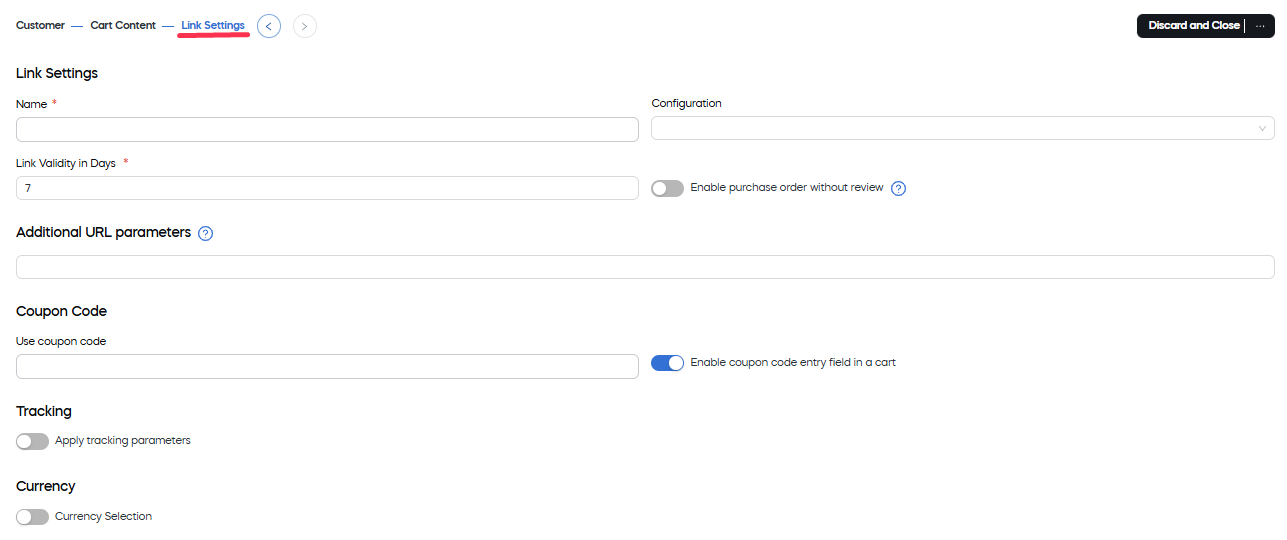
Here you can:
-
Define the basic link settings: The Basic Link Settings define the core behavior and availability of the quote link. They include options such as the link name, configuration template, validity period, and whether purchase orders require manual review. These settings ensure that the quote link aligns with your promotional, branding, and operational needs.
Under the Link Settings header, you will find the following key settings of the link:
- Name: The name that could be used to refer to the link in the future. It displays in the Quote Links table.
- Configuration: A configuration template to be applied to the link. For more information about configurations, see Checkout styling.
- Link Validity in Days: How long the link can be used. The link will not open to the destination beyond the defined period. This is particularly useful for time-limited promotions, exclusive offers, or campaigns that are only available during a specific period, ensuring that quote links are only accessible within the intended timeframe. The default validity period is 7 days.
- Enable purchase order without review: When this option is enabled, customers are no longer required to submit their purchase orders by fax, letter, or PDF to Cleverbridge before the product is delivered. This option is typically used for reliable B2B customers.
-
Add custom parameters to the URL: If needed, you can enhance the quote link with additional URL parameters to support custom behavior or pre-filled values.
To add URL parameters:
-
Open any of the settings tabs for a cart, quote, or checkout page link.
-
Add the value pair into the Additional URL parameters field in the following format:
<key>=<value>ExampleYou can use these additional parameters for various purposes. For example, you can:
- apply custom product bundles:
<customBundleID>=45789 - preselect delivery options:
<delivery>=express - encounter acknowledgements:
<consent>=true
To add multiple parameters use
&.
- apply custom product bundles:
-
-
Add a coupon code: Under the Coupon Code header, you can define a specific coupon code that will be automatically applied to the quote or use the Enable coupon code entry field in a cart toggle to allow the use of coupon codes for the quote.
-
Add tracking parameters: Use tracking parameters to capture campaign or transaction-specific data directly through the quote link.These parameters help associate incoming traffic and purchases with reporting metrics on Cleverbridge-hosted pages.
If the Apply tracking parameters toggle is enabled, you can use the Tracking area to add information to the link which associates data with transactions that occur on Cleverbridge-hosted pages for the purpose of tracking information and viewing the information in reports. For more details, see Set up x-parameters.
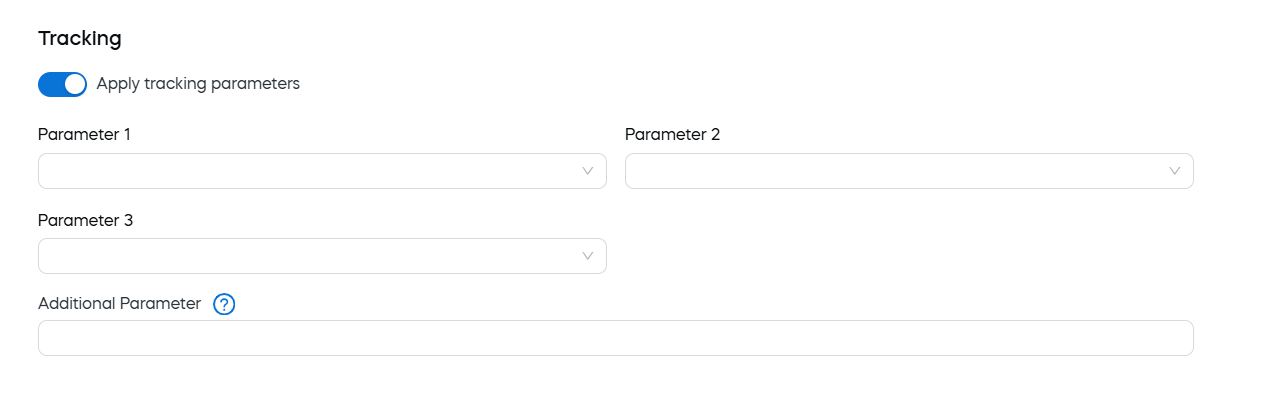
Options in the parameter drop-down lists are pulled from the hierarchy that it was created in. If no options are displayed, then a hierarchy is not set up for that parameter.
Additional parameters
Enter any additional x-parameters to include in the link, using this format:
<key>=<value>.Examplesummercampaign=abc123 -
Enable the currency selection: Use the currency selection settings to control how currencies are displayed and selected in the quote link. This allows you to predefine the default currency and tailor the available currency options for specific customer regions, overriding the cart's default behavior.
If the Currency Selection toggle is disabled, your customer will not be able to change the currency of the quote.
When the Currency Selection toggle is enabled, you can control which currencies are available for selection in the cart. This overrides the cart's default settings. You can use this to localize the cart for customers in a specific region. For more information, see Localize checkout.
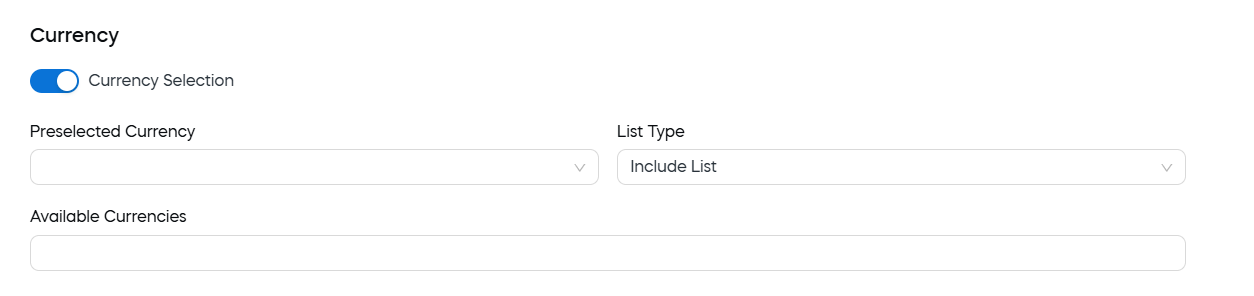
You can define the following parameters:
- Preselected Currency: The currency by default selected in the Currency drop-down list of the cart.
- Available Currencies: Under Preselected Currency you can create a list of currencies to include in or exclude from the cart's currency selector.(Start typing the currency name to add it to the list).
- List Type: exclude the currencies listed in Available Currencies or include them int he list.
4. Finalize creation of a quote for an initial order
Once you've defined all the mandatory and desired settings, click Save and Close. Your protected quote link is now created and ready to use. You can copy it directly from the confirmation screen.  .
.
View and manage quotes for initial orders
To manage your quote links in SCM, navigate to the Quote Links under Manage.
A searchable and filterable Quote Links grid is displayed, allowing you to easily find and review quotes. 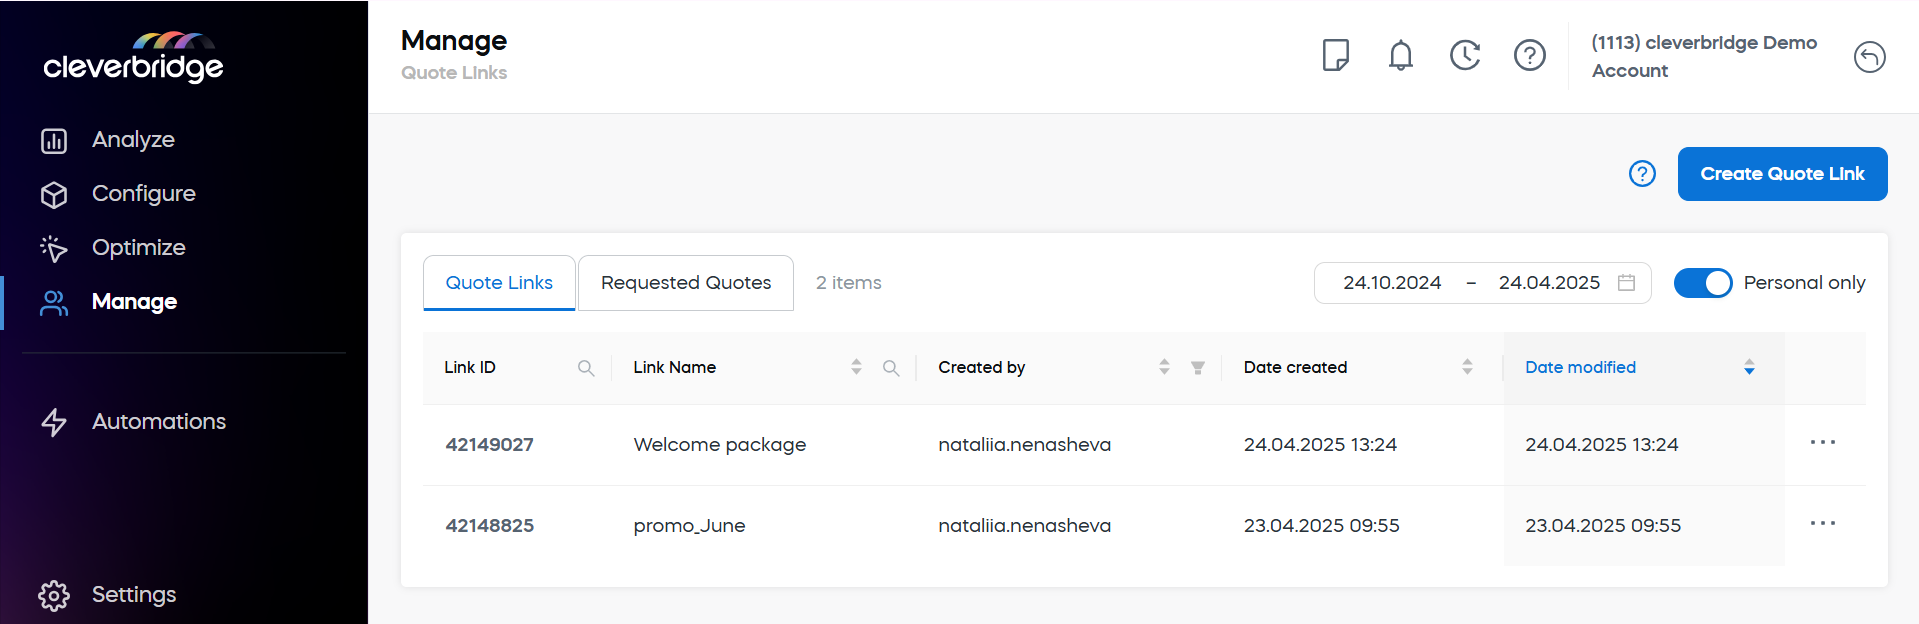 .
.
The screen includes two tabs:
- Quote Links: Shows all quote links created in your account, along with key details such as link name, creator, creation date, and last modified date. Enable the Personal only toggle to limit the view to links you've created yourself.
- Requested Quotes: Displays quotes that have been requested by customers.
Regardless of the quote link source, you can use the calendar selector above the table to filter quotes by date range.
Actions on the grid
Each row includes a three-dotted action menu with the following options:
- Edit link: Opens a page similar to the quote creation screen, allowing you to modify details such as link name, expiration settings, or associated products.
- Open link: Shows a preview of the quote page your customer will see when they access the link.
- Copy link: Copies the quote link to your clipboard so you can easily share it.
- Delete link: Permanently removes the quote link from your account.
What happens next?
- As soon as the quote is created, it appears in the customer's documents on SCM and is sent out to the customer via a direct link and email.
- As soon as the customer has accepted the quote, the process continues with invoicing and fulfilment.
The Using quotes for renewals and Managing subscription upgrades articles provide more specific details on how you can use quotes to renew and upgrade existing subscriptions.