Add a bundle product
You can choose products to include in a bundle and offer them together at a set price. Typically, the bundle price is lower than the total cost of all individual products, encouraging customers to purchase multiple items simultaneously. In the Cleverbridge platform, a bundle consists of multiple products grouped together rather than multiple licenses of a single product.
When products are grouped into a bundle, they no longer keep their individual product IDs but are assigned a single bundle ID. Bundled items must stay together, and individual products cannot be removed from the bundle during the ordering process.
To create a new bundle product in SCM:
- Go to Configure > Manage Products, and select Add Bundle Product from the three-dot menu.

Complete the information in the following sections:
General
The General section is used to enter bundle product's details that will be visible to your customer on the checkout pages, as well as categorical and other internal information about your products. In this section, you can find the following options and fields:
Visible Information
Select base product (optional)
You can use the drop-down list to select a base product on which you can base other products. For a product to appear in the drop-down list, it must be set up in advance.
For more information about base products, including rules for how they work, see Products.
Product Status
The Product Status option determines how the product is used in the Cleverbridge platform. The options include:
| Option | Description |
|---|---|
| Fully available | It is a default status. The product is available for sale and listed online. |
| Deactivated | The product is neither available for sale nor listed online. |
| Allow sale and initiate only through client website | The product can be sold with no limitations through a direct link provided on a web page or in an email. However, a customer who contacts Cleverbridge Customer Supportto purchase the product will be asked to order it through the client's website. Out of PCI compliance reasons, Cleverbridge Customer Supportwill not send the customer other purchase links, such as protected URLs created using Link Generator. |
| Hide, only sell if product ID is known | The product is hidden from the general public. The customer must have the product ID to access the product. After entering the product ID, the customer can purchase the product at a discounted or special price. |
| Only available from restricted IP range | Use this option if you don't want customers to purchase the product, but you want individuals within your company to be able to use the product in the cart. To set up an IP range for restricting access to this product, contact Client Experience. |
| Only available in protected URLs | The product is available only through a protected URL (created using Link Generator) that is shared with specific customers. You can also use this option if you don't want customers to purchase the product, but you want individuals within your company to be able to use it in the cart. |
Product Name
Product Name is displayed to customers during the checkout process. This field doesn't support HTML.
You must include an English product name, even if your company uses another default language and only sells the product in this language. Failure to do so will result in an Input Validation message when you try to save the product.
Product Subtitle
You can use the Product Subtitle option to provide a short product description that provides more detailed information about the essential features of the product. This description displays as an additional line below the product in the shopping cart, review page, confirmation page, email messages, and so on. This field doesn’t support HTML.
Category
Select a category
You can use the Select a category section to choose the characteristics of the product. Cleverbridge, as the reseller of the product, uses this information in order to gain a more thorough understanding of the types of products Cleverbridge clients sell.
Images
You can use the Images section to add images of your product that will display in the cart.
Internal information
Internal Product Name
The Internal Product Name value cross-references purchases for this product with your own internal product name, which you can also use to easily organize your product information within the Cleverbridge platform.
If Internal Product Name is defined, this name will be used throughout the Cleverbridge platform instead of the name defined in Product Name. In the checkout process, however, customers will see the main product name and not the internal name.
Internal Category
Internal Category is an internal product category for the purpose of sorting products by a specific type or class.
Internal ID
The Internal ID value cross-references purchases for this product with your own internal number. This ID can include alphanumeric characters.
If you would like to use your internal product ID in the checkout process, you can submit the internal ID as a parameter with the number prefixed by the capital letter I.
A Cleverbridge product ID in an order URL is formatted as &cart=42149, but an internal ID is formatted as &cart=I543.
If you are offering a product selection in the checkout process, you can submit Internal ID to trigger the preselection of a particular option. For example, imagine that you are offering the following subscription options for a product: 6 months, 1 year, and 2 years. You can submit Internal ID for the 1-year subscription product so that it is pre-selected for the customer. To trigger a pre-selection using the internal ID for a specific option in a selection, use the following parameter:
&cart=S<selection ID>:I<internal product ID> (for example, &cart=S42149:I543)
Attributes
The Attributes section is used to enter information that will be used to market your product in the Cleverbridge platform, as well as restrict the quantity of products that your customers can order.
Version
If applicable, enter the version of the product. This can be displayed in the checkout process, depending on your configuration template.
Min. Order Quantity
The Min. Order Quantity field specifies the minimum quantity that can be purchased for this product in an order.
Max. Order Quantity
The Max. Order Quantity field specifies the maximum quantity that can be purchased for this product in an order.
Descriptions for Marketing Purposes
Short Description
A short description that appears when this product is used in a recommendation or Cleverbridge-hosted catalog. The exact placement of this text depends on your selected template.
Long Description
A description that appears when this product is used in a recommendation or Cleverbridge-hosted catalog. The exact placement of this text depends on your selected template.
System Requirements
A description of system requirements that appears when this product is used in a recommendation or Cleverbridge-hosted catalog. The exact placement of this text depends on your selected template.
Volume Pricing Note
The volume pricing note displays in the Volume discount pop-up window in the cart. Use this option to provide contact information or any additional information that further explains your volume pricing.
Shopping Cart
Product Information in Cart (as Pop-Up)
To add plain text or HTML that appears within a pop-up in the cart, do the following:
-
Create your product information in the Product Information in Cart (as Pop-Up) text editor field.
-
To add a reference to an image, use the following HTML, and include your client account ID and the image name:
<img src=mycontent/client account ID/image name>.
To reference an image, you must first upload it to Web Files in CA. For more information, see Web files.
The following is an example of how the pop-up information in the cart could be formatted:
<table>
  <tr>
    <td><img src=/mycontent/123/GenericBoxshotSmall.png> </td> <td>
      <h1>Internet Security Basic Extended</h1>
      <p>Anti-virus software for personal use. This product offers virus protection, anti-phishing tools, email protection, and identity theft protection. It removes worms and eliminates malware. Protect your Internet browsing, online banking, social networking, and more.</p><br />
    </td>
  </tr>
</table>
Delivery Text (HTML)
The Delivery Text (HTML) displays information about the product delivery method, such as download, email, and so on, in the delivery section of the cart.
Delivery Text (PDF)
The Delivery Text (PDF) displays information about the product delivery method, such as download, email, and so on, in the delivery section of a PDF order confirmation document. Because PDFs are not compatible with HTML, enter non-HTML information here.
Product Features
You can list here the main features of product versions so that they appear under each product version in the cart. Product features make it easier for the customer to choose between different versions in the product selection.
Selection Text
Use selection texts so that customers can choose between different options for a product in the cart.
Pricing
The Pricing section is used to enter base pricing information for your product. In this section, you can find the following options and fields:
Base Price
Volume Pricing Method
For bundle products, this is always set to All-units discount.
Price Type for Taxation
In the Price Type for Taxation drop-down list, select one of the following options:
The following settings only pertain to taxable transactions. For customers outside countries with taxation obligations, the Price Type for Taxation setting is irrelevant. Their prices will always be calculated based on the defined price, regardless of this additional setting.
| Option | Description | ||||||||||||||||
|---|---|---|---|---|---|---|---|---|---|---|---|---|---|---|---|---|---|
| Gross price | To provide a better shopping experience for your customers in countries with taxation obligations, you can configure every cart to always display a single tax-inclusive price to shoppers. However, with this strategy, if German customers (19% VAT) pay the same gross price as Danish customers (25% VAT), the VAT rates will make a difference in the revenue you generate. Example
Bottom line: Your revenue will fluctuate if you select this option, but you'll display "marketing-friendly" pricing. | ||||||||||||||||
| Net price | This approach lacks a “marketing-friendly” price display, but it preserves a consistent revenue stream. This means you can choose to generate the exact same revenue on every single transaction from EU consumers. Important For US customers, the Price Type for Taxation setting is irrelevant. The purchase price is always considered the net purchase price, based on which the state sales tax is calculated. Each county, city, and special district can add their sales tax on top of the state tax rate. For more information on the US tax rates, see Tax rates for digital products. Example In the following example, US Customer 1 in Louisiana and US Customer 2 in Illinois pay different sales tax due to the different state, local, and city tax rates and regulations in the United States. Being a non-profit organization, the third US Customer in Illinois does not pay sales tax. Nonetheless, the net price remains the same for all three customers.
Your revenue stream remains consistent if you select this option, regardless of the respective local, state, or national tax rates and regulations. |
Options
Allow custom product price
Enabling the Allow custom product price toggle activates a dynamic price for the product. Dynamic products are created with parameters that are added to the URL. For more information, see Dynamic Products.
Before a dynamic product price can be applied to a product, this functionality must be activated for your account and a seed must be defined in the Additional Details section of Account Setup in Commerce Assistant. See Account setup.
Enable subscription billing
Enabling the Enable subscription billing toggle opens up the following options:
- Sync next billing date with last payment: Synchronizes the billing date with the date the last payment was received. In the event of late payments, this option automatically recalculates the next billing event date according to the last date a payment was received from the customer.
- Subscription Interval: Under Length of Initial Subscription Interval, define how much time should pass between the signup and the first recurring billing event. This can be set in months or days. After the first billing event, the amount of time set for Length of Recurring Subscription Interval is used for future billing events. Under Length of Recurring Subscription Interval, define how much time there should be between recurring billing events. This interval can be set in days or months. Typically, 1, 3, or 12 months are used for monthly, quarterly, or annual billing intervals.
- Start with free trial period: Choose this option if you want to offer a free trial of the bundle product.
- Start with paid period: Choose this option if you want to start with a paid period for your bundle product and not offer a free trial period.
Price Settings
Define price settings for your product, including base currency price and prices for other currencies if you want to set them.
Delivery
Key Template
The Key Template option inserts custom license key information, such as customer name, product name, license key number, and so on, for the customer on the confirmation page. If you don't enter any custom text in this field, default key template text displays on the confirmation page as follows:
Your product key: ...
If you don't want the default key template text to display on the confirmation page, and you don't want to enter custom text, you can enter only the Key placeholder in this field. In this case, if you use a key list, only the license key itself displays, and if you use a key generator, neither the default text nor a license key displays.
The following dynamic placeholders are available to insert customer information:
| Placeholder | Description |
|---|---|
<Key> | License key |
<RegName> | Customer name |
<ProductId> | Product ID |
<InternalProductId> | Internal product ID |
<[NAME_OF_X_PARAM]> | Corresponding x-parameter |
<ProductName> | Name of the ordered product |
<Quantity> | Quantity of the ordered product |
<ProductTrialUrl> | URL to download a trial version of the product |
The following is an example of key template text:
<RegName>, here is your product key for your purchase of <ProductName>.
<Key>
Email Key Template
The Email Key Template option is used to define a key template for the email confirmation. Use this option only if the key template for the email confirmation needs to differ from the one used for the confirmation page.
If the same key template should be used for the confirmation page and the email configuration, leave this field blank.
Additional Delivery Note
The Additional Delivery Note option inserts additional delivery information for the customer on the confirmation page. The following dynamic placeholders are available to insert customer information:
| Placeholder | Description |
|---|---|
<ProductId> | Product ID |
<InternalProductId> | Internal product ID |
<[NAME_OF_X_PARAM]> | Corresponding x-parameter |
<ProductName> | Name of the ordered product |
<Quantity> | Quantity of the ordered product |
<ProductTrialUrl> | URL to download a trial version of the product |
The following is an example of additional delivery note text:
<p>Thank you for your order. To download and install your product, please follow these instructions:</p>
    <ol>
      <li>Download the installation file by clicking the button below.</li>
      <li>Double-click on the downloaded file to begin installation.</li>
      <li>Follow the onscreen installation instructions.</li>
      <li>When prompted, enter your license key.<br /></li>
    </ol>
    <p>Please note: The license key is also included in your confirmation email.</p>
Information on Extra Page
The Information on Extra Page option is used when the installation instructions or other product information are too long to fit on the confirmation page. This creates a button on the confirmation page that the customer clicks to open the instructions in a separate window.
Bundle
In the Bundle section:
- Click Select Product to add products of your choice to the bundle.

- In the Position in the cart column, enter a position in the cart for each product in the bundle. This determines the order in which products display to customers. The position ranges from 1 to 100, with 1 being the highest position in the cart, and 100 being the lowest position in the cart. The default value is 50.
- Optionally, to hide a product in a bundle, enable the toggle in the Hidden column of this product.
- Click Save and Close.
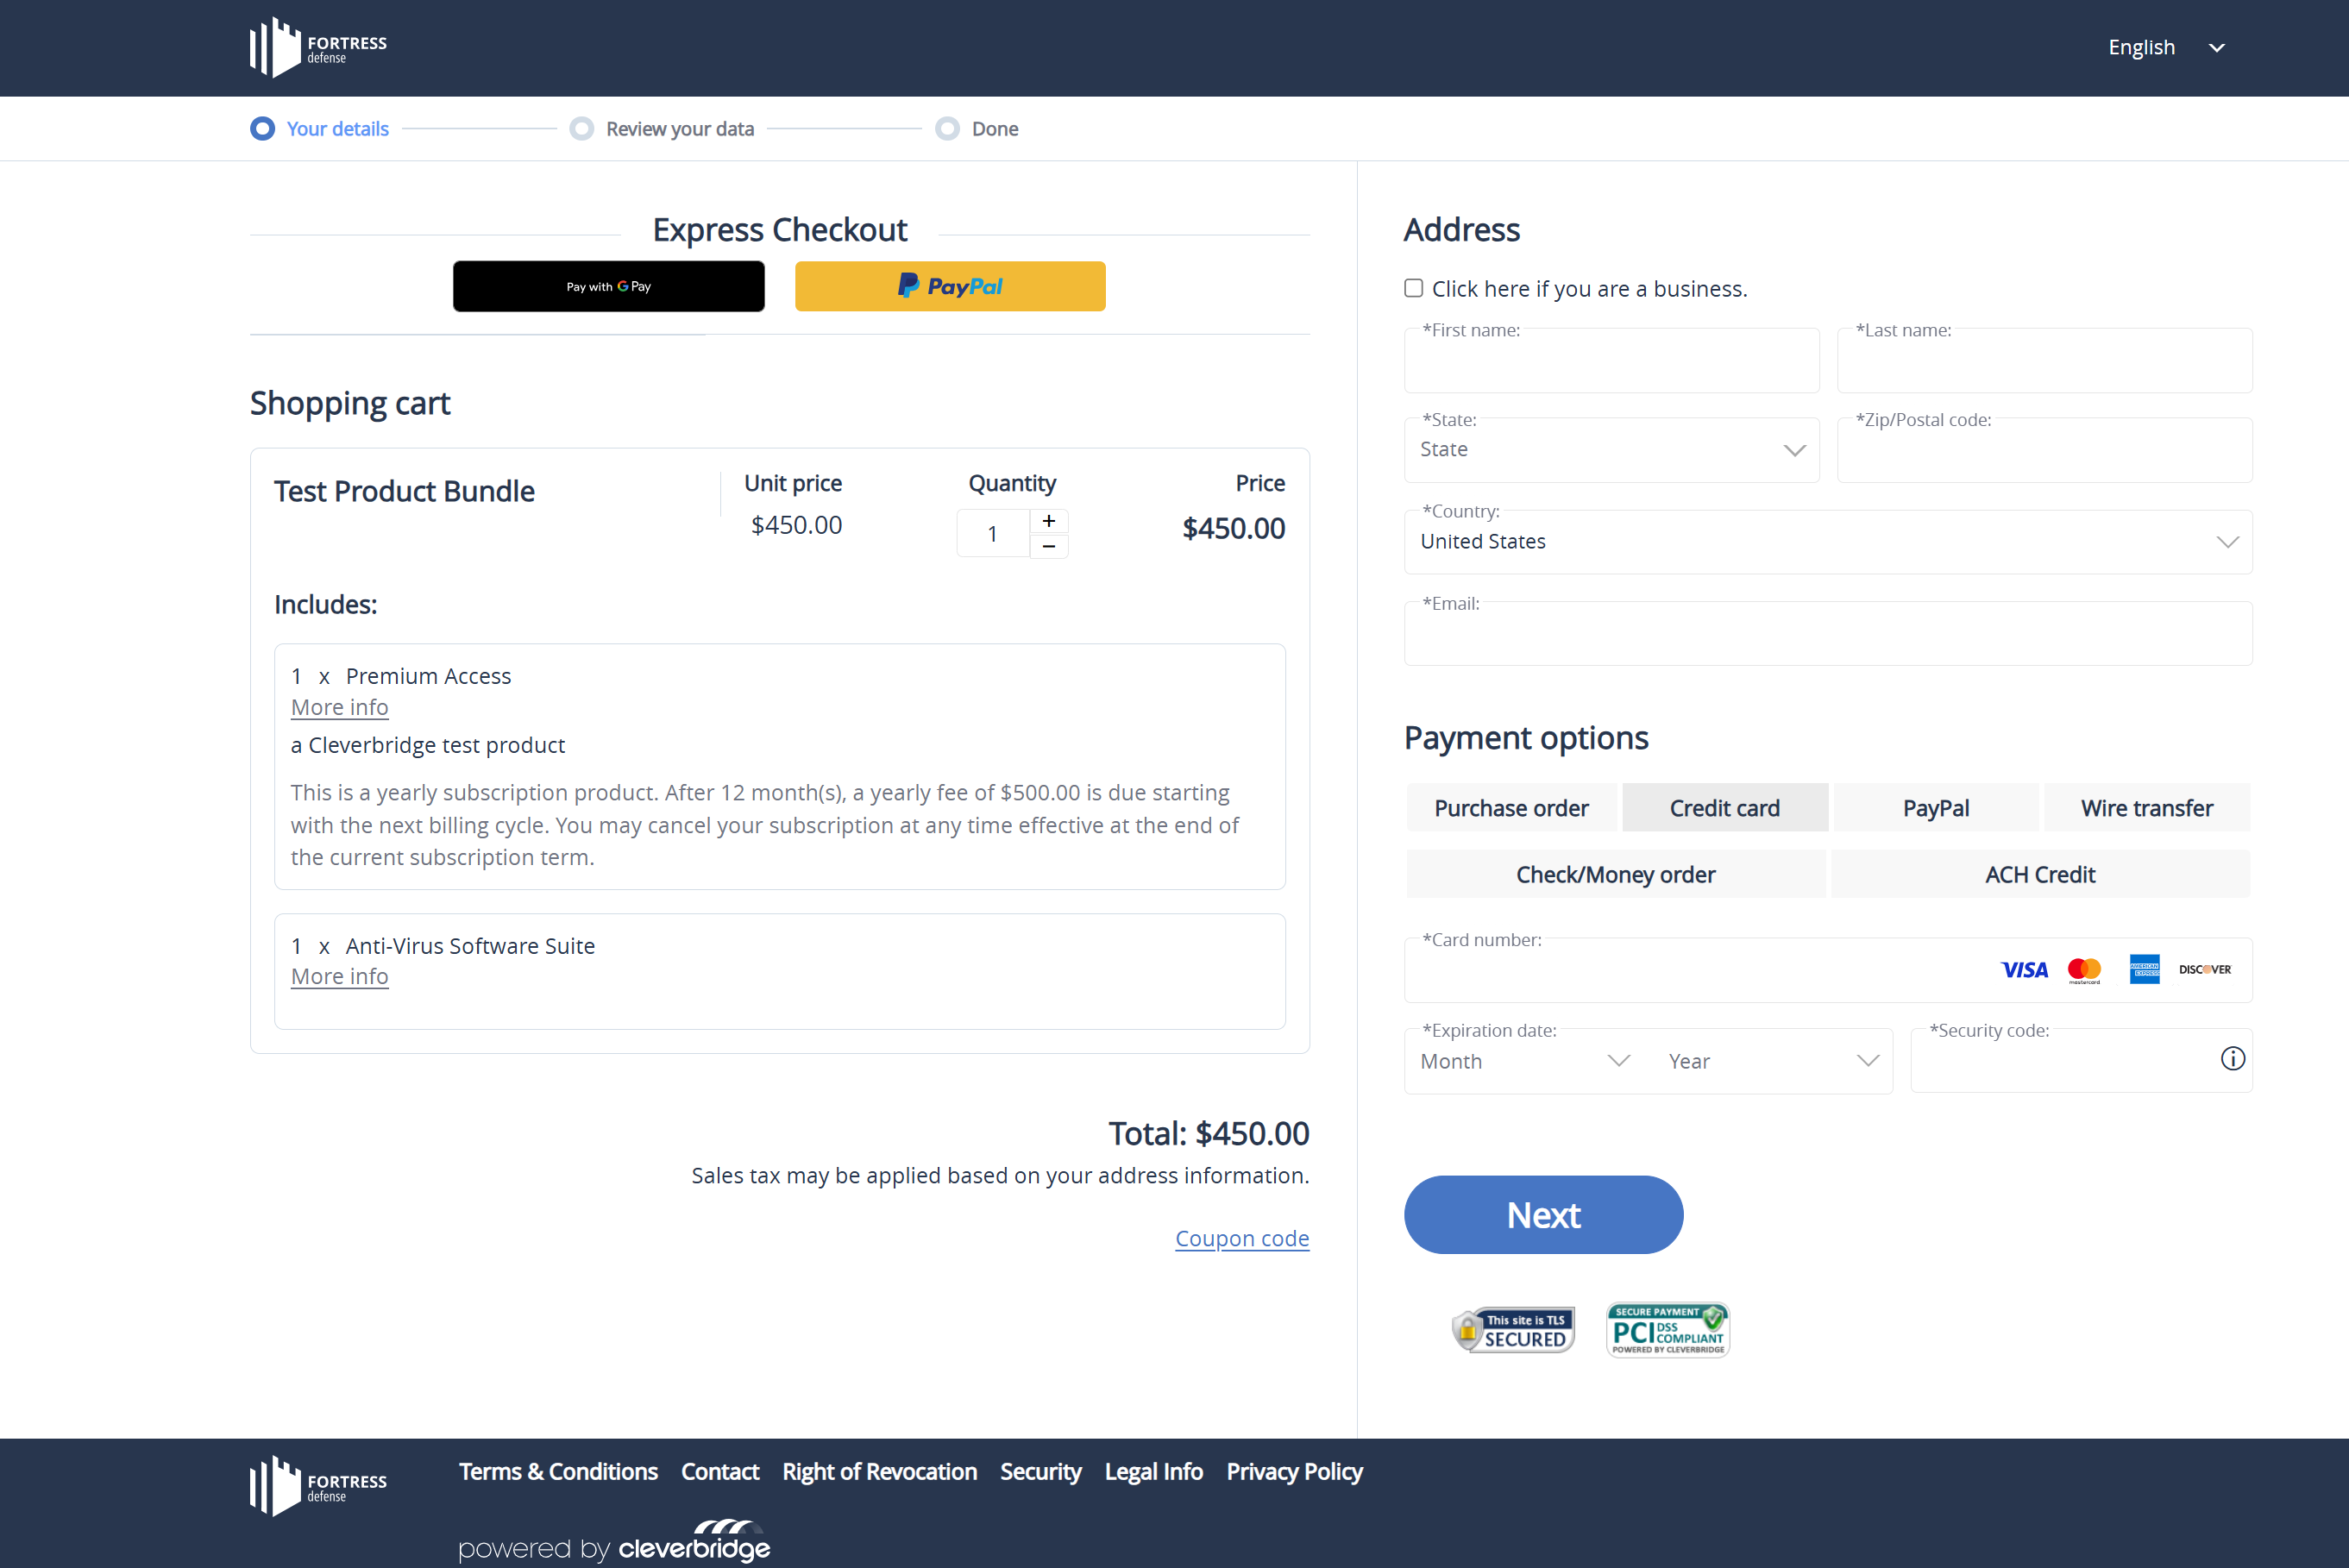
The following is an example of a checkout page with a bundle product created out of two products: Anti-Virus Software Suite and Premium Access.

Remove products from a bundle in SCM
To remove a product from a bundle in SCM:
- Go to Configure > Manage Products.
- From the All Products tab, select the bundle that you want to update.
- Go to the Bundle section and click the bin icon next to the product you want to remove.

- Click Save and Stay or Save and Close.
Create a bundle in CA
- Go to the main menu of CA and choose Products & Delivery > Add Product > Bundle. The Product portal opens.
- In the Product portal, open the Bundle section.
- In the Available Products section, select a product.
- To filter the list of products, use the Search function in this section and enter search text.
- To select multiple items, hold down the CTRL key on your keyboard as you click each item individually. To select a range of items, click the first item in the range, then hold down the SHIFT key while clicking the last item in the range.
- Click the
arrow or drag-and-drop the items to the Products Included in Bundle section.
- Optionally, to change the quantity for a product, in the Products Included in Bundle section, select the product and enter the quantity in the Quantity column.
- In the Position column, enter a position in the cart for each product in the bundle. This determines the order in which products are displayed to customers. The position ranges from 1 to 100, with 1 being the highest position in the cart, and 100 being the lowest position in the cart.
- Optionally, to hide a product in a bundle, select the product and check the box in the Hidden column.
- Click Save.
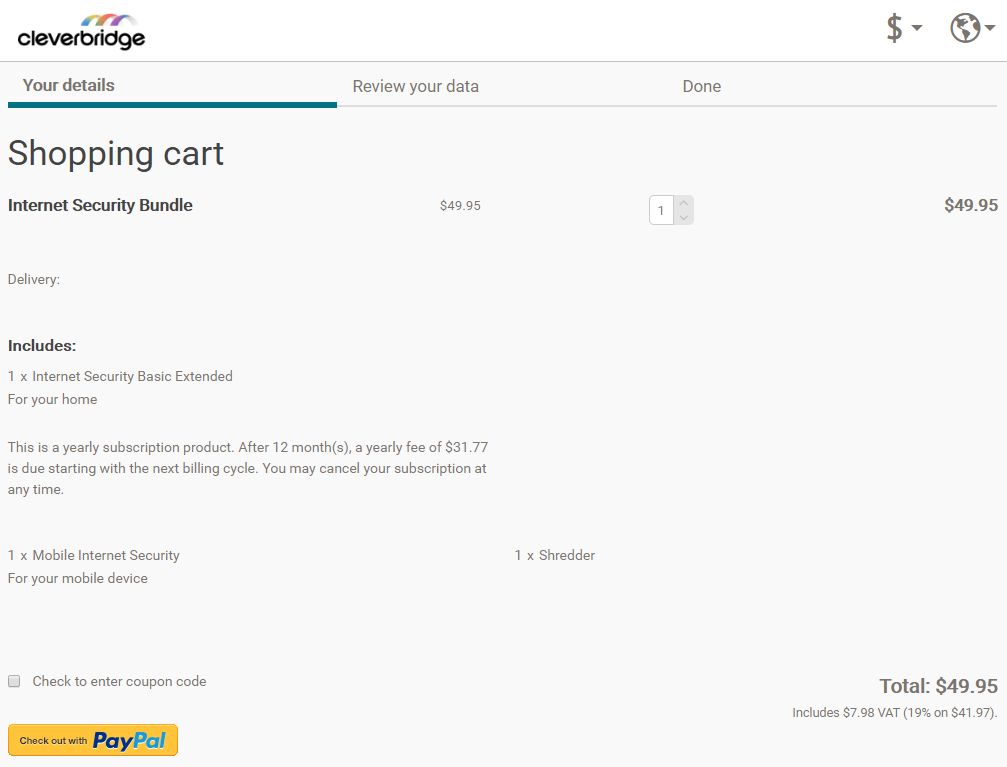
In the cart below, Internet Security Bundle includes three products at a single discounted price.

The following table shows the included products and the position numbers assigned to them when setting up the bundle in CA.
| Product | Position |
|---|---|
| Internet Security Basic Extended | 1 |
| Mobile Internet Security | 2 |
| Shredder | 3 |
Remove products from a bundle in CA
- Go to the CA main menu and select Products & Delivery > Add Product > Bundle. The Product portal opens.
- In the Product portal, open the Bundle section.
- In the Products Included in Bundle section, select the products you want to remove from the bundle.
- To select multiple items at once, hold down the CTRL key while selecting the individual items. To select a range of items, click the first item in the range, then hold down the SHIFT key while clicking the last item in the range.
- Click the
arrow or drag-and-drop the items to the Available Products section.
- Click Save.
Set up pricing for a subscription bundle
There are several ways to set up bundle pricing, depending on the use case.
Use case A: Sell perpetual software combined with a maintenance plan
- Create a new bundle product.
- Set up the bundle as a regular product.
- Add the perpetual software to the bundle.
- Add the maintenance plan as a subscription product to the bundle. Only the maintenance plan in the bundle will be renewed, and the renewal price will include only the maintenance plan cost you specified.
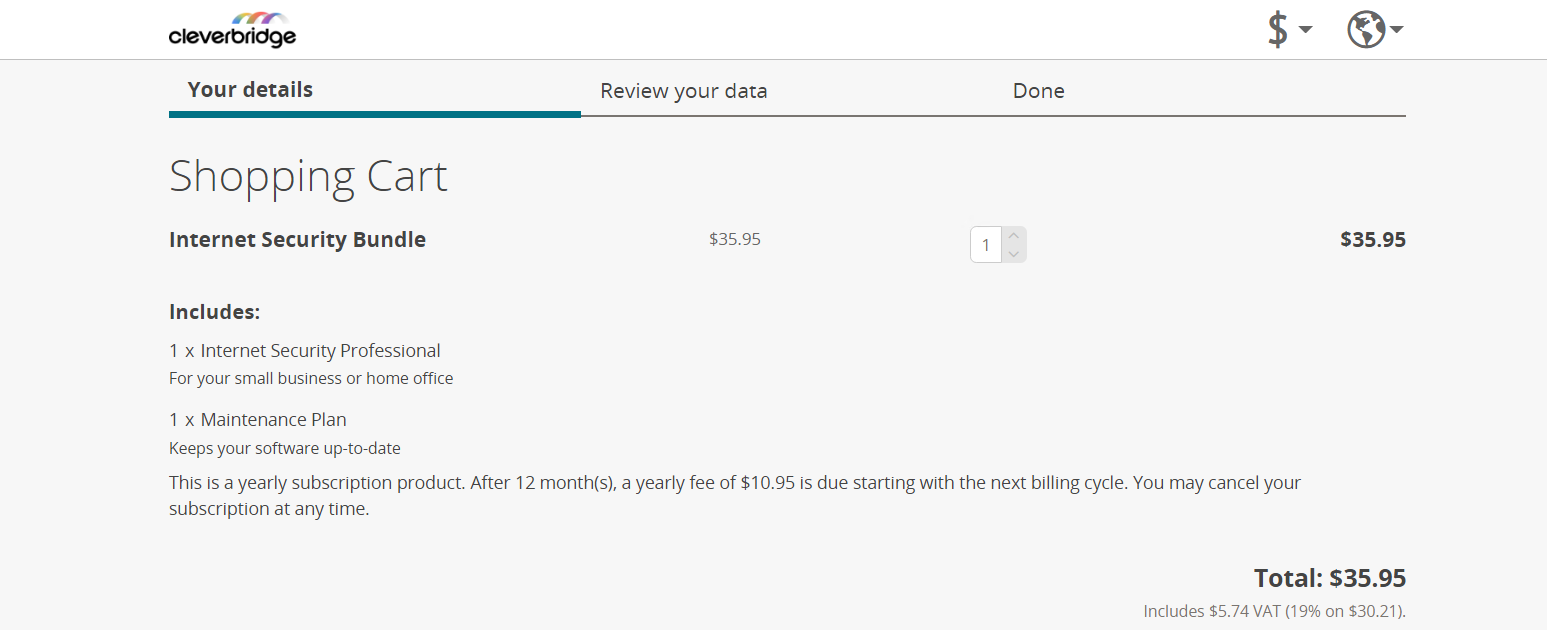
In the cart below, Internet Security Bundle includes perpetual software and a maintenance plan at a single discounted price.

The following table shows the included products, the prices you entered for them in the Cleverbridge platform, as well as both the initial and the renewal price for the bundle.
| Product | Position | Product price | Bundle initial price | Maintenance plan renewal price |
| Internet Security Professional | 1 | $29.95 | $35.95 | $10.95 |
| Maintenance Plan | 2 | $10.95 |
The maintenance plan will renew automatically at the price you entered.
Use case B: Offer multiple subscription services for an individual package price
- Create a new bundle product.
- Set up the bundle as a subscription product.
- Add several products to the bundle.
- Set up each product in the bundle as a regular product. Only the bundle product will be renewed, and the renewal price will include only the bundle product cost you specified.
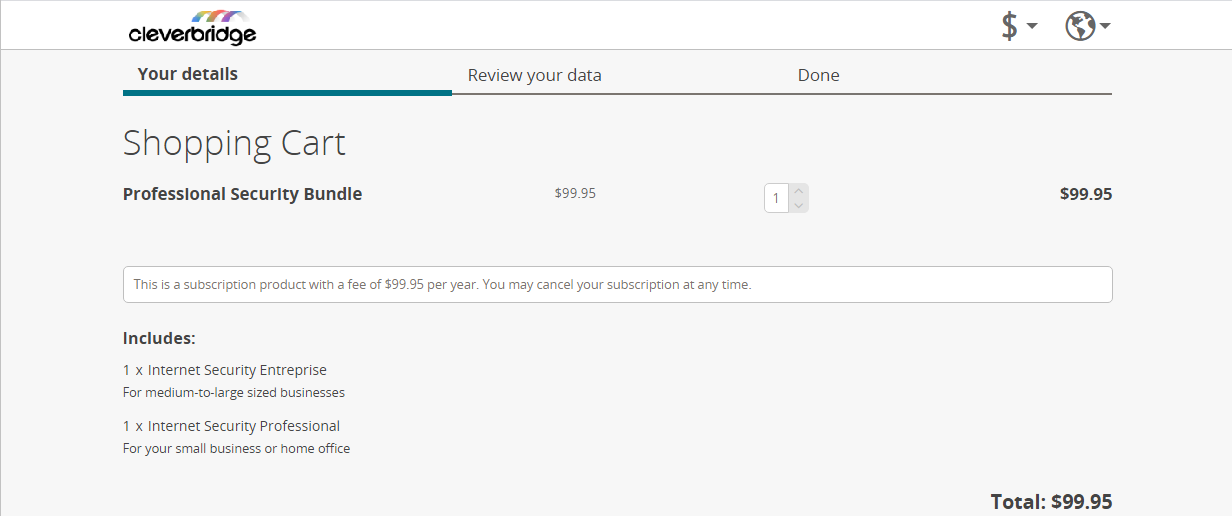
In the cart below, Professional Security Bundle includes two regular products at a single discounted price.

The following table shows the included products, the individual prices you entered for them in the Cleverbridge platform, as well as both the initial and the renewal price for the bundle as a subscription product.
| Product | Position | Product price | Bundle initial price | Maintenance plan renewal price |
| Internet Security Enterprise | 1 | $89.95 | $99.95 | $99.95 |
| Internet Security Professional | 2 | $29.95 |
The subscription bundle will renew automatically at the discounted bundle price you entered.
If you set up both the bundle and the included products as subscription products, the renewal price will include both the bundle price and the subscription products price you entered.
For more information on setting up pricing for a bundle, contact Client Experience.