Product Selection Menus
Use Product Selection Menus to let customers choose between different product versions, editions, or packages in the cart.
Offering multiple product versions can help customers choose the option that best matches their needs and can support upsell scenarios.
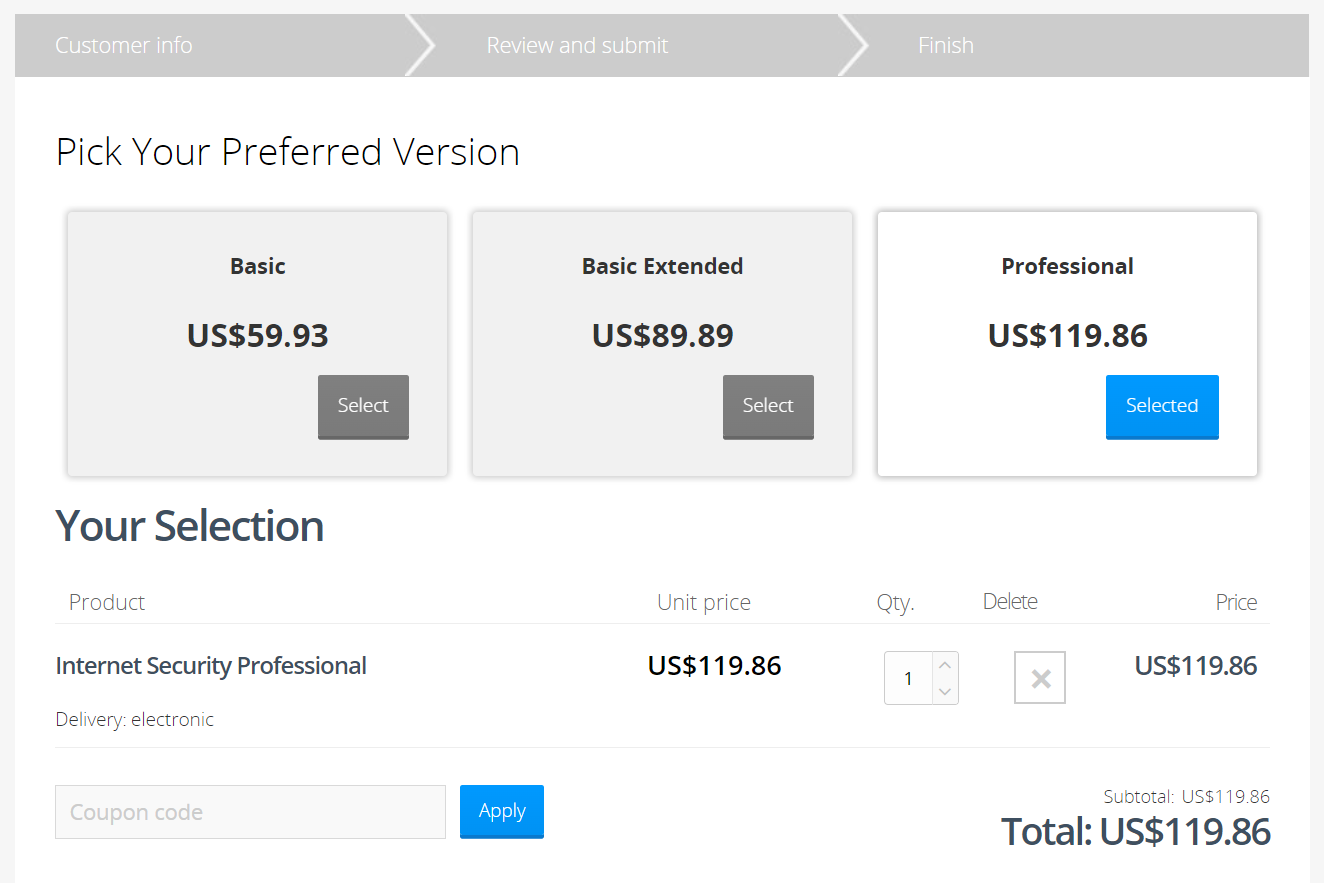
Shieldware, Inc., a provider of anti-virus software for personal and professional use, wants to offer three versions of its Internet Security product:
- Basic at $59.93
- Basic Extended at $289.89
- Professional at $119.86
The more advanced versions include additional features, so customers can compare the options and choose the version that best suits their needs.
In the following example, the customer chooses the Professional version, which offers more advanced features than the initially selected Basic version.
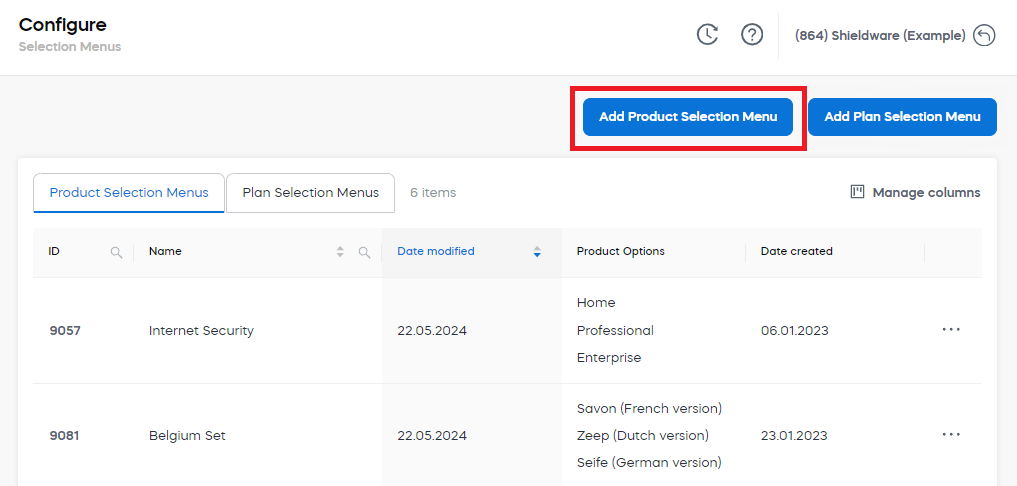
Add a Product Selection Menu
To add a Product Selection Menu:
-
Go to Configure > Selection Menus in SCM.
-
Click Add Product Selection Menu.
-
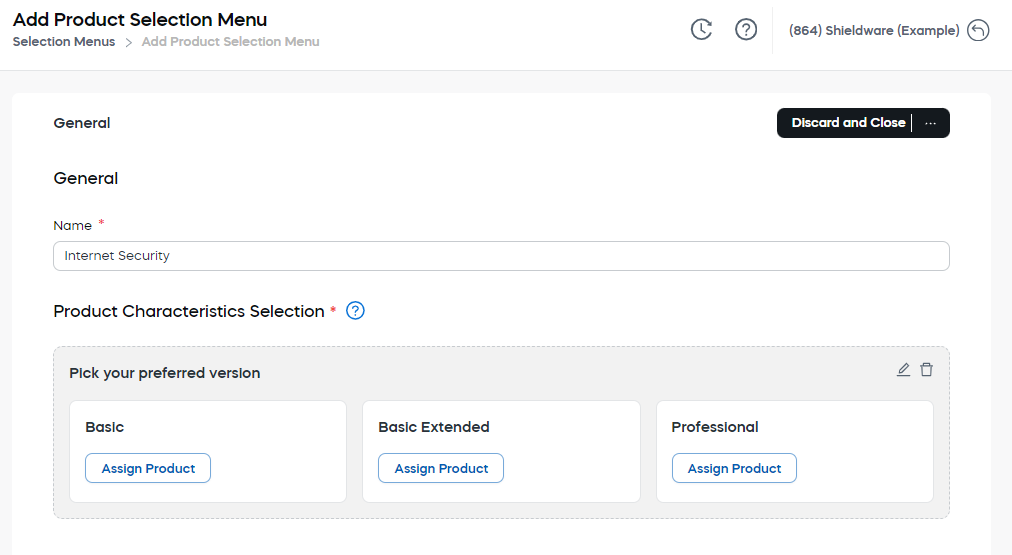
Enter a unique Name for the Product Selection Menu.
-
In Product Characteristics Selection, set up the product versions that customers can choose from.
-
Assign a product to each product version.
-
Enter the main features for each assigned product, if needed.
-
Click Save and Close.
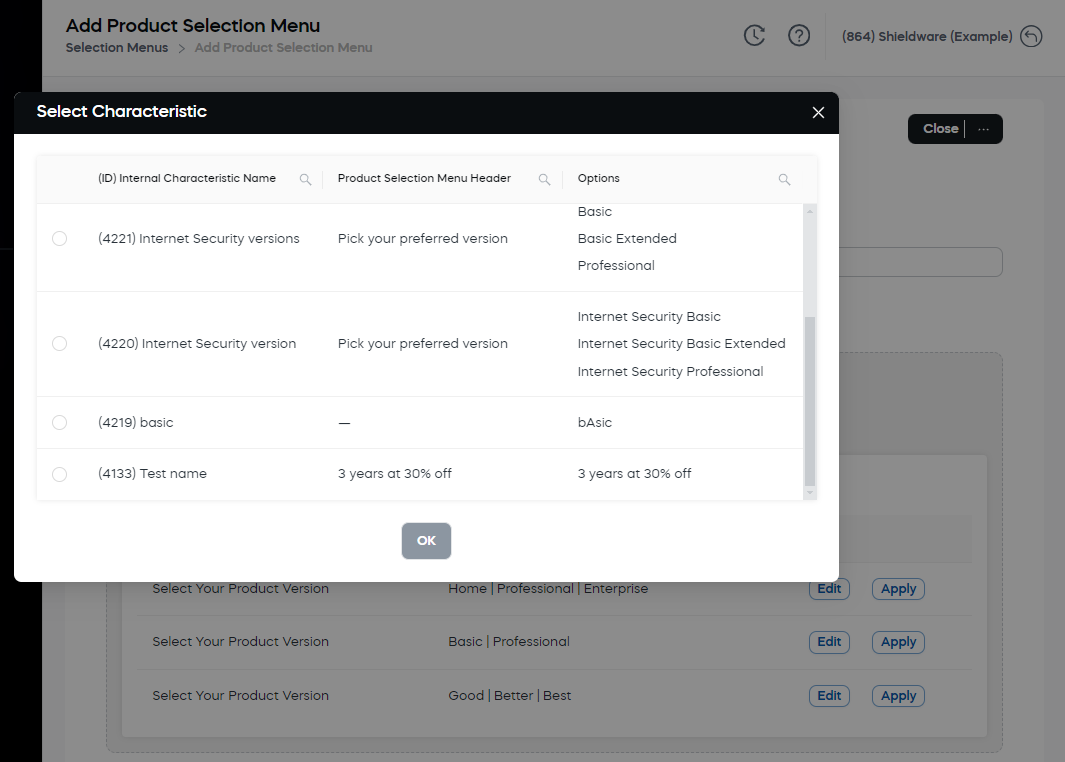
Product characteristics selection
A characteristic is the option group that customers choose from in the cart. For Product Selection Menus, the characteristic usually represents product versions, editions, or packages.
In Product Characteristics Selection, you can select up to three different product versions for one product.
You can set up the product versions in one of the following ways:
| Option | Use to |
|---|---|
| Select Characteristic | Use an existing characteristic. |
| Add New | Create a new characteristic and define new options. |
| Use Template | Create the Product Selection Menu from an existing template. |
Select an existing characteristic
Use this option when the product characteristic already exists.
-
Select the Characteristic ID and click OK.
-
Click Assign Product and choose the products you want to include in the Product Selection Menu.
-
Click OK.
-
Enter the main features for each assigned product so they appear under each product version in the cart.
The assigned product determines which product is added to the cart when the customer selects that option.
Add a new characteristic
Use this option when you need to create a new product characteristic and define new options for the selection menu.
-
Enter an Internal Characteristic Name.
-
Enter or select the Product Selection Menu Header.
-
Enter or select the Product Option Header.
The menu header and option header are display texts. They control what customers see in the cart.
-
Click Submit.
-
Click Assign Product and choose the products you want to include in the Product Selection Menu.
-
Click OK.
-
Enter the main features for each assigned product so they appear under each product version in the cart.
Product features help customers compare product versions in the cart. For more information, see Product attribute settings.
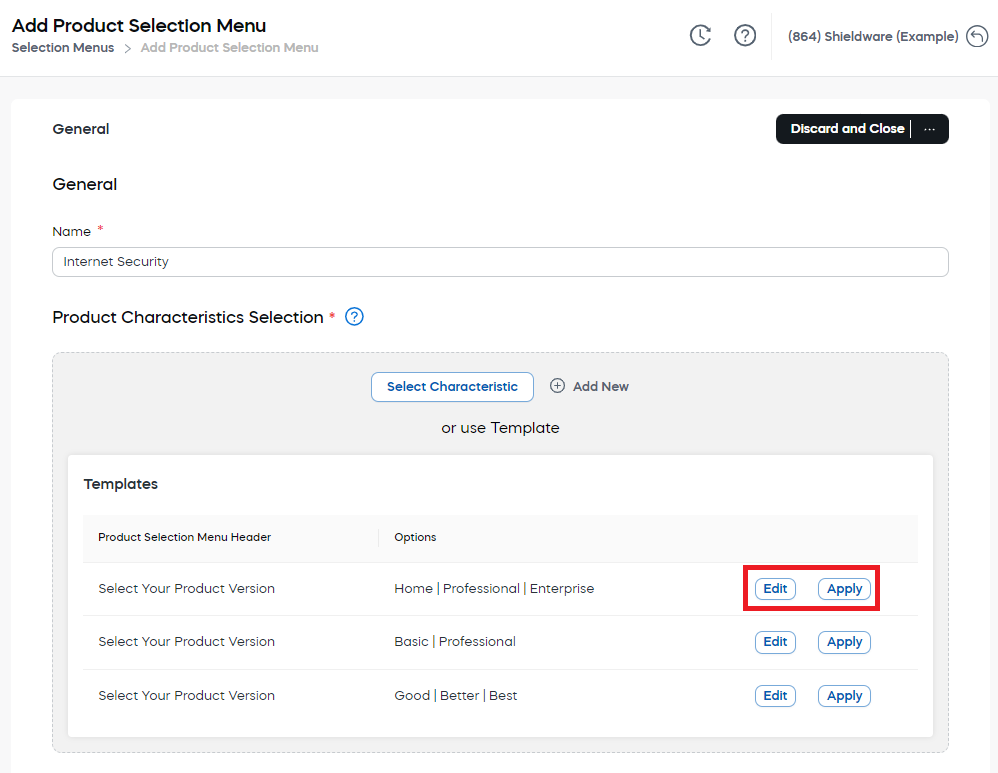
Use a template
Use this option when you want to create a Product Selection Menu based on an existing setup. You can apply a template as-is or edit it before submitting.
-
Under General, enter a unique name for the characteristic.
-
From the Templates list, choose one of the Product Selection Menus.
-
Click Apply to select a template, or click Edit to adapt the template before submitting.
-
Click Assign Product for the desired characteristic and choose the product you want to include in the Product Selection Menu.
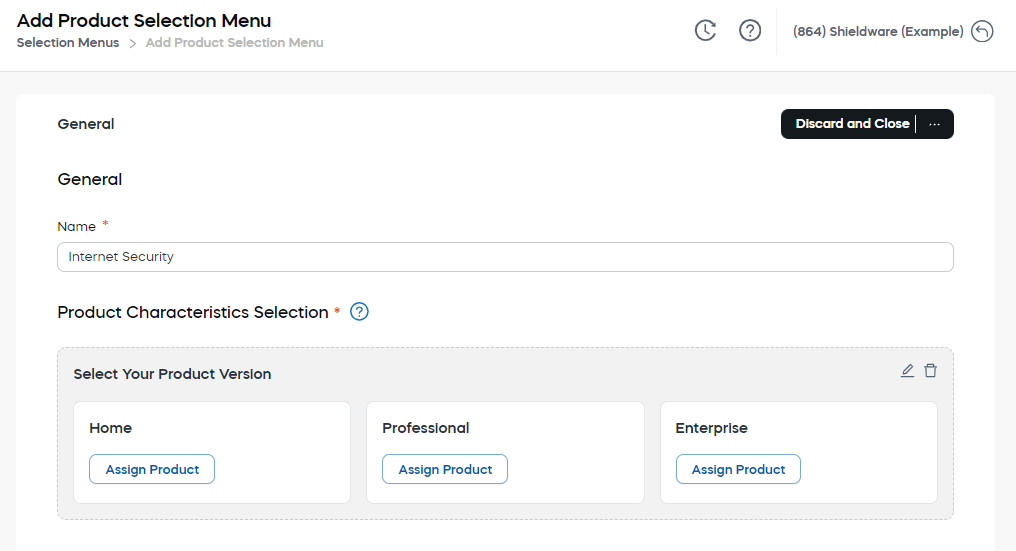
-
Click OK.
-
Enter the main features for each assigned product so they appear under each product version in the cart.